Local controls – NewTek TriCaster 300 User Manual
Page 70
Page | 54
Controls for each layer are stacked in order of their appearance from ‘bottom to top’ on Program
output – first BKGD, then the other two layers in order. (FTB, the final video layer, has no
optional settings; thus it does not appear in this area.)
LOCAL CONTROLS
Let’s begin our exploration of switching with local controls and the BKGD (Background) layer.
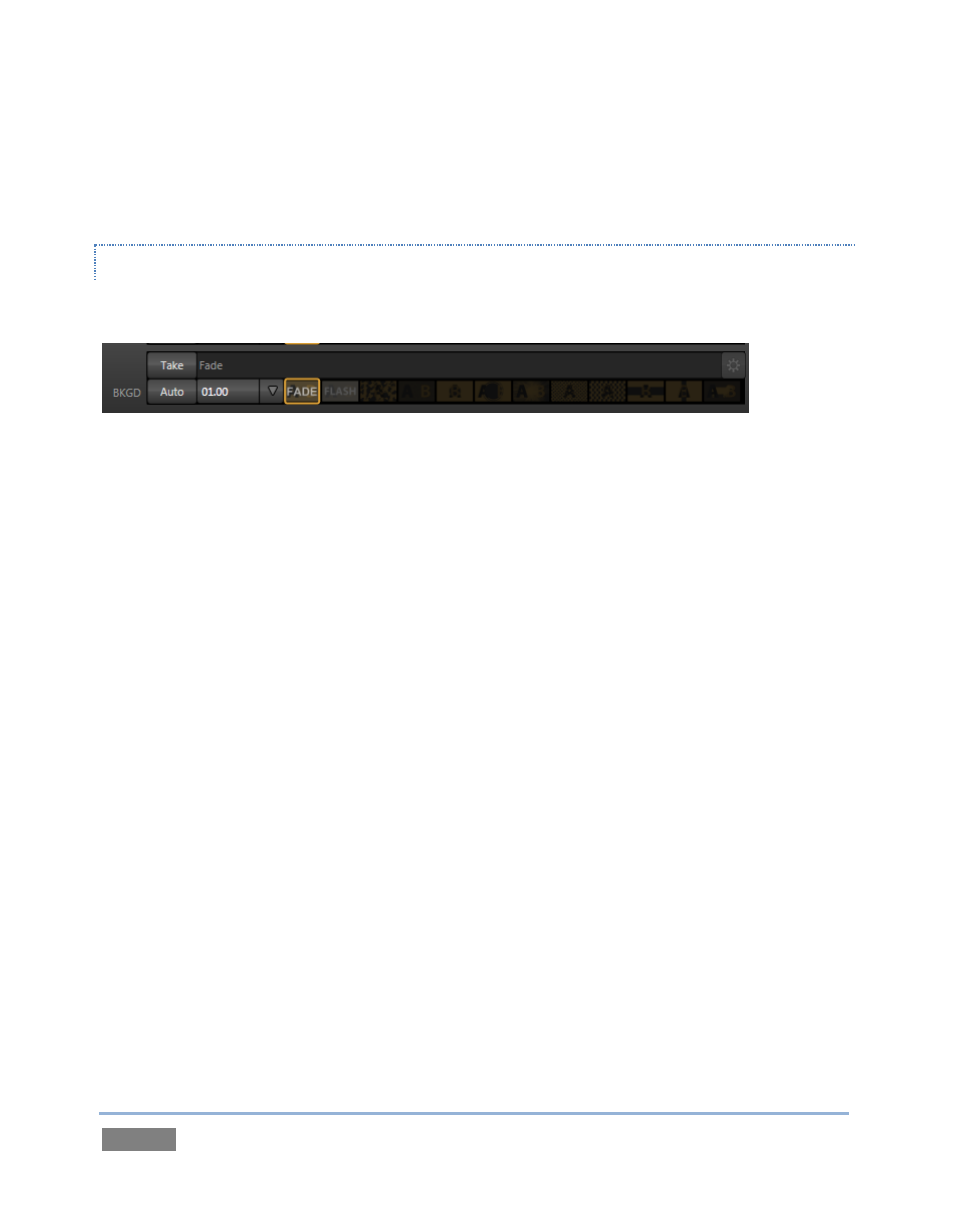
Figure 46
1. Select Camera 1 on the Switcher’s Program row.
2. Select Camera 2 on the Preview row.
3. Click the All Monitors tab, and notice that the red and green highlighted titlebars
conform to the selections you just made.
4. Click the local Take button for the BKGD layer (Figure 46).
a. Camera 1 is removed from Program Out.
b. Camera 2 (previously the Preview row selection) moves to Program output.
c. The Camera 2 button is now lit up on the Program row.
d. The Camera 1 button is lit up on the Preview row.
e. The red and green monitor titlebars have been swapped.
5. Now click the local Auto button for the BKGD layer. The Program and Preview row
selections swap again, but this time, rather than a simple (and instant) Cut, the change
employs the currently selected transition – by default, a Fade.
6. The icon for the current Transition for the BKGD layer has a gold border in the Transition
Bin at right. Click a different icon to select a different transition, and click Auto again.
7. To replace the current transition in the Transition Bin with a different one, follow these
steps: