Verify the configuration – H3C Technologies H3C WX6000 Series Access Controllers User Manual
Page 194
25-8
# Configure a default route on AC.
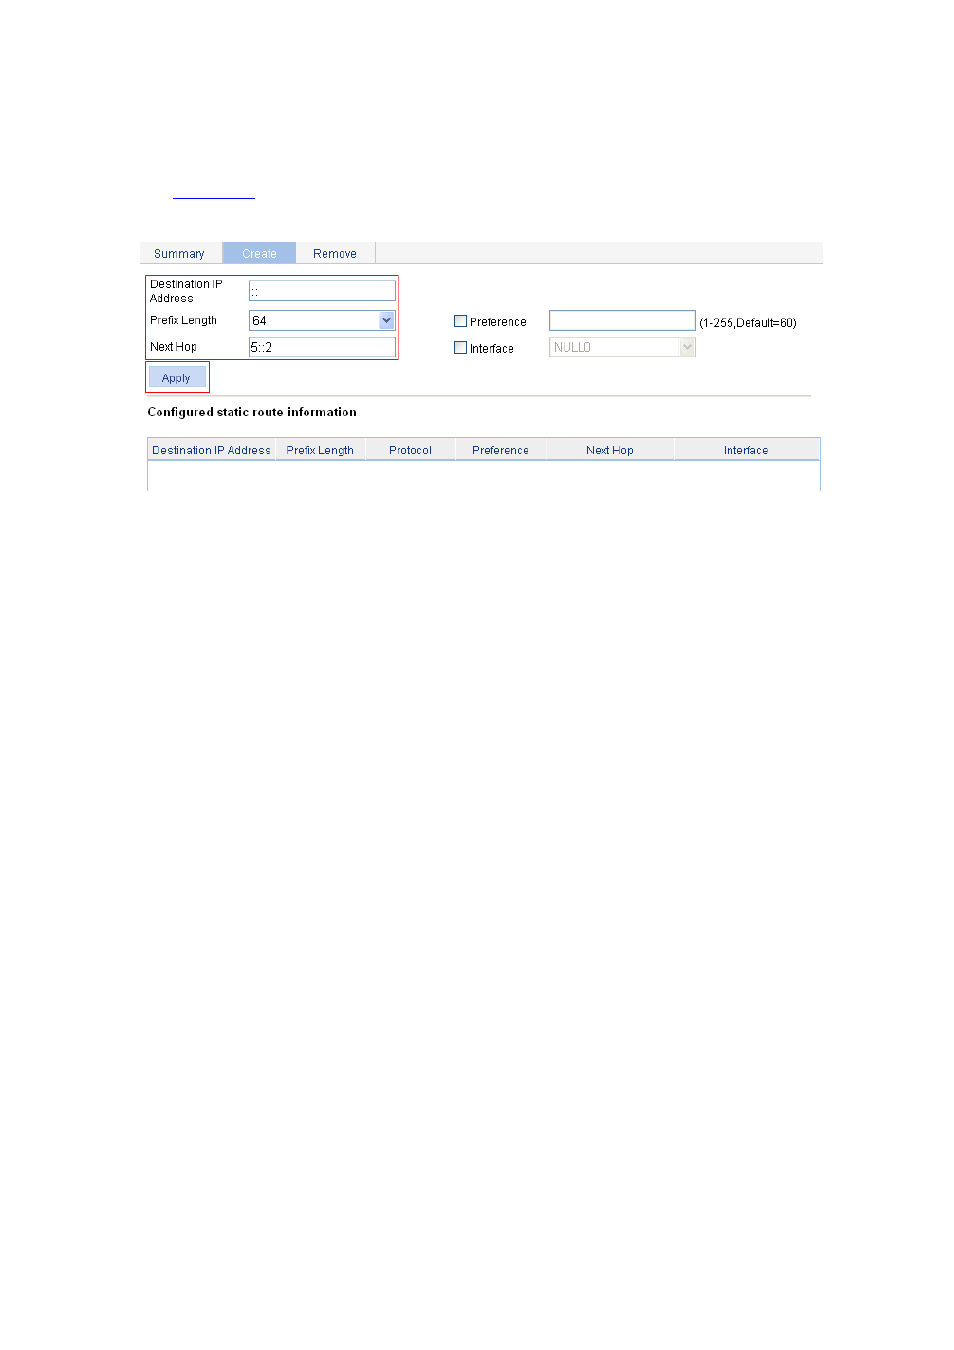
After you log in to the Web interface of AC, select Network > IPv6 Routing from the navigation
tree and then click the Create tab to enter the IPv6 static route configuration page, as shown in
Figure 25-8 Configure a default route
Type :: for Destination IP Address.
Select 0 from the Prefix Length drop-down list.
Type 5::2 for Next Hop.
Click Apply.
Verify the configuration
# Display the route table.
Enter the IPv6 route page of Switch A, Switch B, and AC respectively to verify that the newly configured
static routes are displayed as active routes on the page.
# Use the ping command for verification.
Ping Host B from Switch A.
<SwitchA> system-view
[SwitchA] ping ipv6 3::2
PING 3::2 : 56 data bytes, press CTRL_C to break
Reply from 3::2
bytes=56 Sequence=1 hop limit=254 time = 63 ms
Reply from 3::2
bytes=56 Sequence=2 hop limit=254 time = 62 ms
Reply from 3::2
bytes=56 Sequence=3 hop limit=254 time = 62 ms
Reply from 3::2
bytes=56 Sequence=4 hop limit=254 time = 63 ms
Reply from 3::2
bytes=56 Sequence=5 hop limit=254 time = 63 ms
--- 3::2 ping statistics ---
5 packet(s) transmitted
5 packet(s) received
0.00% packet loss
round-trip min/avg/max = 62/62/63 ms