Installing the external fan – Yaskawa iQpump Micro User Manual
Page 210

Rubber bushing
Push the rubber bushing
out of the wiring holes
Label
Bolt 7 mm
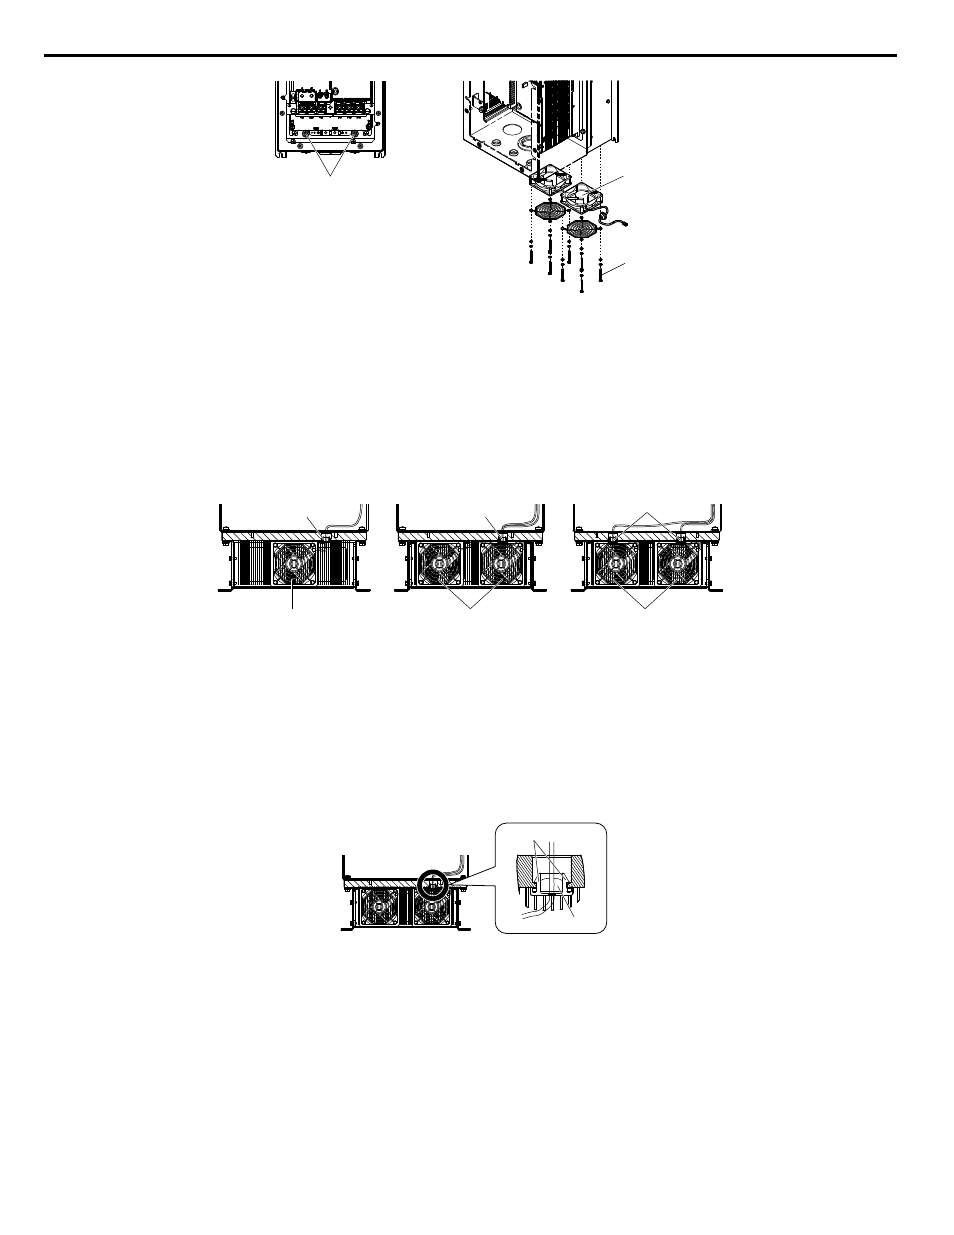
Figure 6.10 Removing the External Fan
n
Installing the External Fan
The external fan installation procedure differs by drive model. Refer to
for the different fan configurations.
NOTICE: Install the fan with the label facing the toward the inside of the drive. The fan may be damaged if it is facing the wrong direction.
2V0030G to 2V0056G
4V0018G to 4V0031G
4V0038G
2V0069G
A
B
A
B
B
A
A – Conduit hole
B – Fan unit
Figure 6.11 External Fans and Conduit Holes
1.
Place the rubber bushing for the fan into the heatsink holes.
NOTICE: Ensure that all bushings fit securely into place. Loose rubber bushings may allow water and dust to enter the drive.
2.
Route the fan wiring through the rubber bushing.
3.
Plug the fan connector back in.
4.
Fill the wiring hole in the rubber grommet to a minimum depth of 9.7 mm (0.38 in.) with RTV sealant (KE-3494) specified
in
.
B
A
Figure 6.12 Fastening the Rubber Bushing in Model 4V0038G
5.
Install the fan guard onto the fan.
6.
Replace the fan into its original position and fasten the fan into place.
6.3 Drive Cooling Fans
210
YASKAWA TOEP YAIQPM 03B YASKAWA AC Drive - iQpump Micro User Manual