Hardware installation – Areca 24/4 Internal/External Port Pcie 3.0 12 Gb/s SAS/SATA Raid Controller 2Gb Cache User Manual
Page 25
HARDWARE INSTALLATION
25
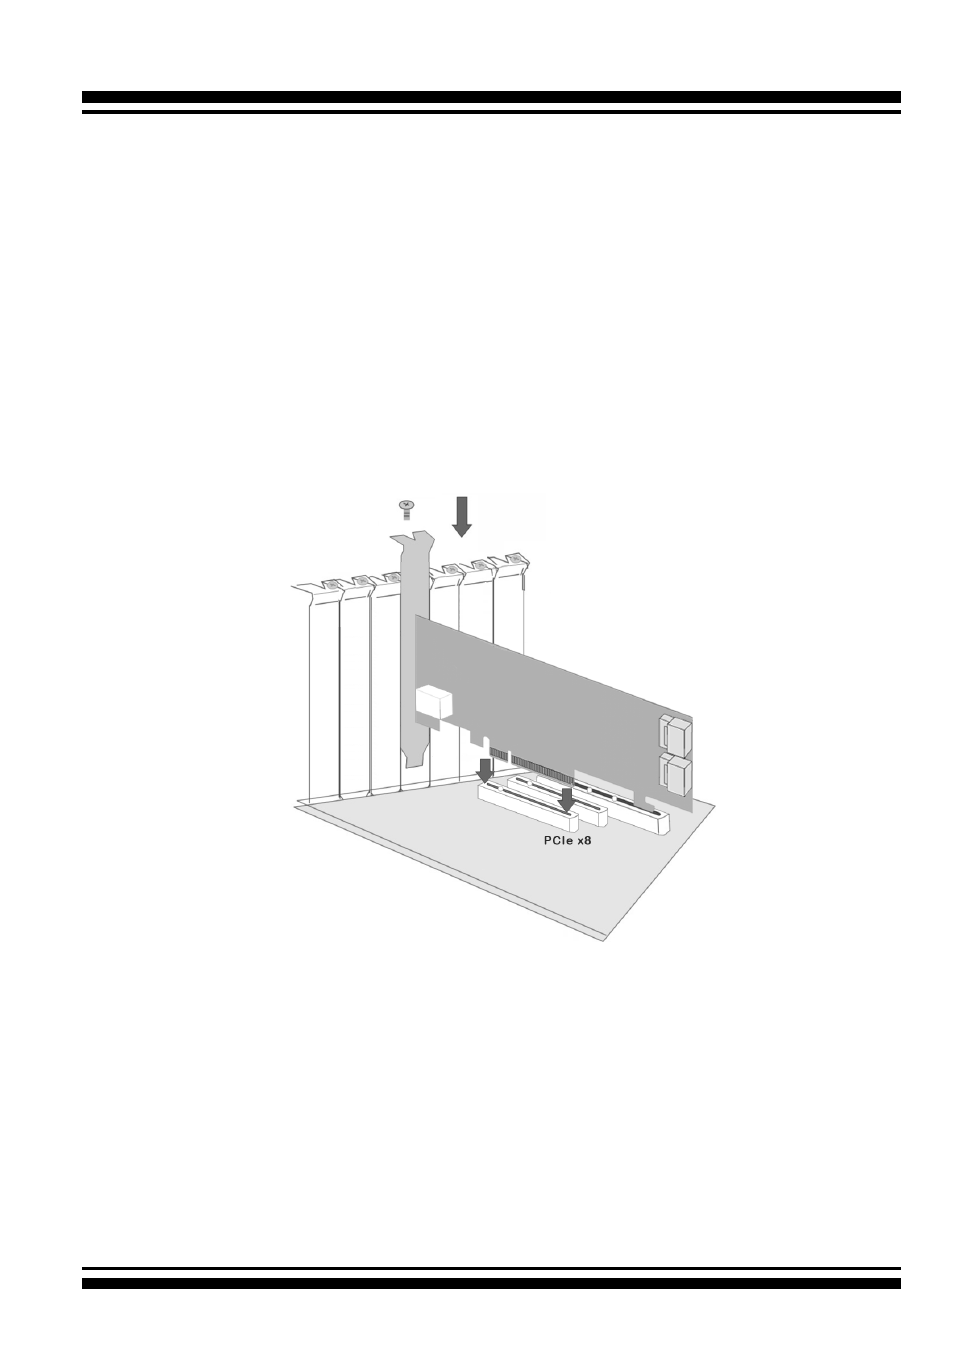
Figure 2-5, Insert into a PCIe Slot
Step 5. Mount the Drives
You can connect the SAS/SATA drives to the controller through
direct cable and backplane solutions. In the direct connection, SAS/
SATA drives are directly connected to 12Gb/s SAS RAID controller
PHY port with SAS/SATA cables. The 12Gb/s SAS RAID controller
can support up to 28 PHY ports. Remove the front bezel from the
computer chassis and install the cages or SAS/SATA drives in the
computer chassis. Loading drives to the drive tray if cages are
physical memory configuration for ARC-1883ix series is
one 240-
pin DIMM socket for 2GB(default) up to 8GB DDR3-1866, 1Rx8,
ECC module or 8GB, DDR3-1600, 2Rx8, ECC module.
Step 4. Install the 12Gb/s SAS RAID Controllers
To install the 12Gb/s SAS RAID controller, remove the mounting
screw and existing bracket from the rear panel behind the selected
PCIe 3.0 slot. Align the gold-fingered edge on the card with the
selected PCIe 3.0 slot. Press down gently but firmly to ensure that
the card is properly seated in the slot, as shown in Figure 2-5.
Then, screw the bracket into the computer chassis. ARC-1883
series controllers require a PCIe 3.0 x8 slot for better performance.