LSC Lighting CLARITY LX Series v.1 User Manual
Page 220
Timelines
Clarity
Operator Manual
Page 210
On Desktop Clarity the “Timeline” window is on the main menu bar.
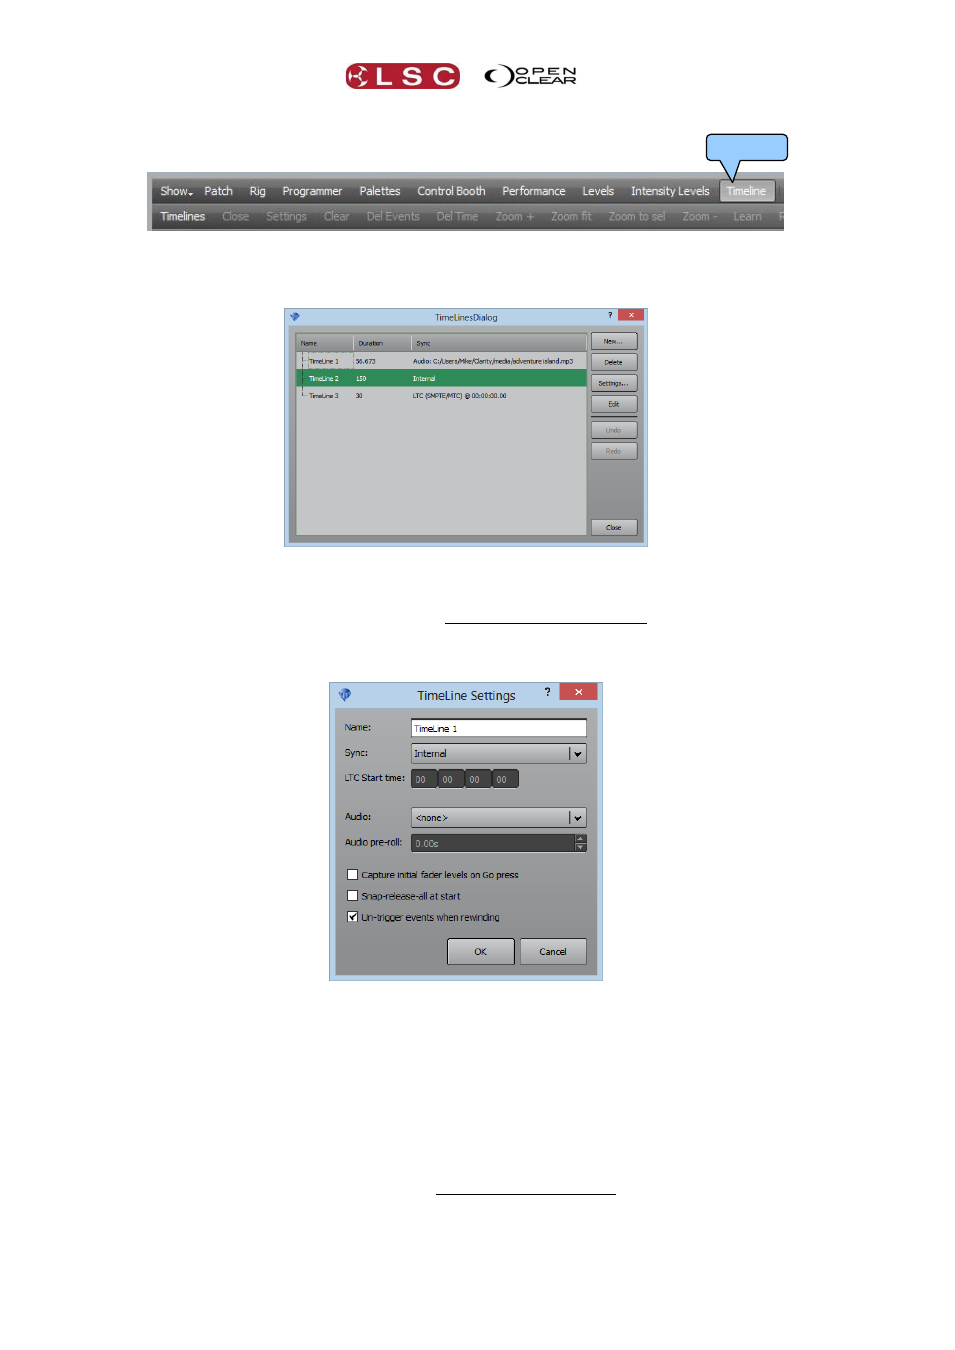
To create a new Timeline, in the Timeline window select Timelines. This opens the “Timelines
Dialog”.
Any existing timelines will be shown. You can select an existing timeline and change its
Settings (below) or Delete it. Undo will recover a deleted timeline. To use or edit an existing
timeline, click on its name and select Edit or double click on the name.
To create a new timeline select New. This opens the “Timeline Settings” dialog.
“Name:”
You can enter a name for the Timeline or accept the default name.
“Sync:”
Allows you to choose either:
LTC (Linear Time Code). This will be either:
o SMPTE (the SMPTE input on LX600 and 900 consoles or Clarity’s
internal Timecode simulator)
o MTC (MIDI Time Code).
Internal. Clarity’s own internal timer.
LTC and Internal are only available when “Audio” is set to “<None>”.
Audio. This sync source is automatically selected when an “Audio” track is
selected as described below.
“LTC Start Time:” Sets the start time of the Timeline when using LTC.
Timeline