Picture-in-picture formats – Grass Valley iTX Desktop v.2.6 User Manual
Page 122
The Event Editor
•
Select the way (mix or zoom) in which the picture-in-picture effect starts and ends.
Note:
•
To change the timing of the secondary event, you change its time offset.
Picture-in-picture formats
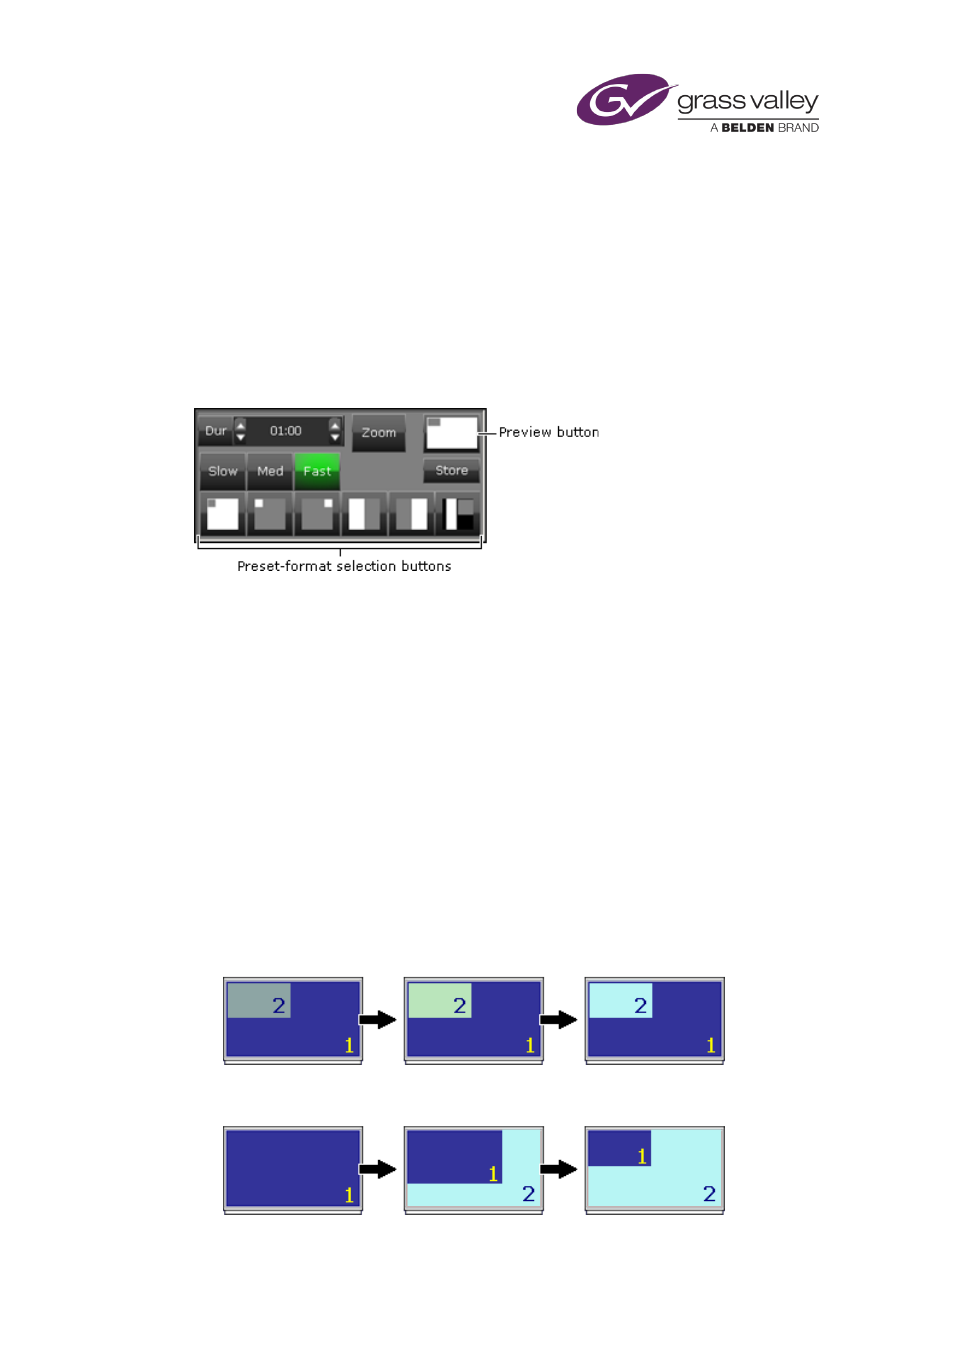
The Event Editor displays 6 preset-format selection buttons, which store details of different
picture-in-picture formats:
The diagram on each button indicates the format. In the diagram, a white rectangle represents
the primary video; a grey rectangle, the secondary video.
By clicking one of these buttons you apply the stored format to the selected primary and
secondary events. The preview button indicates your selection.
From the preview button, you can select the picture-in-picture format dialog and modify the
selected format. Your modifications then apply to the selected primary and secondary events.
To make the modified format available for other events, you can make it the stored format of
any of the preset-format selection buttons.
Mix and zoom options for a picture-in-picture effect
The Zoom button on the Event Editor controls the way in which a picture-in-picture effect
happens.
•
With the zoom option not selected, the secondary video fades in over the primary video.
The following diagram (in which 1 identifies the primary video and 2 the secondary video)
shows stages of this process.
•
With the zoom option selected, the primary video squeezes into a specified area of the
screen to reveal the secondary video, as the next diagram shows.
March 2015
iTX Desktop: Operator Manual
102