The encode control panel, About the encode server lock button – Grass Valley iTX Desktop v.2.6 User Manual
Page 263
Ingesting media by using an Encode Server
The Encode control panel
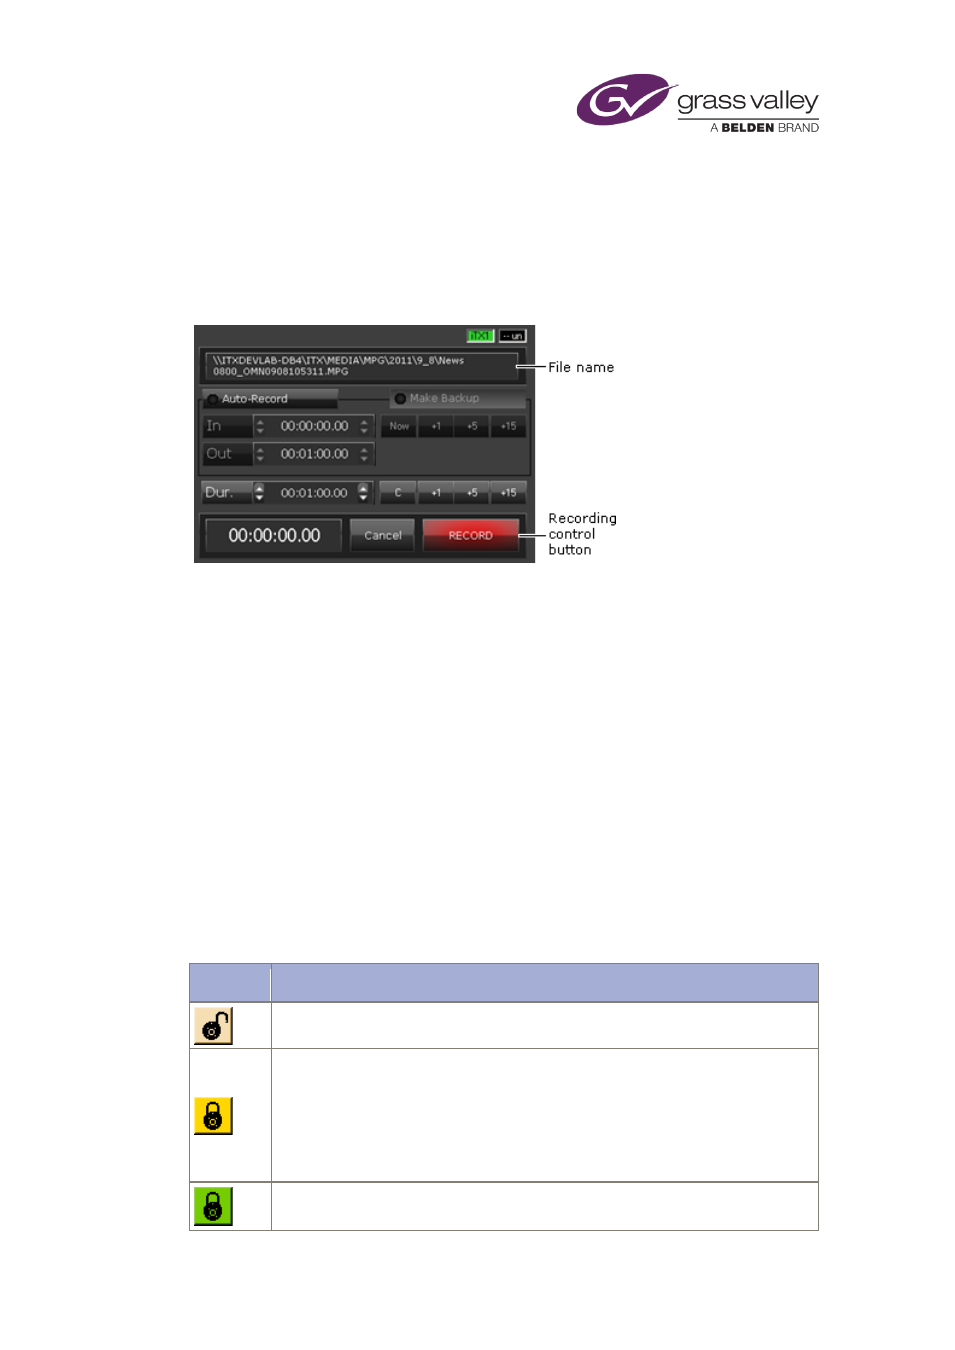
To prepare and start a crash or automatic recording, you use the Encode control panel that is
connected to the Encode Server you are going to use for the recording:
For a crash recording, you just need to enter a file name and a duration and then click Record.
For an automatic recording, you select Auto-Record. The In and Out boxes then become active,
allowing you to set the timecode values at which you want the Encode Server to start and stop
recording.
Once a recording starts, you can stop it at any time.
The recording control button changes its function depending on the current stage of the
recording process. The button label describes the function: Prepare, Record or Stop.
About the Encode Server lock button
While an Encode Server is recording, it is locked so that only the user who started the recording
can control it.
Next to each channel-selection feature is a lock button; the appearance of this changes to show
the availability of the relevant Encode Server.
Button
Description
An unlocked symbol shows that the Encode Server is available to any user.
A yellow lock button appears when you lock the Encode Server for one recording
session.
You can modify the recording settings, but no other user can access the Encode
Server while it is in this state. All other iTX Desktops show the red lock button (see
below).
At the end of the session, iTX releases the Encode Server.
A green lock button appears when you permanently lock the Encode Server.
You can modify the recording settings, but no other user can access the Encode
March 2015
iTX Desktop: Operator Manual
243