About the picture-in-picture format dialog – Grass Valley iTX Desktop v.2.6 User Manual
Page 123
The Event Editor
In each case, at the end of the picture-in-picture effect, the reverse process happens.
About the picture-in-picture format dialog
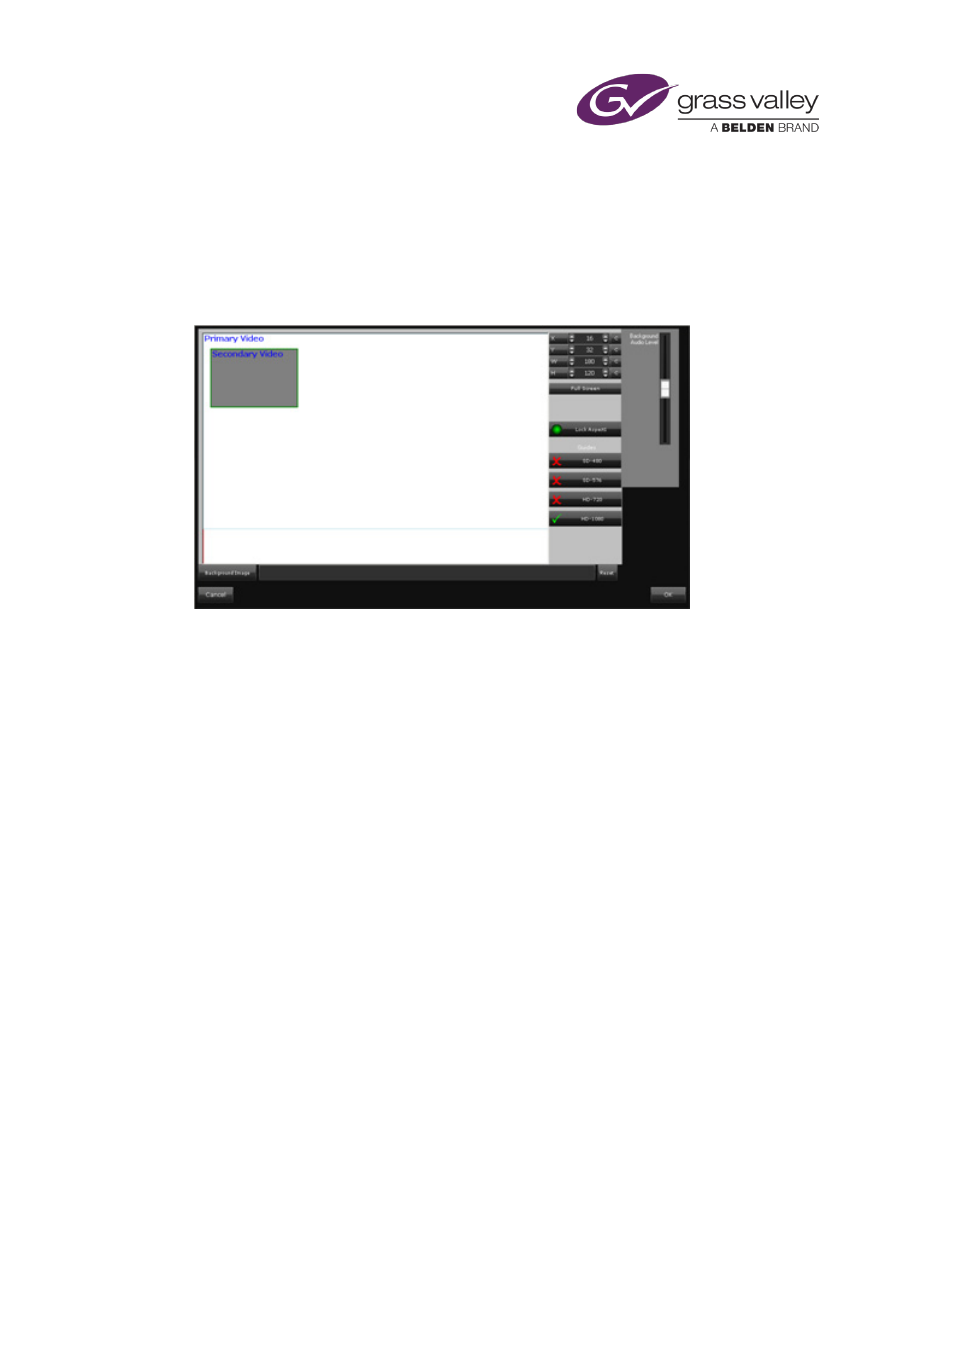
Clicking the preview button on the Event Editor causes the picture-in-picture format dialog to
appear:
The dialog contains a window, which represents the television display area. Within the window
are two rectangles, which you can move and resize; these represent the primary and secondary
video images. You can display guide frames for various video display resolutions (SD and HD) to
help you adjust the rectangles.
To the right of the window is an audio fader for the background audio (i.e. the audio associated
with the primary video).
Through the dialog, you can do the following to modify the selected picture-in-picture format:
•
Change the size and position of the primary and secondary video images.
•
Add a still image to act as a background.
•
Adjust the volume of the background audio track.
You may position either video image such that part of it lies outside the display area; iTX then
crops the image, to show just the part that is within the display area.
Set the size and position of the items in a picture-in-picture effect
1.
In the Schedule Grid, select the secondary event in the picture-in-picture effect.
The Event Editor displays the picture-in-picture features.
2.
Click a preset-format selection button on the Event Editor.
The diagram on the preview button shows the selected format.
3.
Do the following if you want to modify this format.
•
Click the preview button. iTX displays the picture-in-picture format dialog.
March 2015
iTX Desktop: Operator Manual
103