Display of vanc data – Grass Valley iTX Desktop v.2.6 User Manual
Page 305
Preparing media items for playout
•
Enter new values directly in the timecode boxes. The markers move to the corresponding
points on the duration bar.
Another way of marking an in- and out-point is to play a clip in the Media Viewer and click the
Mark In and Mark Out buttons:
Note:
•
The Media Viewer only displays the frames between the limits of the loaded media. So,
when just the portion of media in a video clip is loaded, the Media Viewer does not display
the frames outside the marked boundary points.
•
If you want to extend the clip beyond either of these points, you should ensure the Media
Viewer loads the whole file – rather than just the clip media – by selecting Use Media
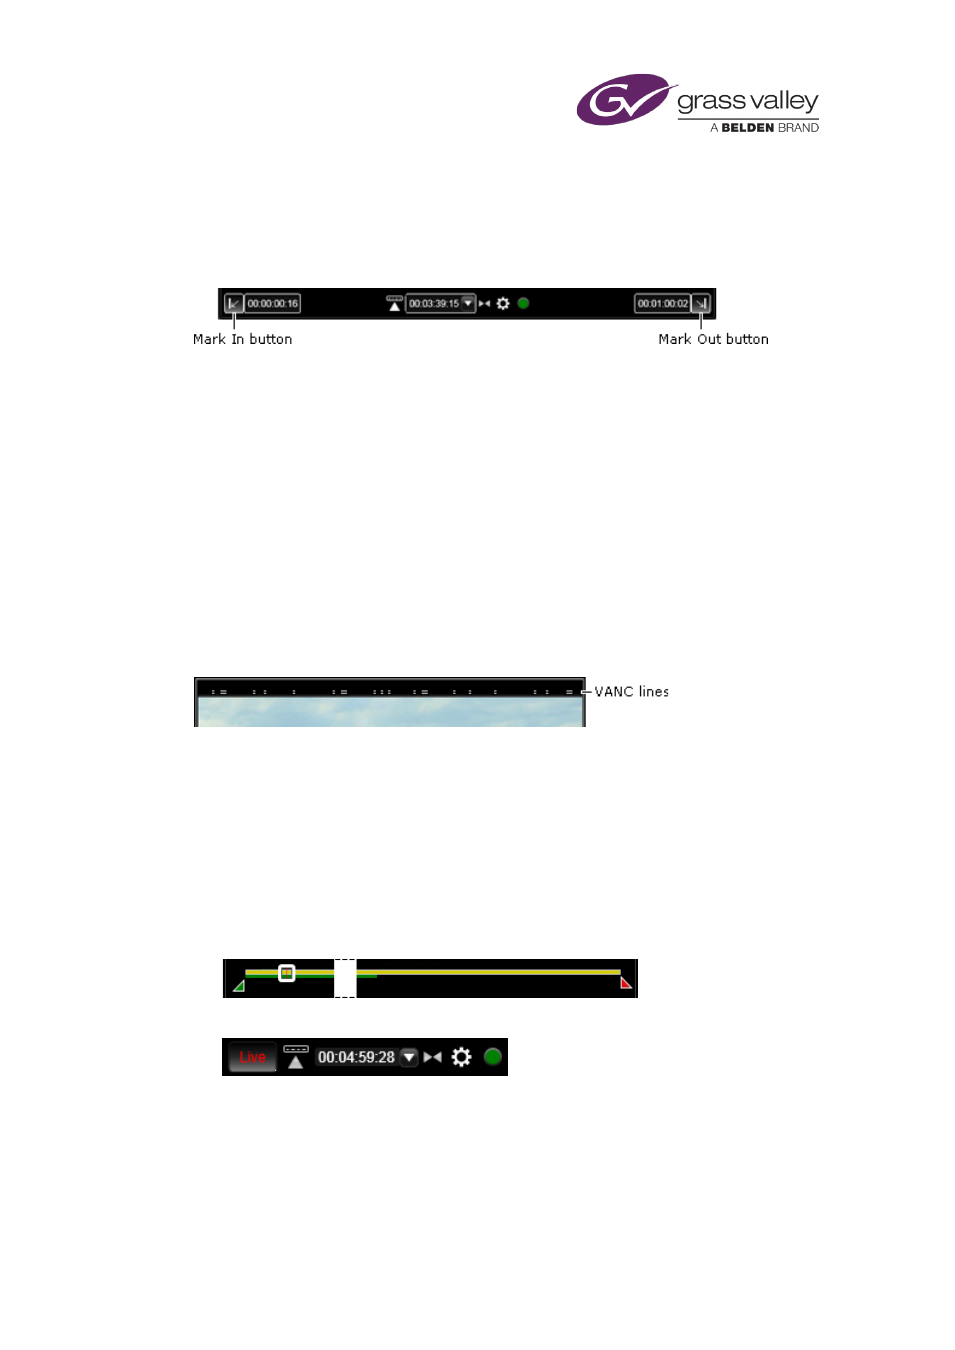
Display of VANC data
If a media file contains VANC data (e.g. timecode, AFD data), the Media Viewer displays the
lines above the video image that carry this data. A pattern of dots and dashes represent the
VANC data:
Working with a video clip while it is being recorded
For some video-storage formats (e.g. MXF), you may be able to preview a video clip while the
media is being recorded; i.e. while the media file is growing.
When playing a growing file, the Media Viewer displays the following extra features.
•
A green recording bar, below the duration bar:
•
A frame-selection button, labeled “Live”:
The green recording bar, which gets longer as the recording goes on, shows how much of the
recording has taken place. The yellow duration bar, in this case, represents the scheduled
length of the recording.
You can perform a number of actions while the recording is taking place:
March 2015
iTX Desktop: Operator Manual
285