Objects, 4 objects – ChamSys MagicQ User Manual User Manual
Page 297
MagicQ User Manual
268 / 355
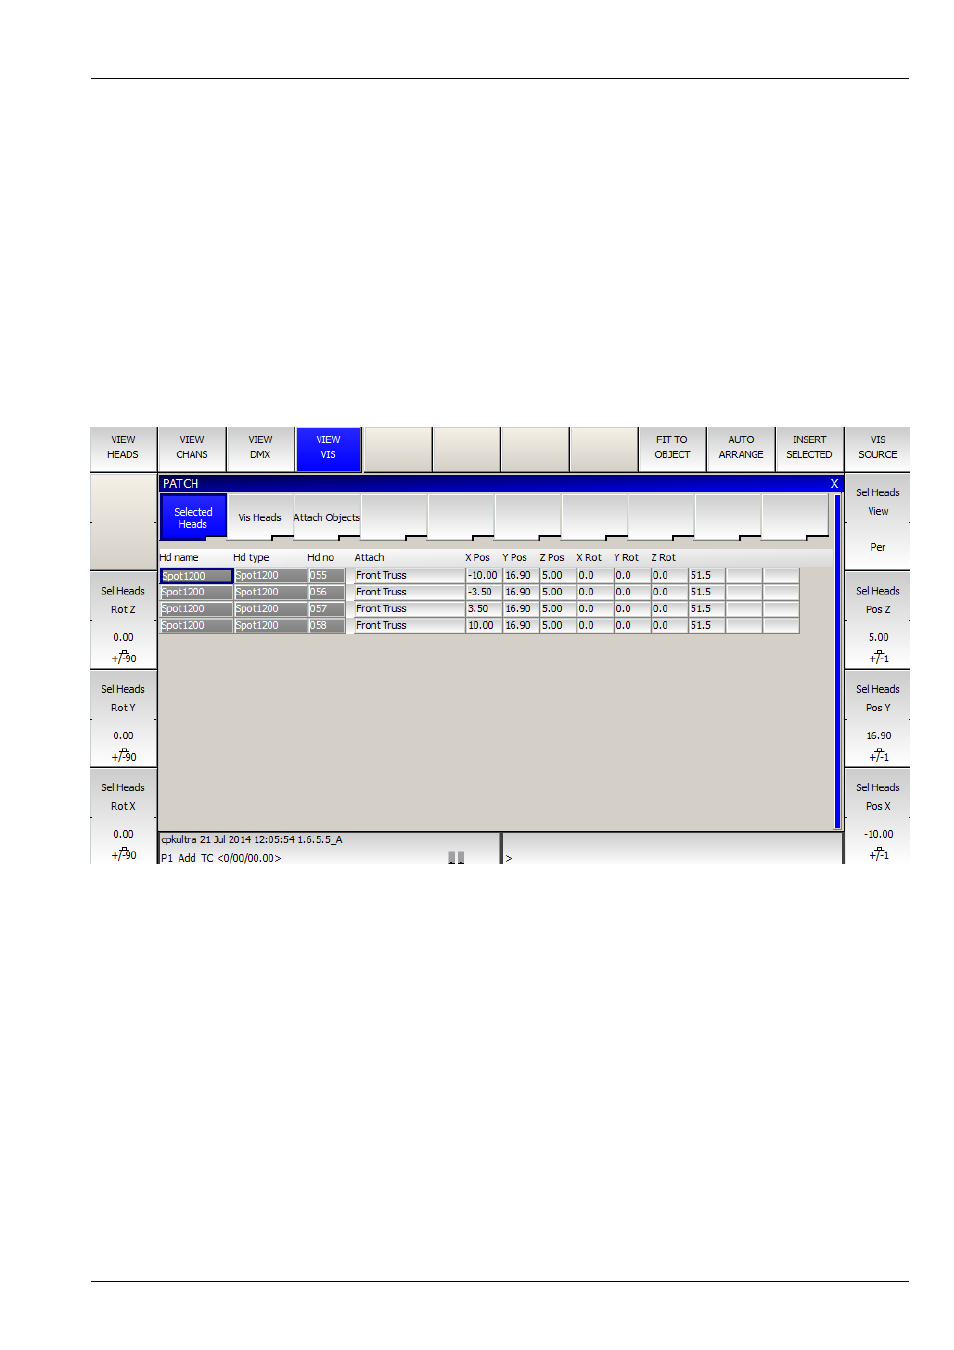
Pressing the soft buttons X, Y and F increases the position by 1 metre on that axis. Pressing SHIFT + the soft button decreases
the position by 1 metre on that axis.
Use fan to spread the position apart on the X,Y, or Z position wheels.
Encoders B, C and D are used for rotation around the X, Y and Z axis.
Pressing the soft buttons B, C and D rotates the heads by 90 degrees around that axis. Pressing SHIFT + the soft button rotates
the heads by – 90 degrees around that axis.
You can also enter values directly into the spreadsheet view of the VIEW VIS window.
You can change multiple values at a time by using SHIFT/CTRL and the cursor keys. Use THRU to enter a spread of values e.g.
-5 THRU 5 to spread the X position between -5 and 5 metres.
39.2.4
Objects
In View Attach you can insert truss, pipe, form or room objects.
The wall, people and furniture objects are not currently
supported.
To create an Object press the INSERT soft button, then select what kind of object is to be created. The object is then created and
added to the list. To add a sphere or a cylinder create a Form object then go to the model column, press Set and select the desired
shape.
Enter values in the window for length, width and height. Adding a / after the number enters the dimension in feet rather than
metres – so for 10 feet enter 10/.
Position the truss or pipe as required. Enter a name in the window for the truss or pipe.
After you insert a truss or pipe, then subsequent heads that are patched will be attached to that truss or pipe object. If for example
you patch 6 spots after inserting a truss object, then they will be spread out along the length of the truss.
When you create reports, then as well as overall plots, a plot is created for each attach object – enabling the lighting rig to be
broken down into separate pipes and trusses.