Rewiring gigastudio 4 with ableton live 7 – Teac GigaStudio 4 User Manual
Page 178
GigaStudio 4 Reference Manual
178
ReWiring GigaStudio 4 with Ableton Live 7
This procedure is based on Live version 7 for Windows XP, and assumes that you have already set up Live to
accept MIDI input, and output audio. Numbers in the diagram refer to the steps below.
1. If you have not used Live yet, run it at least once before proceeding so that Live can install its ReWire
engine in your system.
2. With Live open, in either Live’s Session View or Arrangement View, make sure the I/O section is visible
(click on the small I-O button if the I/O section is hidden).
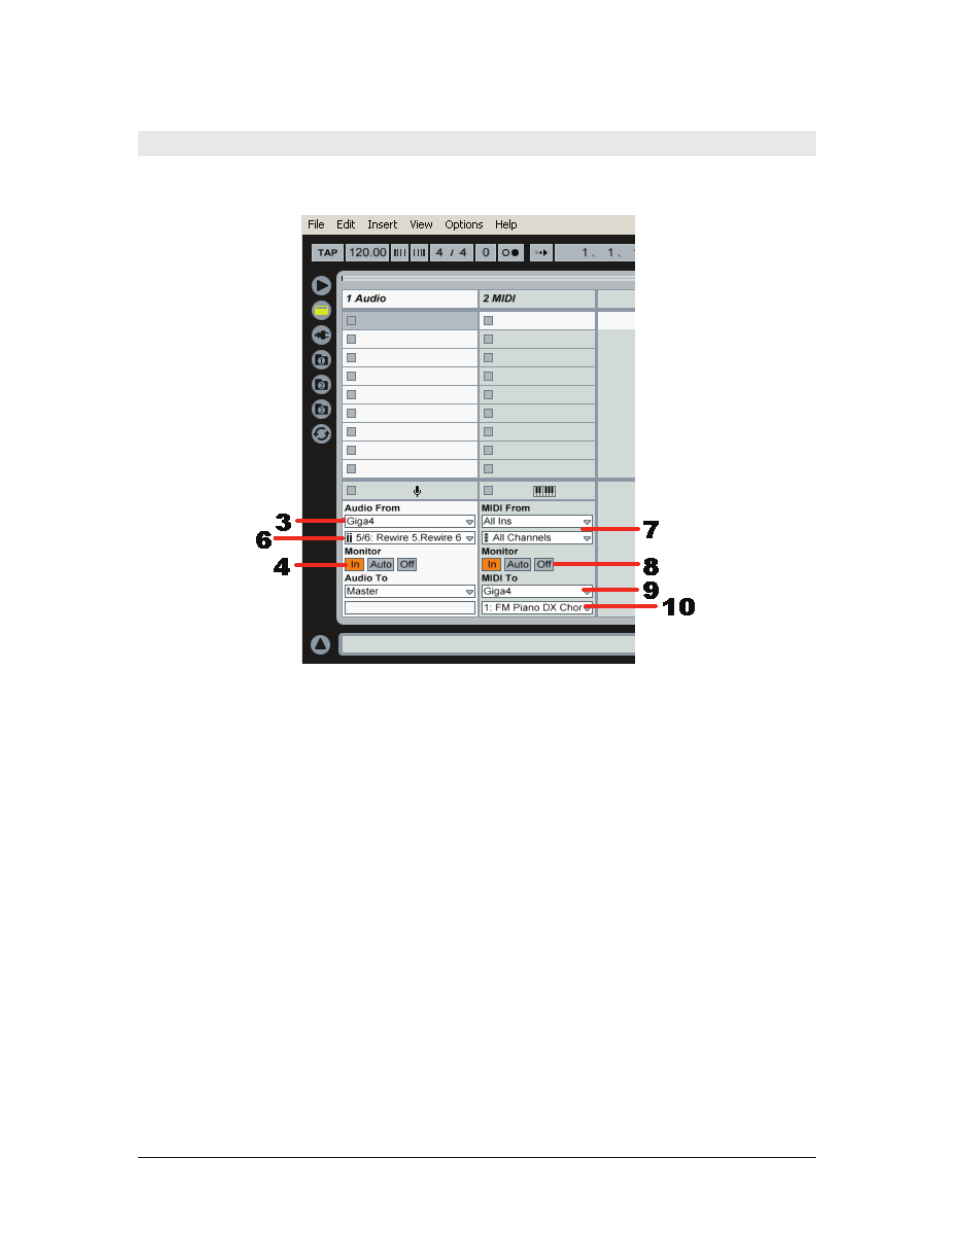
3. In an audio channel’s Audio From field, select Giga4.
4. Set the audio track’s Monitor function to In so that you will hear the ReWire output regardless of Live’s
record or playback mode.
5. Launch GigaStudio 4.
6. In the Input Channel field below the Audio From Field, choose the desired GigaStudio ReWire output if
you have devices in GigStudio routed to specific channels other than the DSP Station Output Master
channels R1:2.
7. In a Live MIDI track, set MIDI From to All Ins and All Channels just to keep things simple. Later on, if
you need to route MIDI to different channels, select the appropriate channel instead of All Channels.
8. Also in the MIDI track, set Monitor to In.
9. Also in the MIDI track, set MIDI To to Giga4, and select the Giga instrument that should receive MIDI
data in the field immediately below the MIDI To field.
10. If you play your MIDI keyboard, you’ll hear GigaStudio’s audio coming out of Live’s audio track.
GigaStudio 4 is now ready to run in ReWire Slave mode, while Live is the ReWire Master. You can record the
GigaStudio ReWire input in Live as you would with any other input in Live. (For more application-specific
information on ReWiring, see the r Live manual.)
To disconnect the ReWire connection from Live, quit GigaStudio 4 first.