Canon imageCLASS MF264dw II Multifunction Monochrome Laser Printer User Manual
Page 293
3
In [Printer], select the fax driver of the machine.
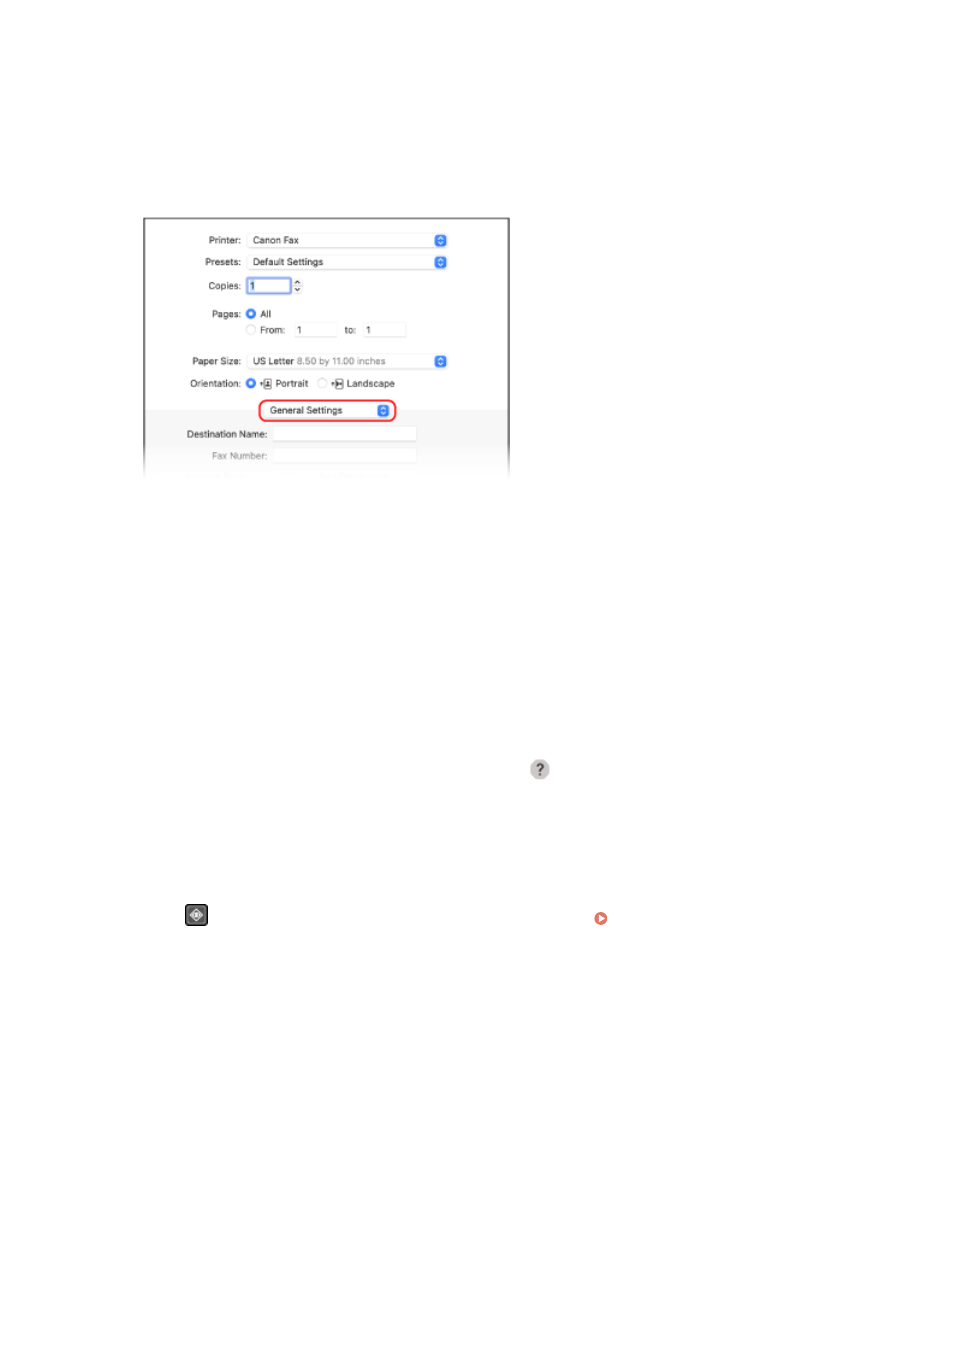
4
From the print options pop-up menu, select [General Settings].
If print options are not displayed, click [Show Details] in the printing dialog box.
5
Enter the fax number, and click [Add Destination].
●
To specify multiple destinations, repeat this step. You can specify a destination registered to the Address
Book from [Address Book].
●
If an outside line number is required, enter this number before the fax number.
6
Configure the cover sheet and other fax settings, as needed.
●
To set the cover sheet details, select [Cover Sheet] from the pop-up menu of the print option.
●
For more information about the other fax settings, click [
] in the printing dialog box to display help.
7
Click [Print].
➠
The fax is sent via the machine.
Press
on the control panel to view the sending status and log. Checking the Status and Log for Sent
Faxing
284