Adept AdeptSight User Guide User Manual
Page 90
AdeptSight Camera Calibration Wizard - Automated, no Belt
l
Start Automated Calibration
1. Close the Pendant window by clicking Cancel.
2. Click Start.
The robot will perform multiple picks and places, taking an image before each pick. The
number of picks and places will vary, depending on the type of calibration being per-
formed. It will usually be 10 or more.
When this step is complete, a Calibration Summary screen will be displayed.
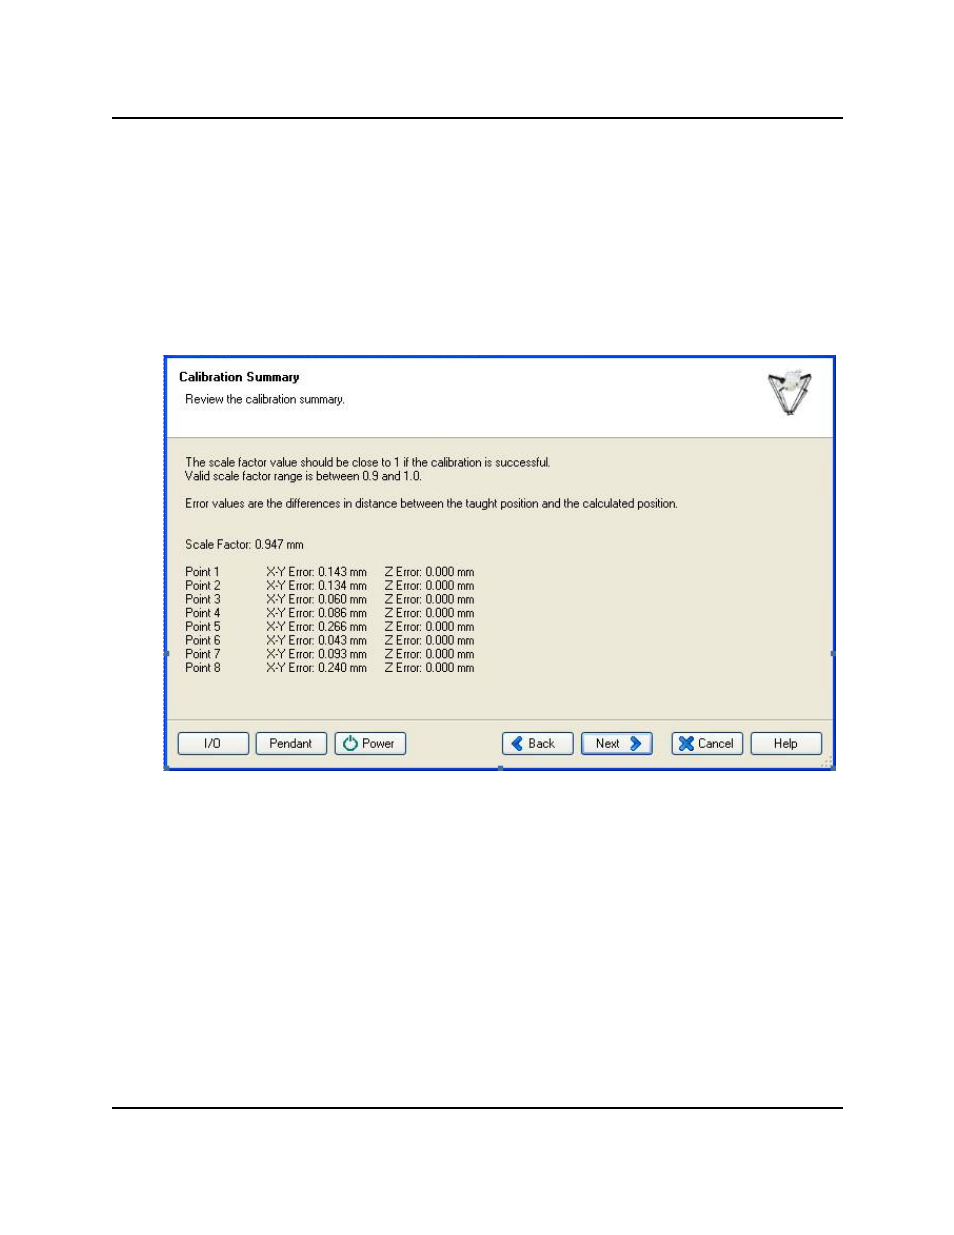
Calibration Summary Screen
This screen shows the amount of XY and Z difference between the calculated cal-
ibration points and the actual points used to generate the calibration. The automated
calibration obtains more points than are mathematically required for calibration. The
calculated calibration represents an average calibration. When AdeptSight uses the cal-
culated calibration to predict where each actual point should be located, the difference
between the actual and calculated point is displayed as the error.
Your Calibration Summary may show a different number of points.
After clicking Next, the Task Manager pane displays "Calibration completed suc-
cessfully".
AdeptSight User's Guide, Version 3.2.x, Updated: 8/23/2012
Page 90