30�3 fronius rl – Solare Datensysteme Solar-Log User Manual
Page 105

105
Fronius
Fronius RL
30�3 Fronius RL
Easy Installation
Termination
Addressing
Interface
Yes
Jumper
Yes
RS485
Overview
•
Integrated interface
•
Where to connect: Round socket on inverter
•
2-pin wiring
•
Communication address does not have to be assigned.
•
Installation steps
•
Switch off the inverters and Solar-Log™
•
Connect inverters to the Solar-Log™
•
Connect the inverters to each other
Connect inverters to the Solar-Log™
•
The wiring is done using a self-made cable connection with the round plug and the terminal strip
plug.
The round plug must be obtained from the manufacturer.
Procedure
1.
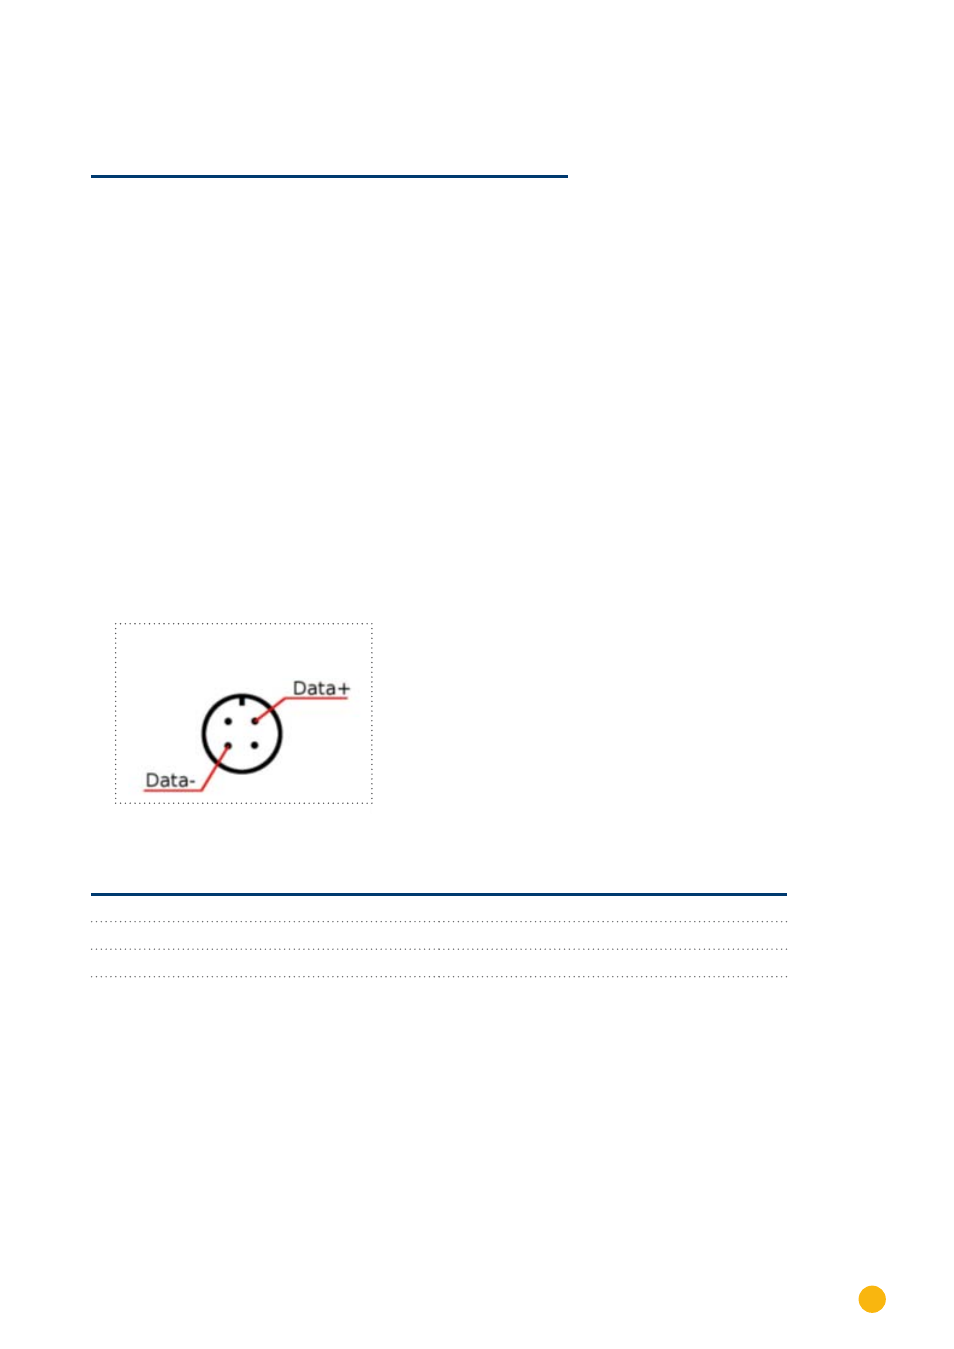
If you are making the cable yourself, connect the wires as shown in the following diagram
View of the connection socket
Figure 10: Fronius RL round plug
Solar-Log™ terminal strip connector
Inverters
RS485/422 B
Round socket
► 1
► 1 Data +
► 3
► 2 use the cable shield
► 4
► 3 Data -
2. Insert the terminal block connector into the Solar-Log™ RS485 socket.
Connect the inverters to each other
•
Connect using a 2 wire, shielded data cable
•
Where to connect: Round socket on inverter
Procedure
1.
self-made cable connection with round plug and a terminal block plug.
2. Also connect the cable to the next inverter in round plug 1.
3. Connect the other inverters to each other in the same way.