2) connecting the cable to the module, Caution – Yaskawa 120 Series I/O Modules User Manual
Page 238
6.1 Installing Modules
6-11
6
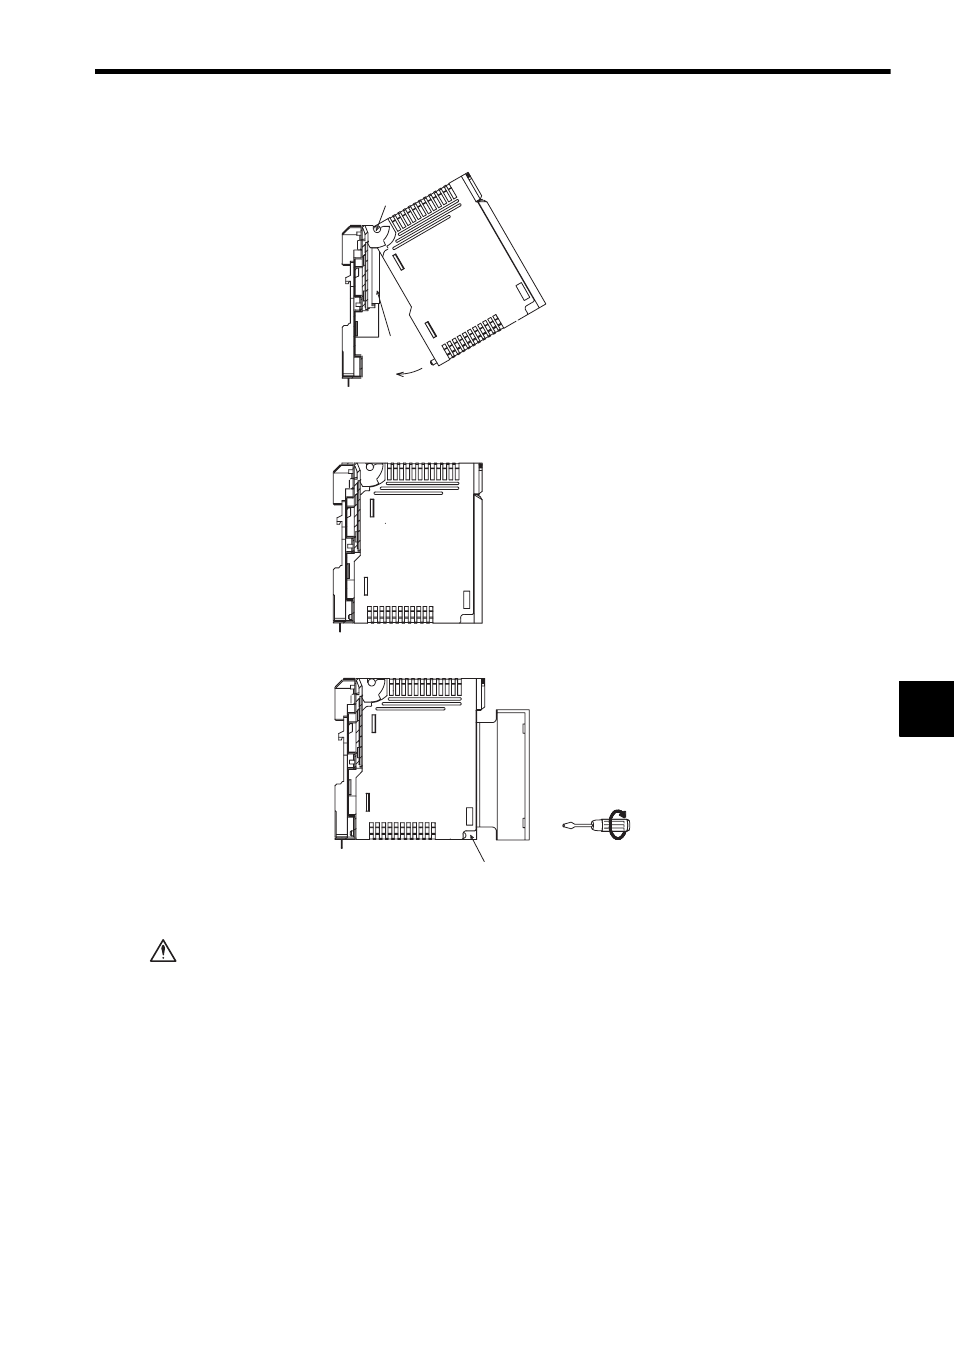
(2) Rotate the Module until it comes into contact with the Mounting Base.
(3) Fit the Module into the Mounting Base to make an electrical connection with
the Module connector.
(4) Tighten the Module mounting screw on the Module.
2) Connecting the Cable to the Module
Make sure that all cable connectors for the Modules are securely inserted and
tightened.
Incorrect connections may cause malfunction of the GL120 or GL130.
Use the following procedures to connect the cable to the Module.
(1) Make sure that the Module is correctly installed on the Mounting Base.
(2) Insert the cable into the connector mounted on the Module.
(3) Tighten the connector fixing screw.
Note: Inserting or removing a connector to/from the Module may cause chattering in
input signals. If this causes a problem, install a chattering prevention switch
for each Module and always turn the chattering prevention switch OFF to turn
OFF the input power supply before inserting or removing the connector to/
from the Module.
DC24IN-32P
Module hook
Rotate
Module
connector
DC24IN-32P
Module mounting screw M4
(Use a Phillips screwdriver.)
DC24IN-32P
CAUTION