Yaskawa AC Drive Z1000 Bypass Technical Manual User Manual
Page 286
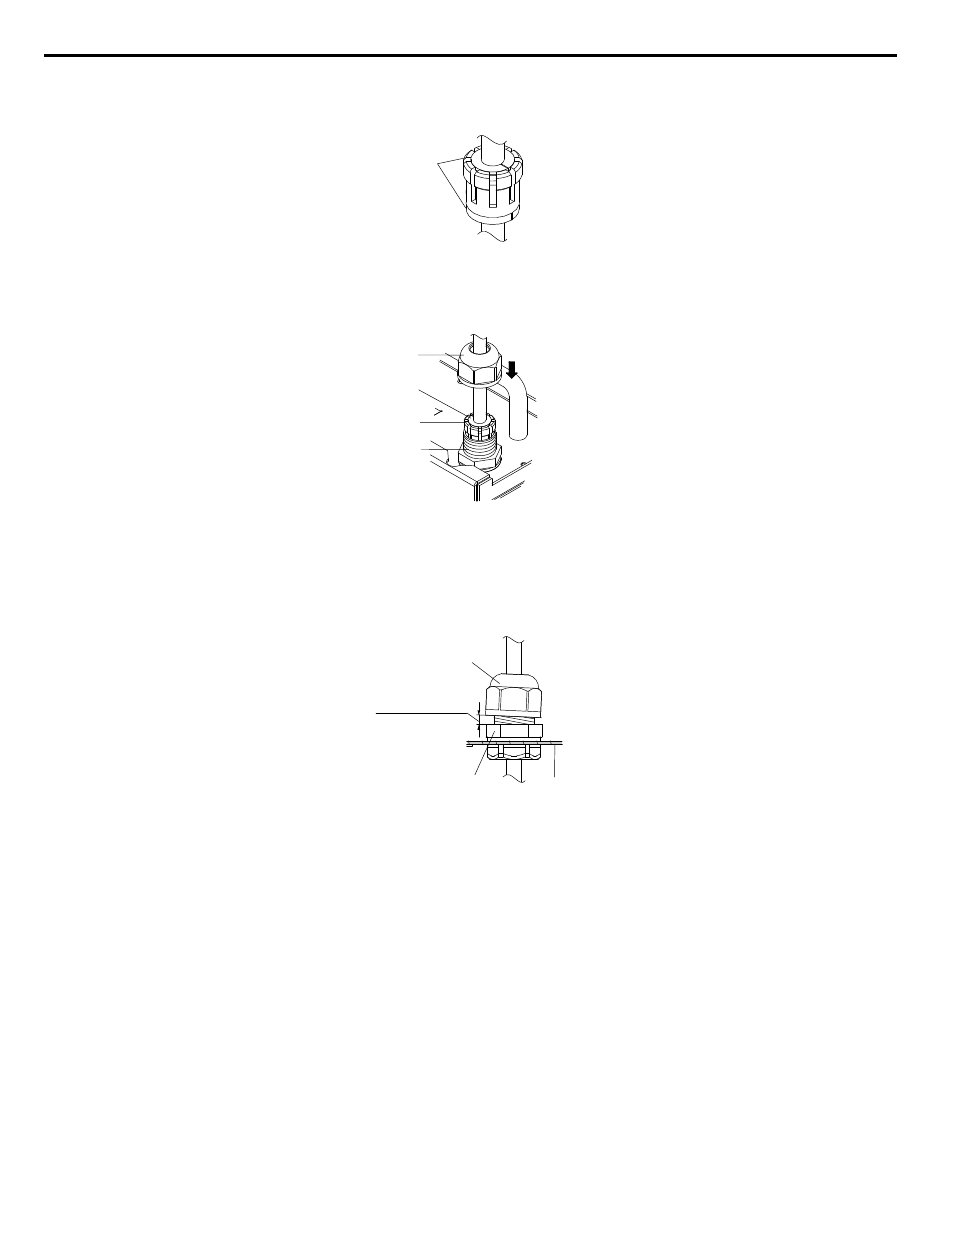
2.
Assemble the clamping claw and sealing insert.
Note:
The clamping claw and sealing insert should fit together so that no opening remains and the sealing insert is not deformed.
A
A –No opening remains and the sealing insert is not deformed.
Figure 7.34 Clamping Claw and Sealing Insert: 4A0124
3.
Place the clamping claw and sealing insert into the cable gland body then tighten the sealing nut into place.
A
B
C
D
A – Sealing nut
B – Sealing insert
C – Clamping claw
D – Cable gland body
Figure 7.35 Reassemble the Cable Gland: 4A0124
4.
The remaining space between the sealing nut and the clamping claw should be between 2.5 and 3.0 mm (0.10 to 0.12
in).
A
B
C
2.5 to 3.0 mm
(0.10 to 0.12 in)
A – Sealing nut
B – Cable gland body
C – Fan unit
Figure 7.36 Cable Gland: 4A0124
5.
Insert the cooling fan into the drive.
Note:
Use a magnetized screwdriver when inserting the screws to prevent the screws from falling.
7.5 Drive Cooling Fans
286
YASKAWA ELECTRIC SIEP YAIZ1B 01D YASKAWA AC Drive – Z1000 Bypass Technical Manual