Move the perspective grid – Adobe Illustrator CC 2015 User Manual
Page 128
123
Drawing
Last updated 6/5/2015
The Perspective Grid Preset Options dialog box opens in edit mode. Enter the new grid setting and click OK to save
the new grid settings.
You cannot delete the default presets. To delete a user-defined preset, click Delete in the Perspective Grid Presets dialog
box.
Illustrator also allows you to import and export user-defined presets. To export a particular preset, click Export in the
Perspective Grid Presets dialog box. To import a preset, click Import.
Move the perspective grid
Illustrator can create only one grid in an Illustrator document. You can move the grid across artboards using the
Ground level widget while the Perspective Grid tool is selected, to place it at the required position.
Note: You must select the Perspective Grid tool to perform this task because the ground level widget is not displayed if this
tool is not selected.
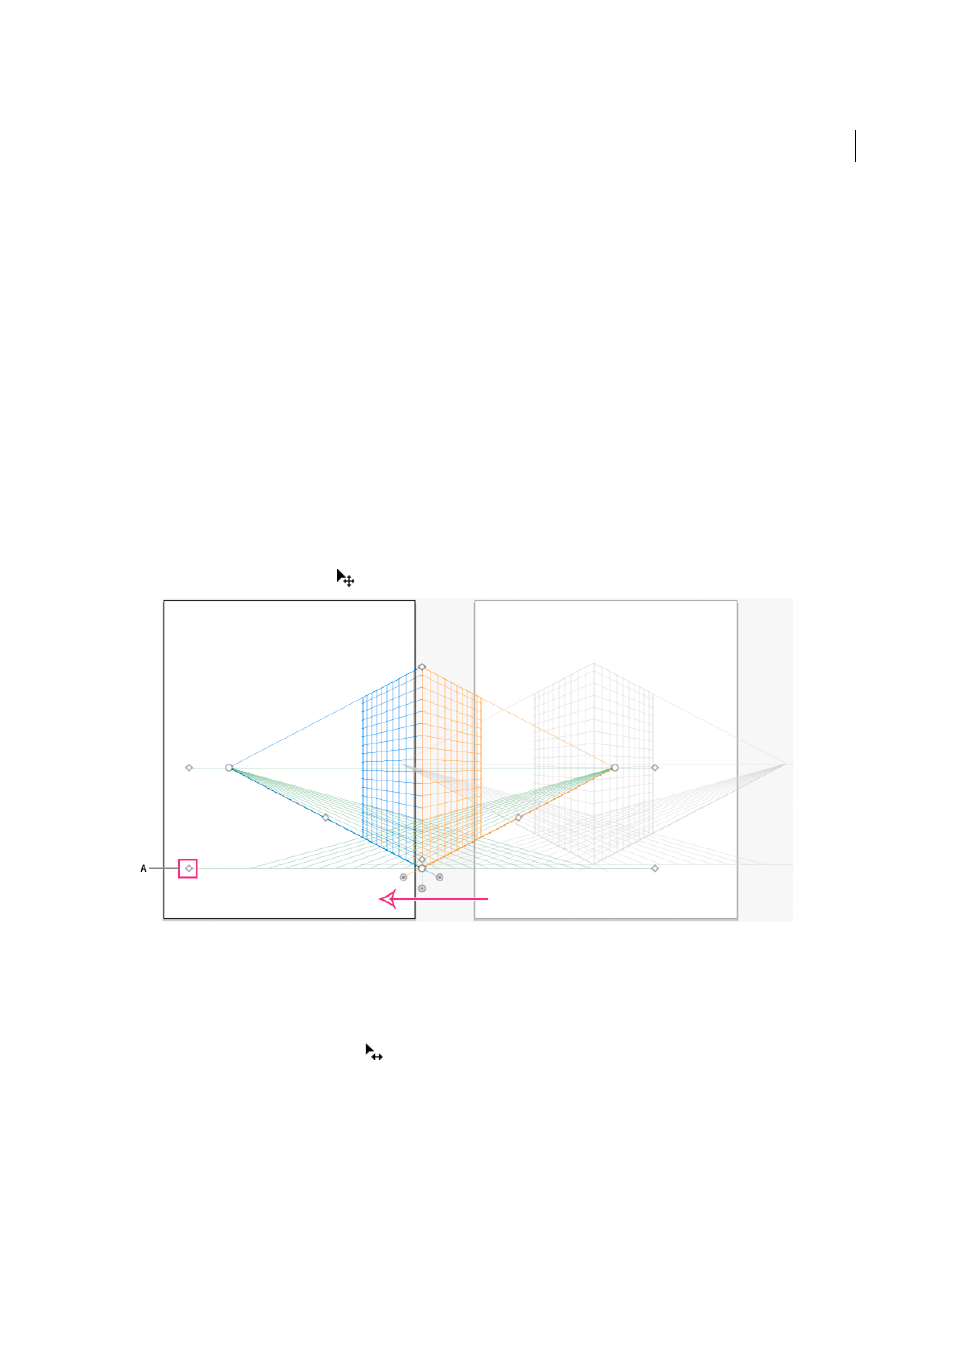
To move the perspective grid do the following:
1
Select the Perspective Grid tool from the Tools panel or press Shift+P.
2
Drag-and-drop the left or right ground level widget on the grid. When you move the pointer over the ground level
point, the pointer changes to
.
Adjust vanishing points, grid planes, horizon height, grid cell size, and grid extent
You can manually adjust vanishing points, grid plane controls, horizon height, and cell size using the respective widgets.
However, these widgets are only visible with the Perspective Grid tool selected.
To adjust the left and right vanishing points use the left and right vanishing point widgets. Notice that the pointer
changes to a two-way arrow pointer (
) when you move the pointer over the vanishing points.
Note: While adjusting the third vanishing point in 3-point perspective, holding down the Shift key constrains the movement
to vertical axis.