Create slices – Adobe Illustrator CC 2015 User Manual
Page 464
459
Web graphics
Last updated 6/5/2015
Slices in an Illustrator document correspond to table cells in the resulting web page. By default, the slice area is exported
as an image file that is enclosed in a table cell. If you want the table cell to contain HTML text and a background color
instead of an image file, you can change the slice type to No Image. If you want to convert Illustrator text to HTML text,
you can change the slice type to HTML Text.
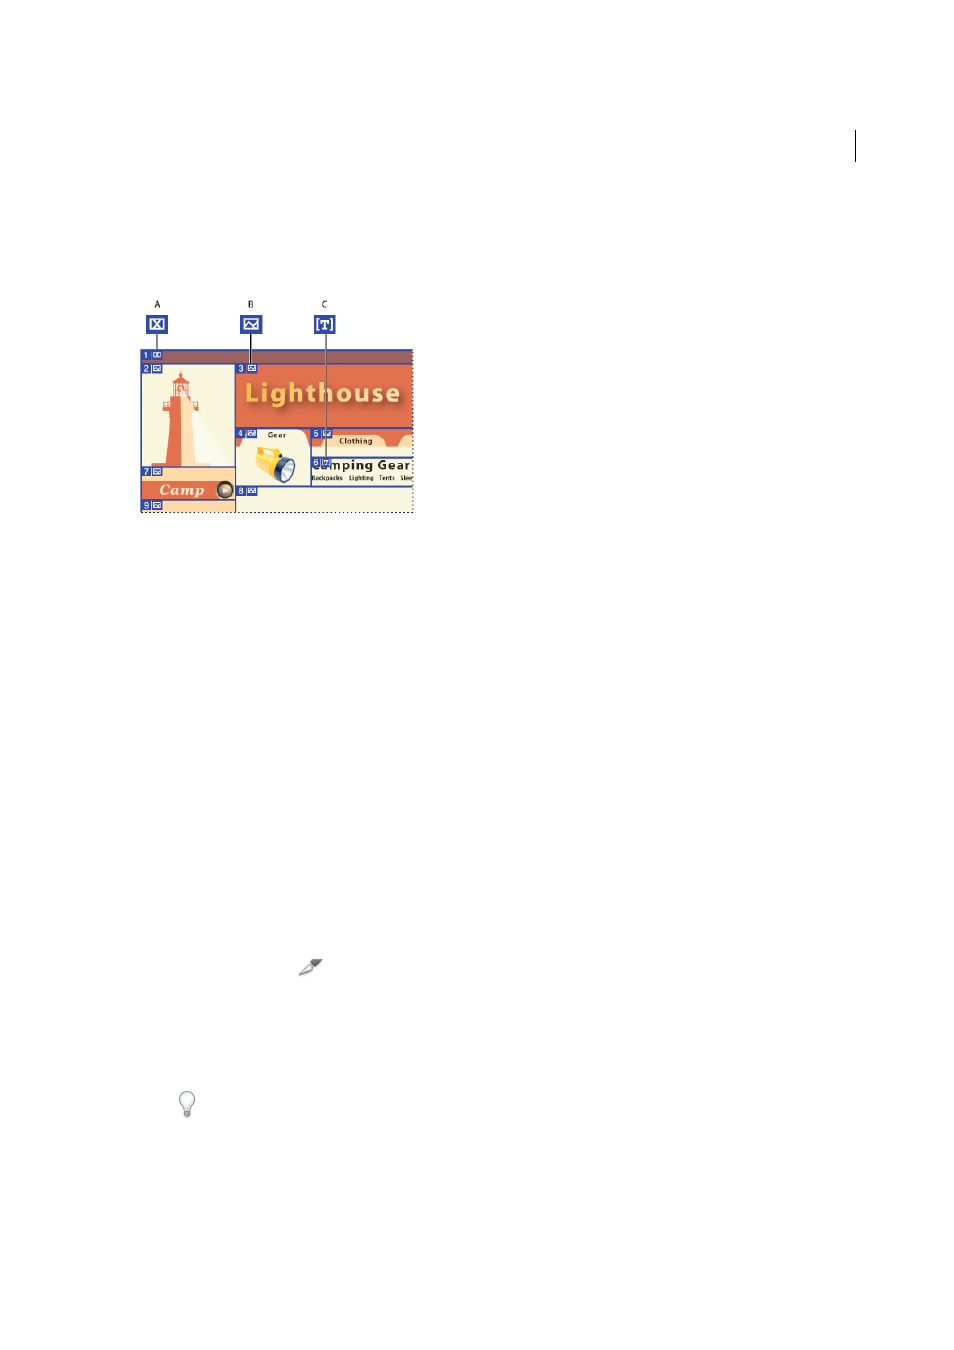
A No Image slice B Image slice C HTML Text slice
You can view slices on the artboard and in the Save For Web & Devices dialog box. Illustrator numbers slices from left
to right and top to bottom, beginning in the upper left corner of the artwork. If you change the arrangement or total
number of slices, slice numbers are updated to reflect the new order.
When you create a slice, Illustrator slices the surrounding artwork into automatic slices to maintain the layout using a
web-based table. There are two types of automatic slices: auto slices and subslices. Auto slices account for the areas of
your artwork that you did not define as a slice. Illustrator regenerates auto slices every time you add or edit slices.
Subslices indicate how overlapping user-defined slices will be divided. Although subslices are numbered and display a
slice symbol, you cannot select them separately from the underlying slice. Illustrator regenerates subslices and auto
slices as needed while you work.
More Help topics
Create slices
❖
Do one of the following:
• Select one or more objects on the artboard, and choose Object > Slice > Make.
• Select the Slice tool
and drag over the area where you want to create a slice. Shift-drag to constrain the slice
to a square. Alt-drag (Windows) or Option-drag (Mac OS) to draw from the center.
• Select one or more objects on the artboard, and choose Object > Slice > Create From Selection.
• Place guides where you want to slice the artwork, and choose Object > Slice > Create From Guides.
• Select an existing slice, and choose Object > Slice > Duplicate Slice.
Tip: Use the Object > Slice > Make command when you want the slice dimensions to match the boundary of an
element in your artwork. If you move or modify the element, the slice area automatically adjusts to encompass
the new artwork. Also use this command to create a slice that captures text and basic formatting characteristics from
a text object.