Create seamless geometric patterns – Adobe Illustrator CC 2015 User Manual
Page 227
222
Painting
Last updated 6/5/2015
4
Do one of the following:
• Choose Edit > Define Pattern, enter a name in the New Swatch dialog box, and click OK. The pattern displays in
the Swatches panel.
• Drag the artwork to the Swatches panel.
More Help topics
Create seamless geometric patterns
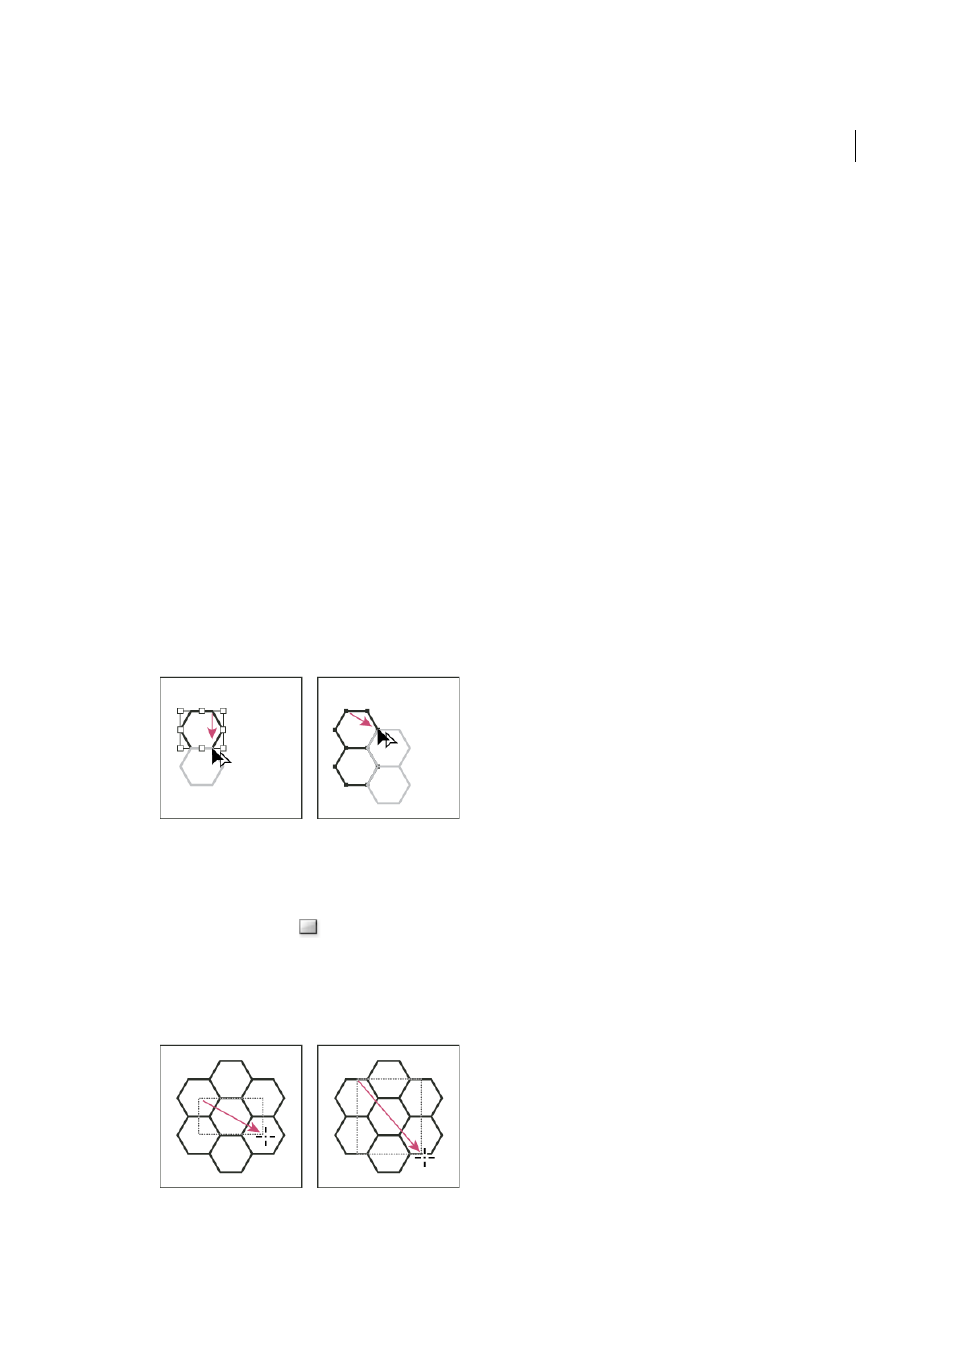
1
Make sure that Smart Guides are turned on and that Snap To Point is selected in the View menu.
2
Select the geometric object. For precise positioning, position the Direct Selection tool on one of the object’s anchor
points.
3
Begin dragging the object vertically from one of its anchor points; then press Alt+Shift (Windows) or Option+Shift
(Mac OS) to copy the object and constrain its movement.
4
When the copy of the object has snapped into place, release the mouse button and then release the keys.
5
Using the Group Selection tool, Shift-click to select both objects, and begin dragging the objects horizontally by one
of their anchor points; then press Alt+Shift (Windows) or Option+Shift (Mac OS) to create a copy and constrain the
move.
6
When the copy of the object has snapped into place, release the mouse button, and then release the keys.
7
Repeat steps 2 through 6 until you’ve built the pattern you want.
8
Use the Rectangle tool
to do one of the following:
• For a fill pattern, draw a bounding box from the center point of the upper left object to the center point of the
lower right object.
• For a brush pattern, draw a bounding box that surrounds the objects and coincides with their outer boundaries.
If the pattern is to be a corner tile, hold down Shift as you drag to constrain the bounding box to a square.