Option 2: connect a drive directly to your pc – Applied Motion RS-232 User Manual
Page 272
272
920-0002 Rev. I
2/2013
Host Command Reference
Option 2: Connect a Drive Directly to Your PC
1.
Connect one end of a CAT5 Ethernet cable into the LAN card (NIC) on your PC and the other into
the drive.
2.
Set the IP address on the drive to “10.10.10.10” by setting the rotary switch at “0”.
3.
To set the IP address of your PC:
a.
On Windows XP, right click on “My Network Places” and select properties.
b.
On Windows 7, click Computer. Scroll down the left pane until you see “Network”. Right
click and select properties. Select “Change adapter settings”
4.
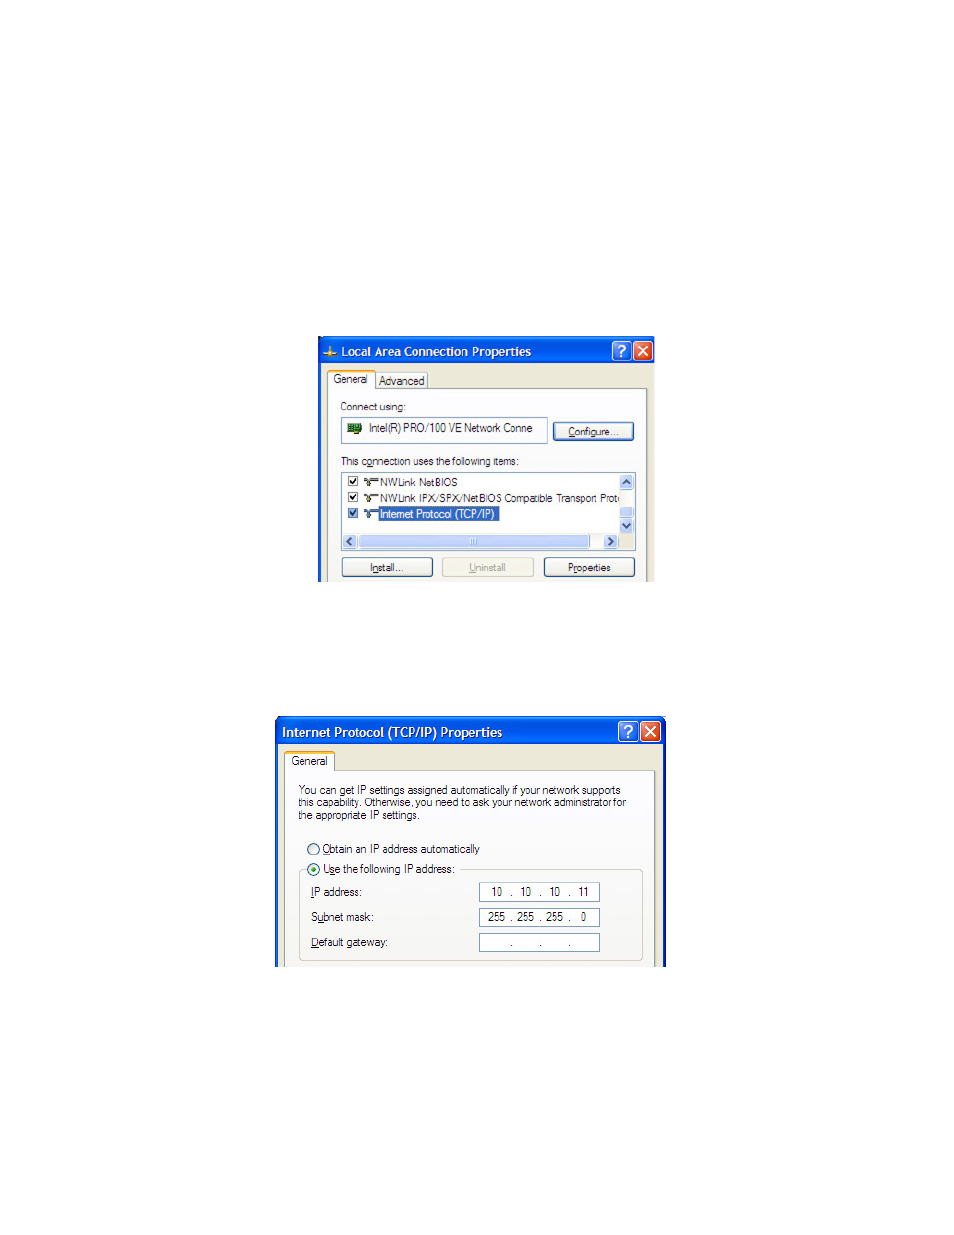
You should see an icon for your network interface card (NIC). Right click and select properties.
a.
Scroll down until you see “Internet Properties (TCP/IP)”. Select this item and click the
Properties button.
b.
On Windows 7 and Vista, look for “(TCP/IPv4)”
5.
Select the option “Use the following IP address”. Then enter the address “10.10.10.11”. This will
give your PC an IP address that is on the same subnet as the drive. Windows will know to direct any
traffic intended for the drive’s IP address to this interface card.
6.
Next, enter the subnet mask as “255.255.255.0”.
7.
Be sure to leave “Default gateway” blank. This will prevent your PC from looking for a router on
this subnet.
8.
Because you are connected directly to the drive, anytime the drive is not powered on your PC
may annoy you with a small message bubble in the corner of your screen saying “The network cable is
unplugged.”