RISCO Group LightSYS 2 User Manual
Page 23
Mounting and Wiring
Page 23
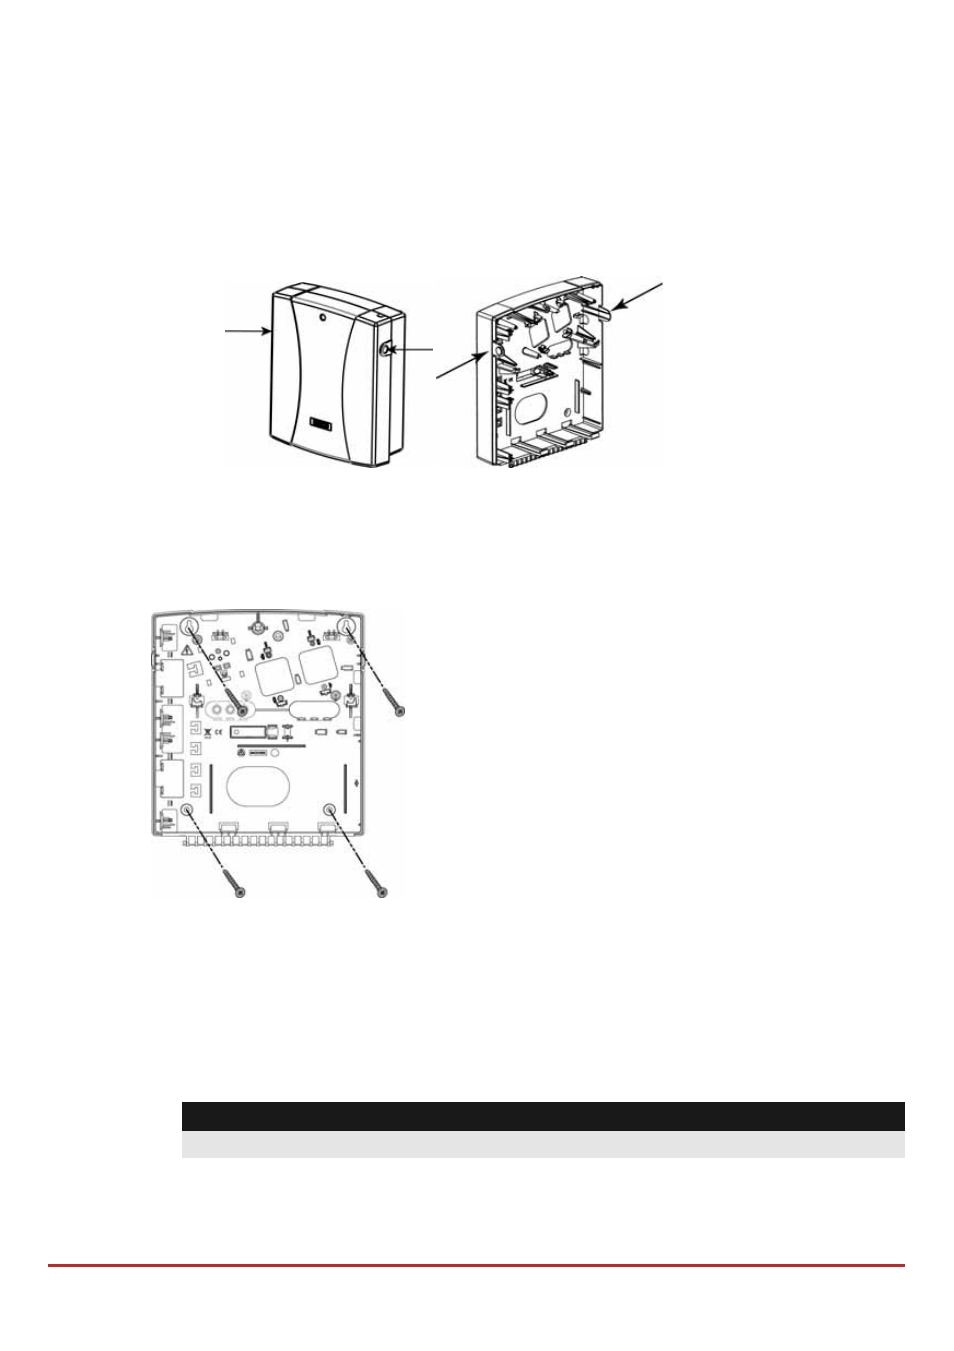
Wall Mounting the LightSYS2 Box
The LightSYS2 is housed in a state‐of‐the‐art plastic enclosement, consisting of back and front
panels and featuring a plastic click‐mounting for all internal components.
To prepare the wall for box mounting
1. Separate the sub‐assemblies by pressing the circular locking plastic brackets
on either side to release the front cover.
Figure 2-1 Box clip release
2. Hold the mounting bracket against the wall as a template and mark the
locations for the mounting holes (4 mounting holes and an additional
optional hole for securing the tamper protection bracket item).
Figure 2-2 Mounting screw template
3. Drill the desired mounting holes and place the screw anchors.
AC adaptor and main board
The LightSYS2 is powered by an AC/DC Adaptor 100‐240V 50/60Hz 14.4V—
1.5A.
Caution:
AC wiring should be done by a certified electrician
Note: For mounting the LightSYS
inside a metal enclosure ( RP432BM,
RP432BM1) refer to the instructions
supplied with the box.