Blackmagic Design DaVinci Resolve Advanced Panel User Manual
Page 140

CONFORM
140
To create a session with handles:
1.
Open the Conform page and select the session you want to add handles to in the
Timeline Management list.
2.
Right-click anywhere in the Timeline and choose “Create Session with Handles” from
the contextual menu.
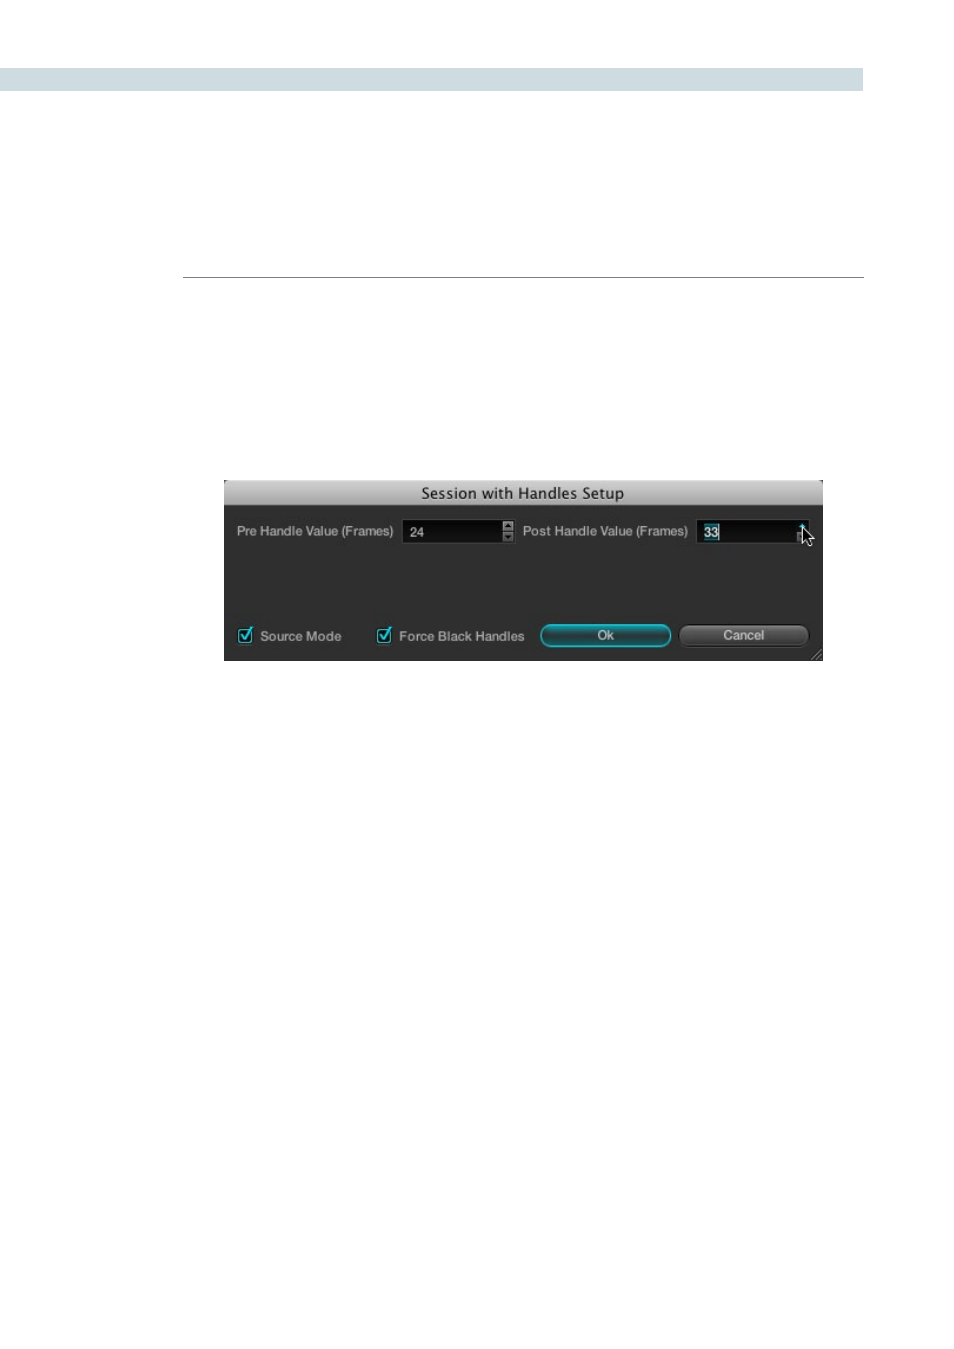
The Session with Handles Setup dialog appears.
3.
Adjust the following settings:
• Pre Handle Value (Frames) field: The number of frames to add before the in point
of the clip. Type a number in the field, or use the up/down arrows to adjust the value
a frame at a time.
• Post Handle Value (Frames) field: The number of frames to add after the out point
of the clip. Type a number in the field, or use the up/down arrows to adjust the value
a frame at a time.
• Source Mode checkbox: Sorts the clips in the new session in ascending order,
according to source timecode.
• Force Black Handles checkbox: For clips that lack extra media at the head or tail,
turning on this checkbox renders black instead, creating handles where previously
there were none.
4.
When you’re finished, click OK, and when a Conform Settings dialog appears, verify the
settings you selected and click OK a second time.
5.
If you want, type a custom name for the new session in the Session Name dialog that
appears, and click OK. By default, the new name is that of the previous session with
“(Handles)” appended to it.
A new session is created, with clips that are longer to reflect the handles that
were added.