Reviewing the detected cuts – Blackmagic Design DaVinci Resolve Advanced Panel User Manual
Page 362
SCENE
362
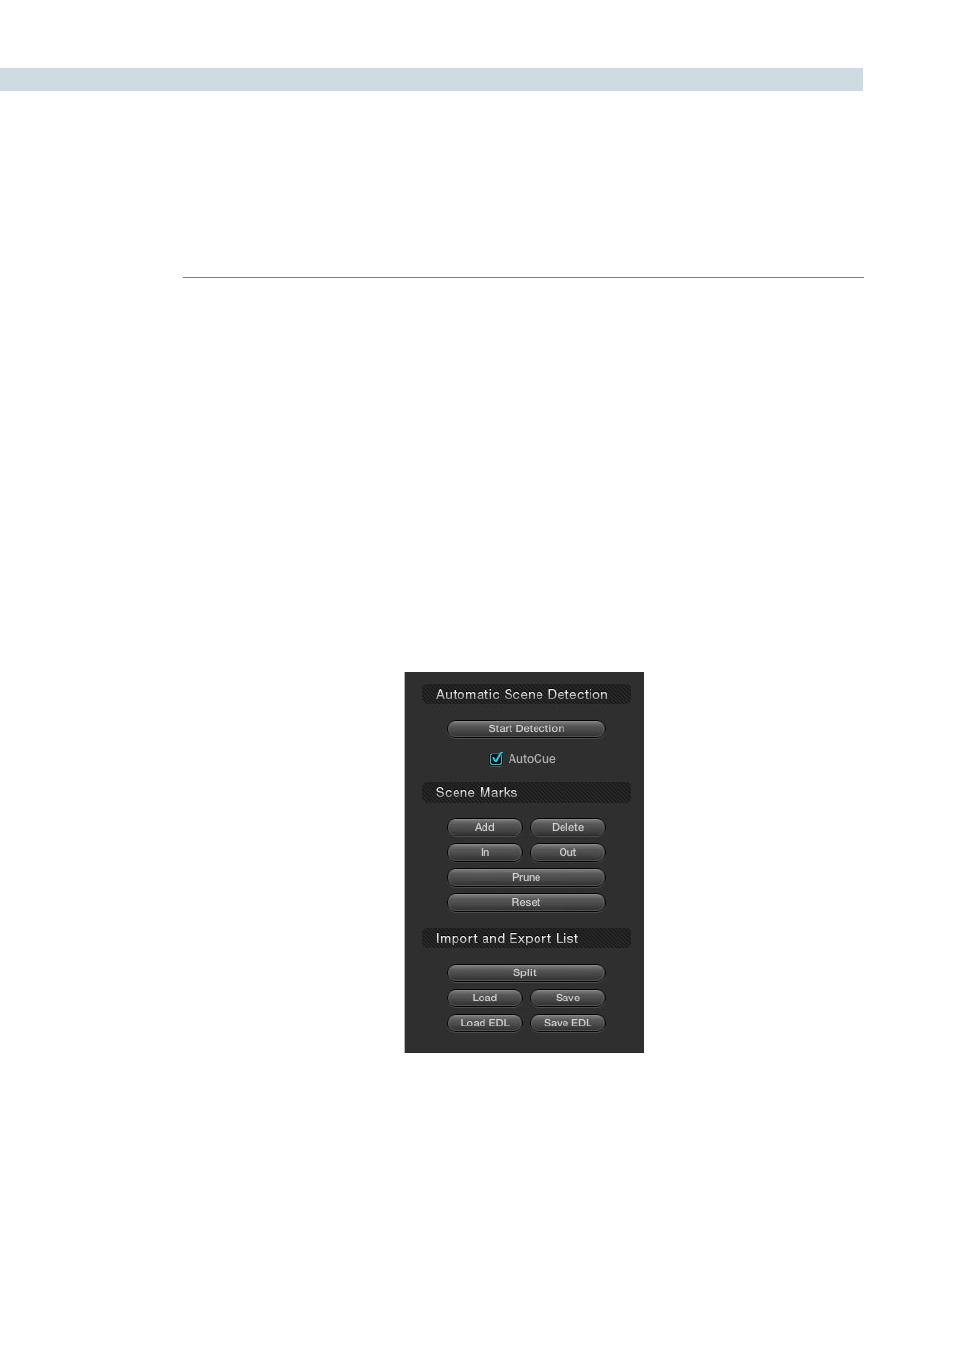
During or after the Scene Cut Detection process you can begin reviewing the Detector’s analysis of the
image to make sure your cut list matches the actual scene cuts. While the Detector is efficient, it can be
confused by motion, camera flashes, or even the rolling up to and down from full film speed where the
shutter can give multiple ‘flashes.’ The analysis is looking for large changes in the image.
The simple method, and fastest way to check to see that the scene cuts are accurate is by pressing
the “N” and “P” keys on the computer keyboard to view the “Next” and “Previous” scene cuts. Look for
the left image to be different from the center and right image. If they are, this is likely to be a scene cut.
As each correct cut point is confirmed, select ’N’ to jump to the next prediction. If the spikes on the
graph are very close together or no cuts are detected, you may need to modify the position of the
horizontal green sensitivity bar and start the cut review again.
If the material which is being scene cut detected, contained certain types of motion which confused
the Scene Cut Detector, you might encounter a group of spikes within the graph that may contain
numerous false positive scene cuts. To delete this information, use ‘Prune’ to trim out scene cuts which
are grouped between the marked “In” cursor point and the marked “Out” cursor point. Once the marked
In and Out points are marked, and the ‘Prune’ button is selected, these scene cuts will be deleted.
Reviewing the Detected Cuts
Scene Cut Detection Controls