Syncing sessions to audio – Blackmagic Design DaVinci Resolve Advanced Panel User Manual
Page 155
CHAPTER
CONFORM
CONFORM
155
8
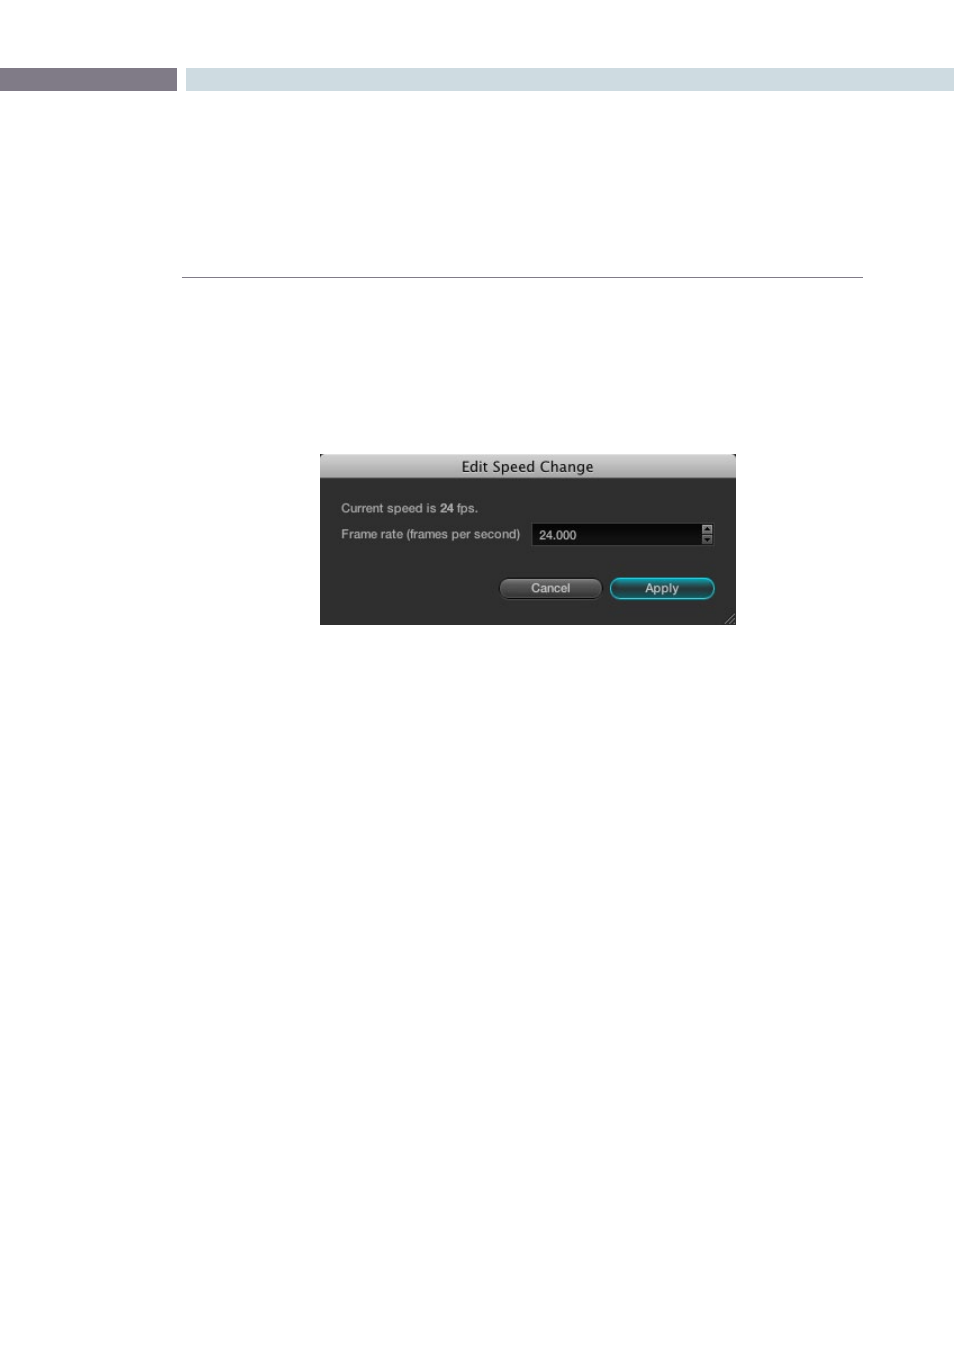
To change a clip’s speed:
1.
Right-click a clip in the Timeline, and choose Change Clip Speed from the
contextual menu.
2.
Enter a new frame rate into the Frame rate field, or click the Up/Down arrow buttons to
change the value in one frame increments.
For example, in a project set to 24 fps, to set a clip to 50% speed, change its frame rate
to 12. To set a clip to 200% speed, set the frame rate to 48.
3.
Click Apply.
The speed of the clip changes to reflect the new frame rate, however the duration and
position of the clip remain unchanged.
Syncing Sessions to Audio
DaVinci Resolve lets you synchronize a session to audio so you can grade it within context to the
program’s soundtrack, host client review sessions with synced audio, or output with audio to tape.
Sessions can be synced to one of two different sources of audio:
A timecode-controllable audio playback device, such as a DAT deck.
A single 16 or 24-bit/48KHz AIFF or WAV file on an accessible volume.
Here are all of the procedures for audio synchronization.
To synchronize a session to audio from a timecode controllable playback device:
1.
Right-click anywhere within the Timeline, and choose Audio Options from the
contextual menu.
2.
Open the LTC tab, and enter the starting timecode value of the recorded audio on tape
you’re syncing into the “Start Timecode” fields.