Using the rgb mixer in monochrome mode – Blackmagic Design DaVinci Resolve Advanced Panel User Manual
Page 250
COLOR
250
Using the RGB Mixer in Monochrome Mode
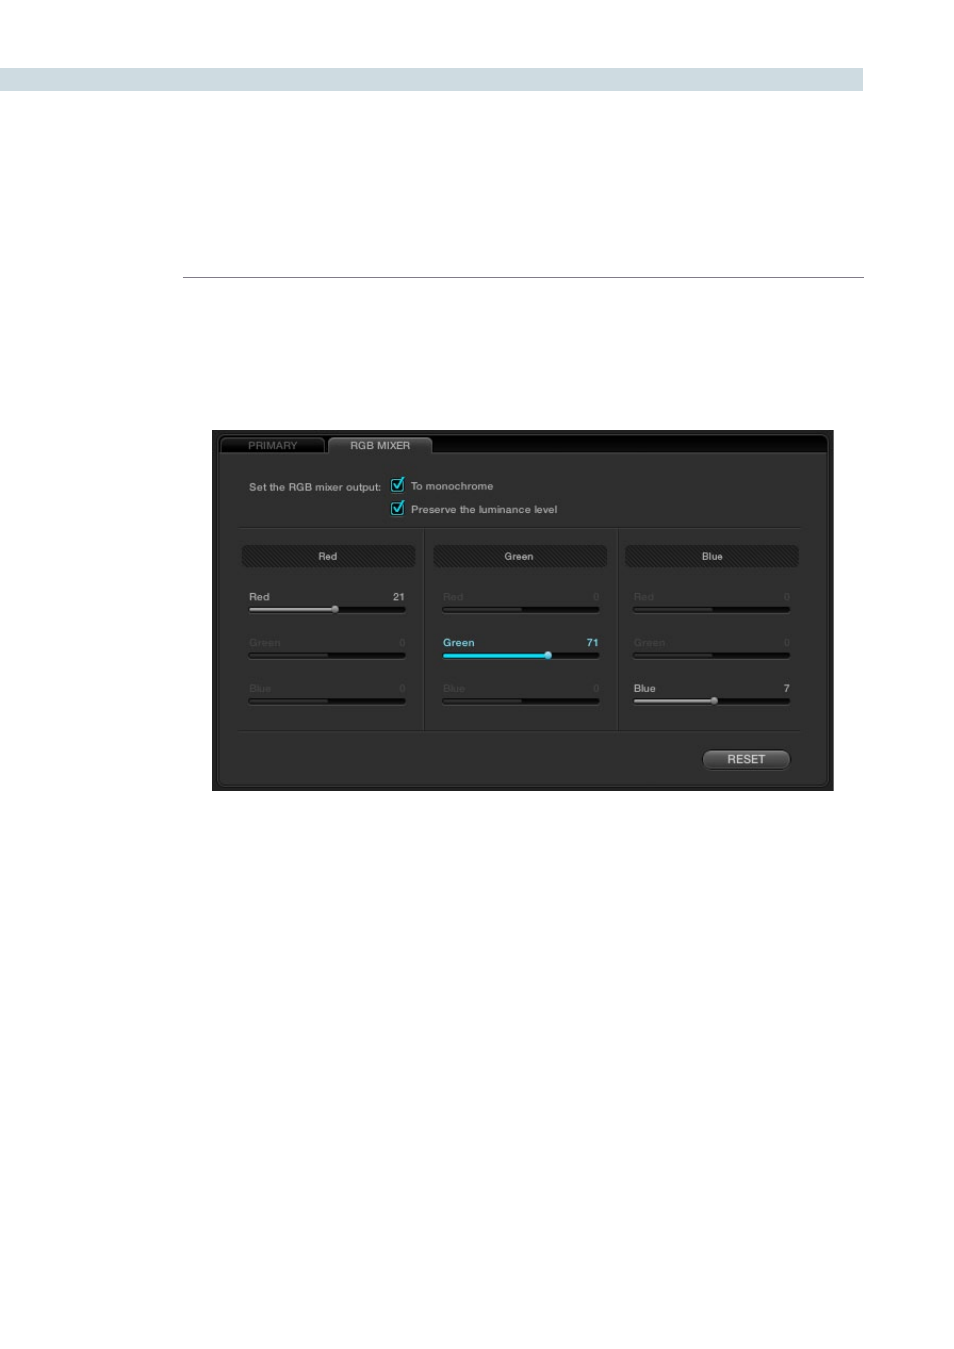
When you turn on the “To monochrome” checkbox, a pair of parameters within each slider group are
disabled so that the only available controls are the Red > Red slider, the Green > Green slider, and the
Blue > Blue slider.
Keeping in mind that each of the color channels that makes up an image is itself a grayscale channel,
the sliders, in Monochrome mode let you add different proportions of the red, green, and blue color
channels together to create custom grayscale versions of a shot.
To understand why this is useful, let’s consider the default values of the Red, Green, and Blue sliders. To
emulate the human eye’s sensitivity to the wavelengths of light, the Rec 709 video standard defines an
isolated Luma (Y’) component as consisting of 0.2126 of the red channel, 0.7152 of the green channel,
and 0.0722 of the blue channels added together. This can be seen in the default values, rounded to the
nearest integer percentage of 21, 71, and 7.
This is the standard method of deriving a black and white version of a color image, and in fact produces
identical results to those obtained by setting the Saturation parameter to 0.
However, there have traditionally been other ways of mixing the colors of life into different grayscale
interpretations. For example, photographers often use colored filters in conjunction with black & white
film stocks, such as a yellow/green filter to emphasize pleasing skin tone for lightly complexioned
people. A much older example is the use of black & white film stocks with different sensitivities. Old
orthochromatic stocks were not sensitive to red wavelengths, recording only blue and green to create
an image.
Sliders at their default values when “To monochrome” is enabled