Using the source monitor and program monitor – Adobe Premiere Pro CC v.7.xx User Manual
Page 221
Using the Source Monitor and Program Monitor
Source Monitor and Program Monitor overview
Open or clear a clip in the Source Monitor
Navigate clips in the Source menu in the Source Monitor
Using the Source Monitor and Program Monitor time controls
View safe zones in the monitors
Choose fields in the Source and Program Monitors
Choose a display mode
Source Monitor and Program Monitor overview
The Source Monitor plays back individual clips. In the Source Monitor, you prepare clips that you want to add to a sequence. You set In points and
Out points, and specify the clip’s source tracks (audio or video). You can also insert clip markers and add clips to a sequence in a Timeline panel.
The Program Monitor plays back the sequence of clips that you are assembling. It’s your view of the active sequence in a Timeline panel. You can
set sequence markers and specify sequence In points and Out points. Sequence In points and Out points define where frames are added or
removed from the sequence.
Each monitor contains both a time ruler and controls to play back and cue the current frame of a source clip or sequence. Set In and Out points,
go to In and Out points, and set markers. Insert and Overwrite buttons are available in the Source Monitor, and Lift and Extract buttons are
available in the Program Monitor, by default. Each monitor also contains an Export Frame button for creating a still from a single frame of video.
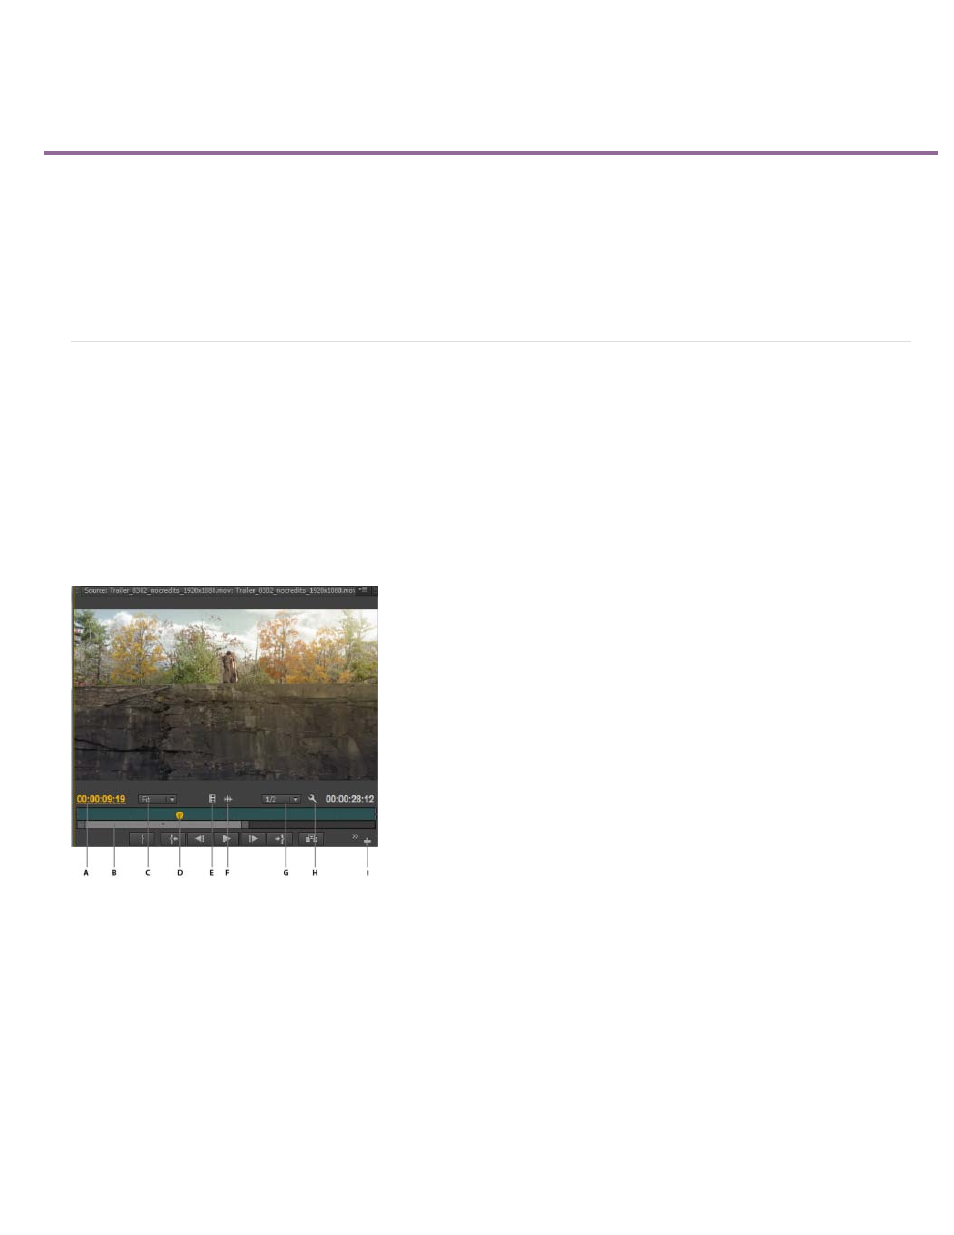
The Source Monitor
A. Time code B. Zoom scroll bar C. Scaling options D. Playhead E. Drag video F. Drag audio G. Resolution H. Settings button I. Button editor
224