Adobe Premiere Pro CC v.7.xx User Manual
Page 53
Note:
Step 1: Select Premiere Pro sequence
Select the Premiere Pro sequence that you want to color grade.
Ensure that you have selected the sequence in the Timeline or Project panel.
Step 2: Send sequence to SpeedGrade using Direct Link
Using Direct Link, you can send a sequence from an open Premiere Pro project directly to SpeedGrade without exporting the project.
To use Direct Link, select File > Direct Link To Adobe SpeedGrade.
Step 3: Choose to open sequence in SpeedGrade
When you select the Direct-Link workflow, Premiere Pro prompts you to save changes to the project in Premiere Pro and open it in SpeedGrade.
Click Yes.
Step 4: Selected sequence opens in SpeedGrade
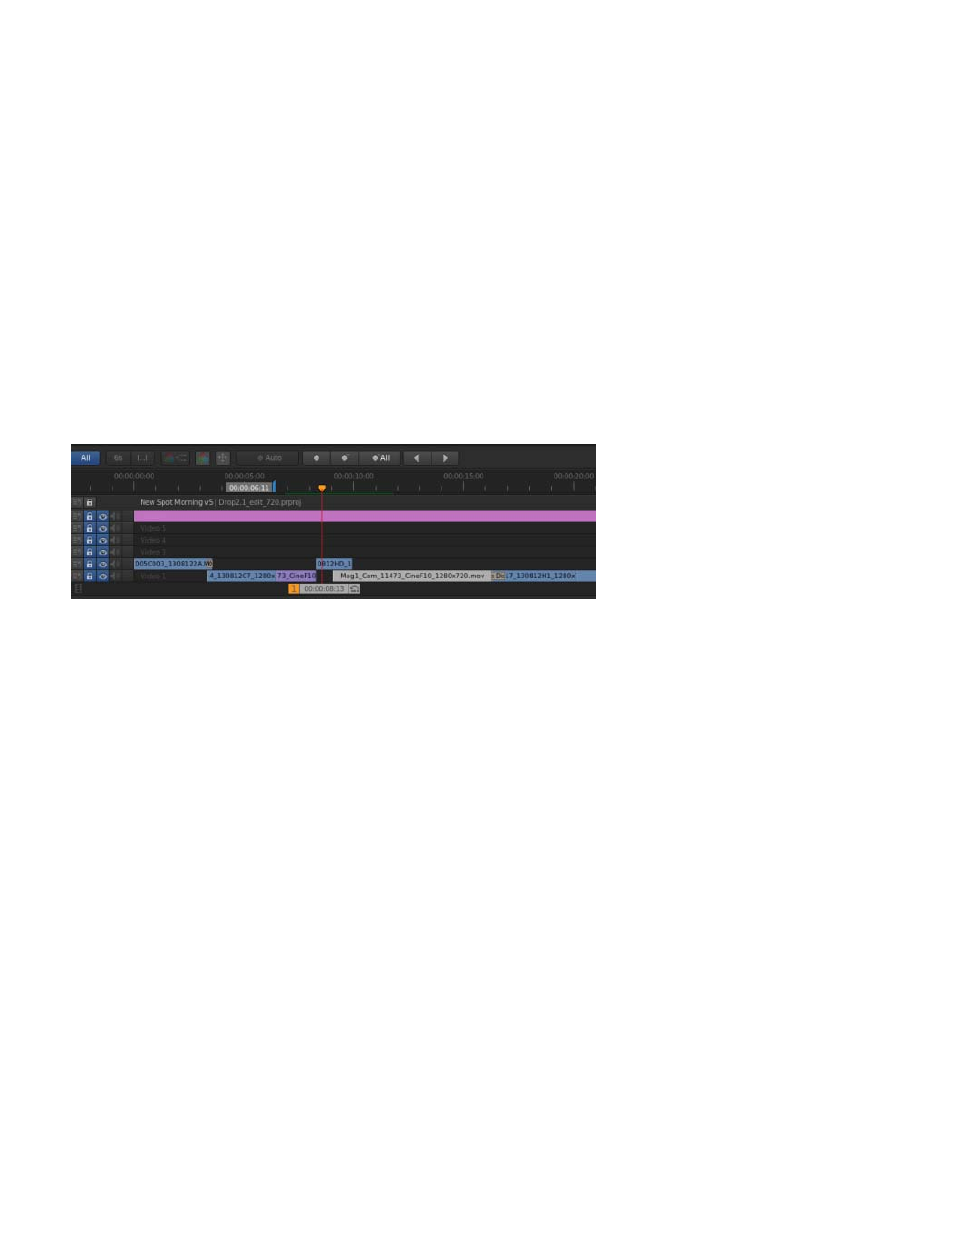
Premiere Pro closes, and SpeedGrade opens the sequence in its Timeline, which uses the same familiar track layout as Premiere Pro.
In the SpeedGrade Timeline, you can see all the clip edit points, transitions, and layers.
Project Timeline in SpeedGrade
Step 5: Color grade the sequence using grading and mask tools
Within SpeedGrade, you can color grade the sequence using Looks and Masks. The Looks that you apply in SpeedGrade will appear as Lumetri
presets when you reopen the sequence in Premiere Pro.
If a Lumetri Look has already been applied in Premiere Pro, it's available in the SpeedGrade Timeline, where you can adjust its parameters.
56