Step 4: export closed caption files – Adobe Premiere Pro CC v.7.xx User Manual
Page 275
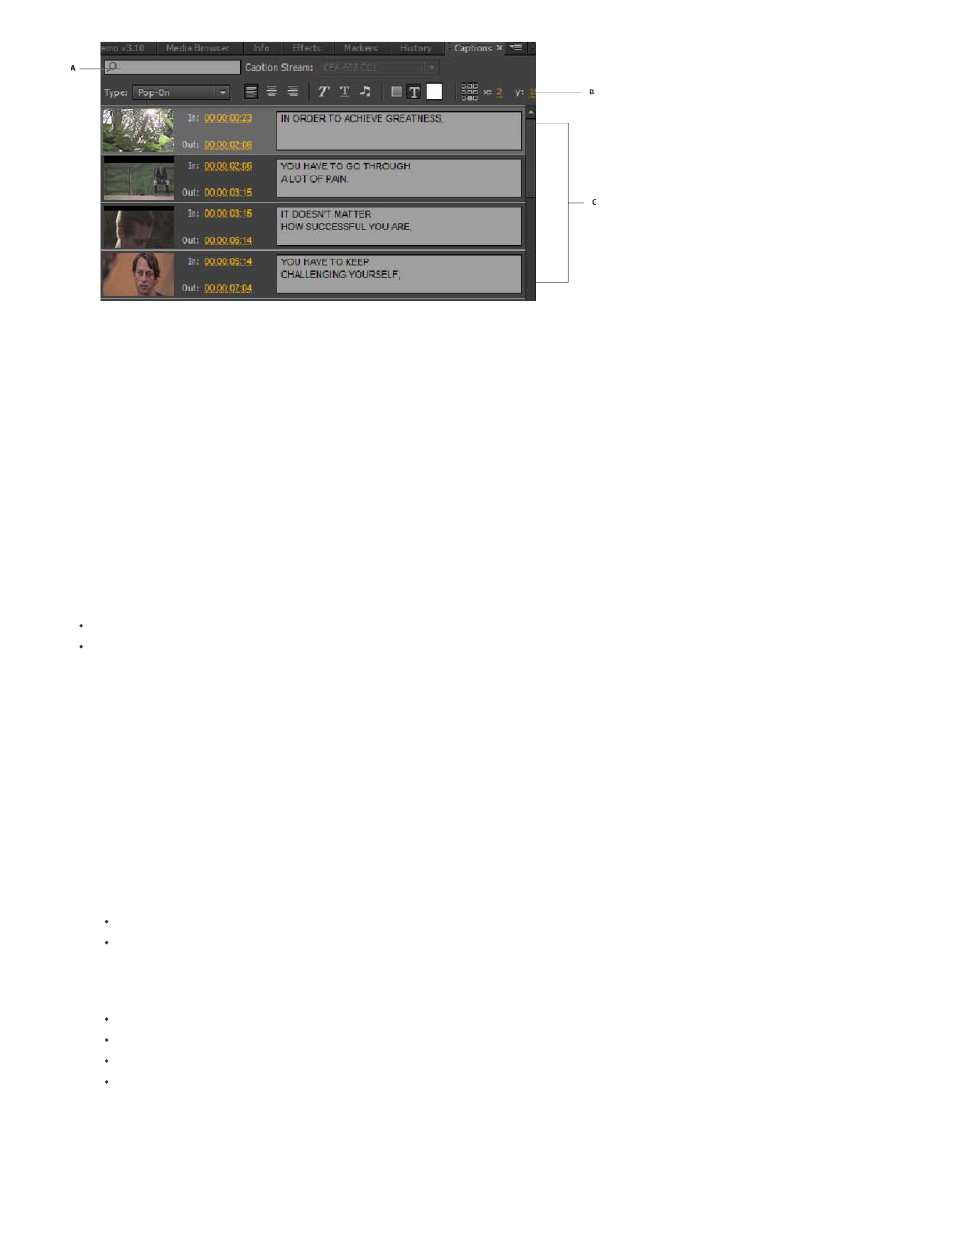
A. Filter caption content B. Formatting toolbar C. Editable text blocks
Example usage scenario
Consider a scenario where you have a program that already contains closed captions. You may need to create a different version of the program,
say with a shorter duration, to add more commercials. In such a scenario, you can make the necessary edits using the Captions tab. The text clips
are visible from the timeline. From there, you can adjust the captions to be in proper sync with the media after any trims, ripple deletes, and
rearranging of segments.
Step 4: Export Closed caption files
After you finish editing or creating closed caption clips, you can do either of the following:
Export the sequence containing the closed caption clip to tape using third-party hardware that support closed caption encoding.
Export the closed caption tracks through Premiere Pro or Adobe Media Encoder using the Export Settings dialog. You can do so by following
these steps:
1. Load a closed caption asset in the Source Monitor or select it in the Project panel. You can also select a sequence in the Project panel, or
have the Timeline panel in focus.
2. Select File > Export > Media.
3. In the Export Settings dialog box, specify the following options:
Export options
Select one of the following export options:
Create Sidecar File
Embed in Output File (applicable for QuickTime movies only)
Format
Select one of the following file formats to export the closed caption data:
Scenarist Closed Caption File (.scc)
MacCaption VANC File (.mcc)
SMPTE Timed Text (.xml)
EBU N19 Subtitle (.stl)
Note: The default option for NTSC regions is SMPTE Timed Text, and for PAL regions, it is EBU N19.
Frame Rate
Depending on the format that you select, a list of supported frame rates are displayed in the Frame Rate pop-up menu. A default frame rate
278