Installing the program – WattMaster WM-WCC3-TGD-01B User Manual
Page 427
WCC III Technical Guide
6-1
6. TENANT OVERRIDE PROGRAM
SECTION 6:
TENANT OVERRIDE PROGRAM
(SS5024)
____________________________________________________
The Tenant Override Program provides a means for an end user,
or Tenant to override specifi c WCC III control point(s) via the
internet with a very simplistic interface that WattMaster Controls
has developed.
This is mainly used for after hours billing of equipment usage, and
the timed usage of said equipment is then kept track for each and
every tenant in this manner. A separate secure program is then used
to retrieve this data.
Please note:
That there are two possible ways of installing
the Tenant Override software—from the main WCC III
installation CD installation disk – WM part # DM1WC011-
01X and from the Standalone Tenant Override CD installation
disk – WM part # DM1WC013-01X. The WM part # denotes
the software version for the installation CD and is typically A
to Z. The standalone version (WM part # DM1WC013-01X)
allows the Building Contractor or build management company
to distribute this Tenant Override Installation software to the
end user/tenant for unassisted overrides.
WCC III Installation Software -
DM1WC011-01X
Please note: Your user name must have
suffi cient rights to install these WCC III programs
onto your computer’s hard drive.
Step 1:
Insert the WCC III Program Setup CD (DM1WC011-
01X) into your computer’s CDROM/DVD drive.
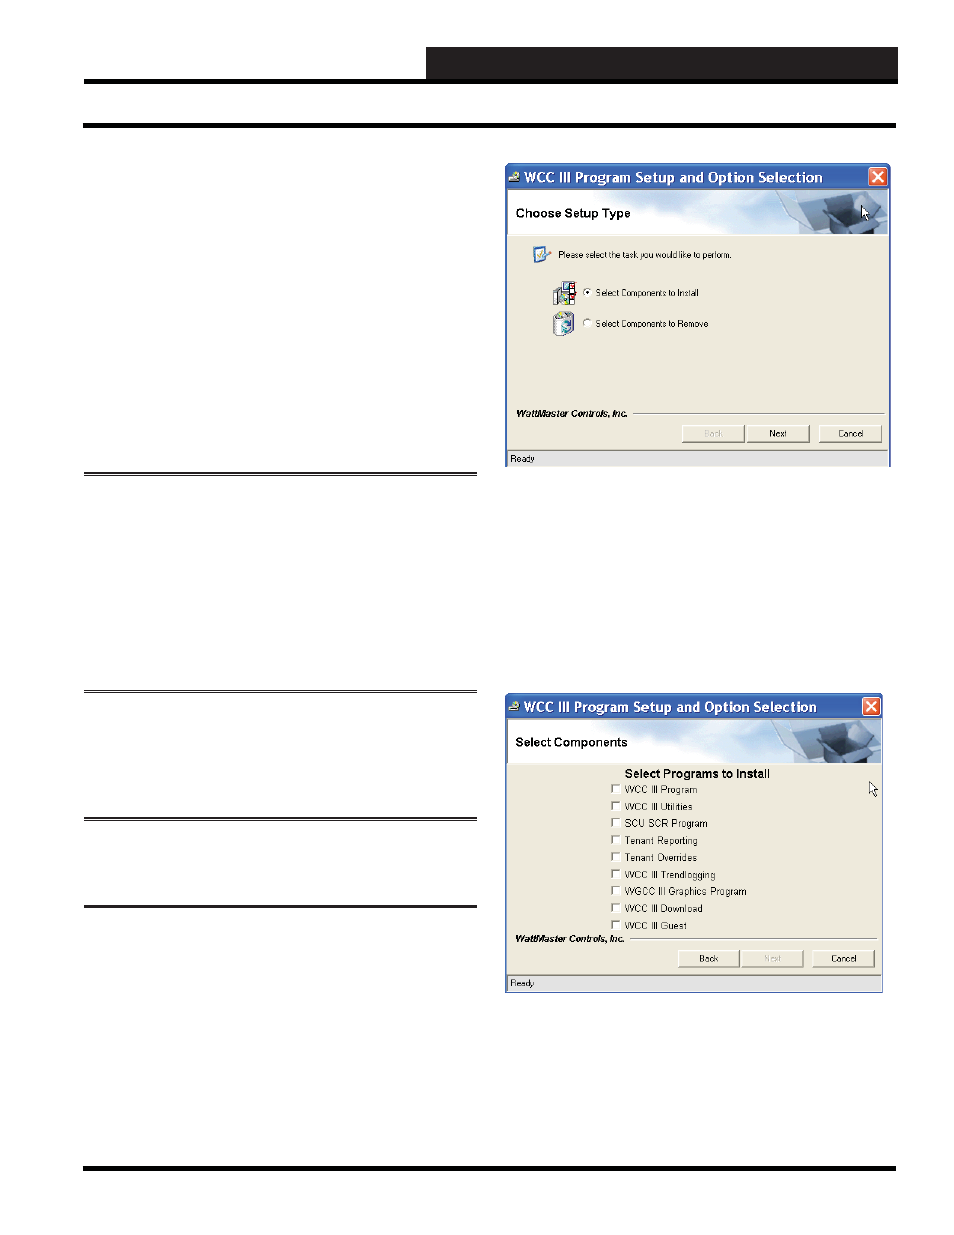
Step 2:
This disk should “autorun” and start the installation
process and then display the WCC III Program Setup and Option
Selection Screen. The WCC III Program Setup and Option
Selection Screen will allow you to select the installation or removal
of the various WCC III component programs on to the WCC III
front end computer’s hard drive.
Step 3:
Choose either “Select Components to Install” and
click
<Next>
to continue with the WCC III program installation
or choose “Select Components to Remove” and click
<Next>
to
continue with the WCC III program removal process.
The
<Back>
button will take you back one screen and the
<Cancel>
button will allow you to cancel the WCC III Program
Setup installation. The instructions that follow describe the
installation process. The removal process closely follows the
installation procedure, but instead of installing the various WCC
III component programs, it will uninstall them.
Step 4:
Select the desired check boxes to the left of the Tenant
Override programs and any other programs you wish to install
and then click
<Next>
to continue with the installation of these
program(s) onto the WCC III Front end computer’s hard drive.
Installing the Program