Printing color separations, About color separations, Preparing artwork for color separating – Adobe Illustrator CS4 User Manual
Page 416
409
USING ADOBE ILLUSTRATOR CS4
Printing
Note: Some imagesetters and desktop laser printers use screening technologies other than halftoning. If you are printing
an image on a nonhalftone printer, consult your service provider or your printer documentation for the recommended
resolutions.
Printing color separations
About color separations
To reproduce color and continuous-tone images, printers usually separate artwork into four plates (called process
colors)—one plate for each of the cyan, magenta, yellow, and black portions of the image. You can also include custom
inks (called spot colors). In this case, a separate plate is created for each spot color. When inked with the appropriate
color and printed in register with one another, these colors combine to reproduce the original artwork.
The process of dividing the image into two or more colors is called color separating, and the film from which the plates
are created are called the separations.
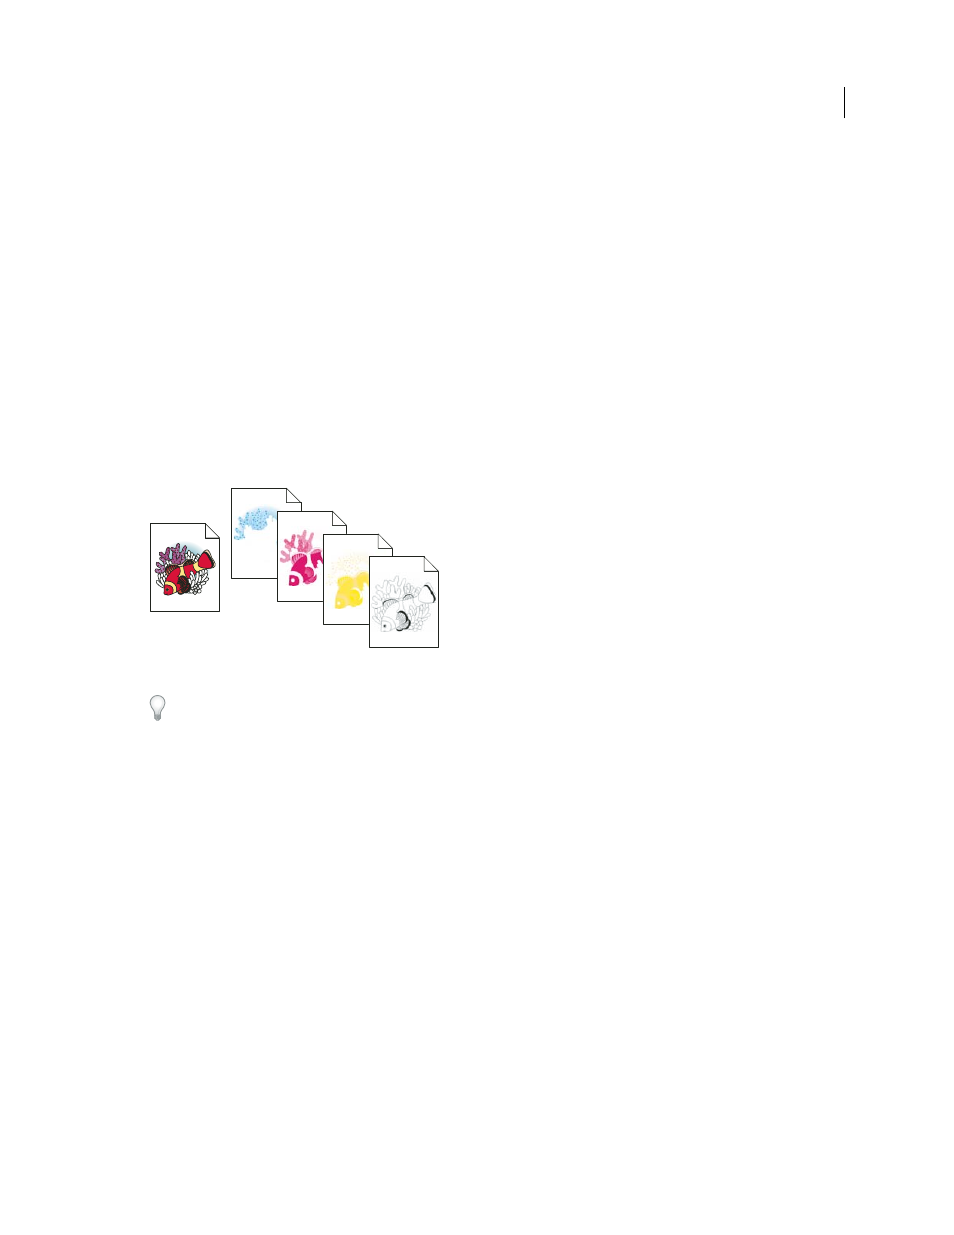
Composite image printed on a color laser printer compared to four-color separations printed on an imagesetter.
To produce high-quality separations, you should work closely with the print shop that will produce your separations,
consulting its experts before beginning each job and during the process. To see a video on using the Separations
Preview panel, see
.
See also
Preparing artwork for color separating
Before you print color separations from Illustrator, it’s a good idea to perform the following prepress tasks:
•
Set up color management, including calibrating your monitor and selecting an Illustrator Color Setting.
•
Soft-proof how color will appear on the intended output device. Choose Window
> Separations Preview to preview
how the color separations will look.
•
If the document is in RGB mode, choose File
> Document Color Mode
> CMYK Color to convert it to CMYK Mode.
•
If your artwork contains color blends, optimize them so that they print smoothly (without discrete bands of color).
•
If your artwork requires trapping, set up appropriate overprinting and trapping.
•
If your artwork contains areas of transparent, overlapping colors, preview which areas will be affected by flattening
and note which flattening options you want to use.