Add printer’s marks, About bleed, Add a bleed – Adobe Illustrator CS4 User Manual
Page 420
413
USING ADOBE ILLUSTRATOR CS4
Printing
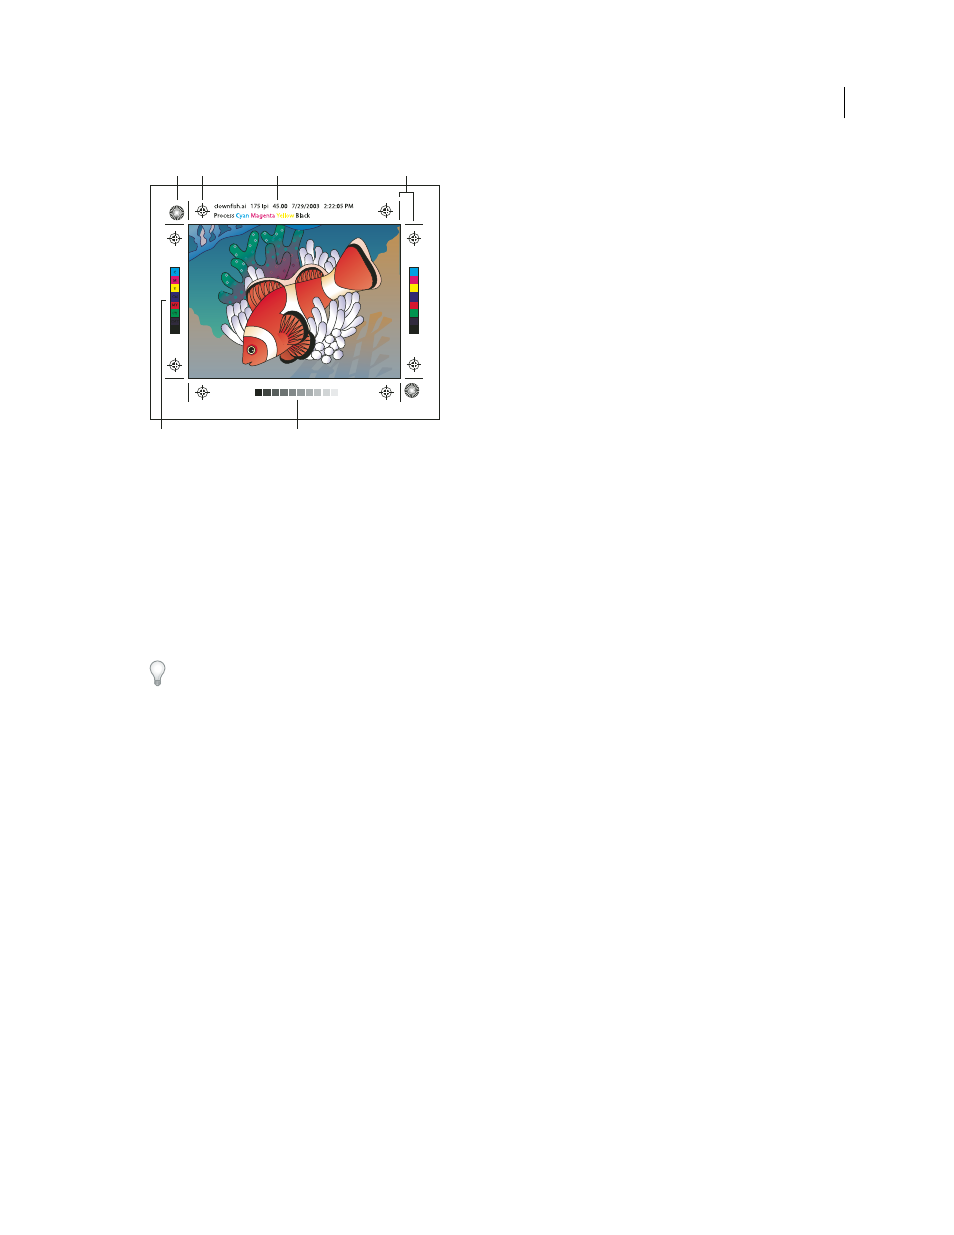
Printer’s marks
A. Star target (not optional) B. Registration mark C. Page information D. Trim marks E. Color bar F. Tint bar
Add printer’s marks
1
Choose File
> Print.
2
Select Marks & Bleed on the left side of the Print dialog box.
3
Select the kinds of printer’s marks you want to add. You can also choose between Roman and Japanese-style marks.
4
(Optional) If you select Trim Marks, specify the width of trim-mark lines and the offset distance between the trim
marks and the artwork.
To avoid drawing printer’s marks on a bleed, be sure to enter an Offset value greater than the Bleed value.
See also
Specify crop marks for trimming or aligning
About bleed
Bleed is the amount of artwork that falls outside of the printing bounding box, or outside the crop area and trim marks.
You can include bleed in your artwork as a margin of error—to ensure that the ink is still printed to the edge of the
page after the page is trimmed or that an image can be stripped into a keyline in a document. Once you create the
artwork that extends into the bleed, you
can use Illustrator to specify the extent of the bleed. Increasing the bleed
makes Illustrator print more of the artwork that is located beyond the trim marks. The trim marks still define the same
size printing bounding box, however.
The size of the bleed you use depends on its purpose. A press bleed (that is, an image that bleeds off the edge of the
printed sheet) should be at least 18 points. If the bleed is to ensure that an image fits a keyline, it needs to be no more
than 2 or 3 points. Your print shop can advise you on the size of the bleed necessary for your particular job.
Add a bleed
1
Choose File
> Print.
2
Select Marks & Bleed on the left side of the Print dialog box.
C
B
D
A
E
F