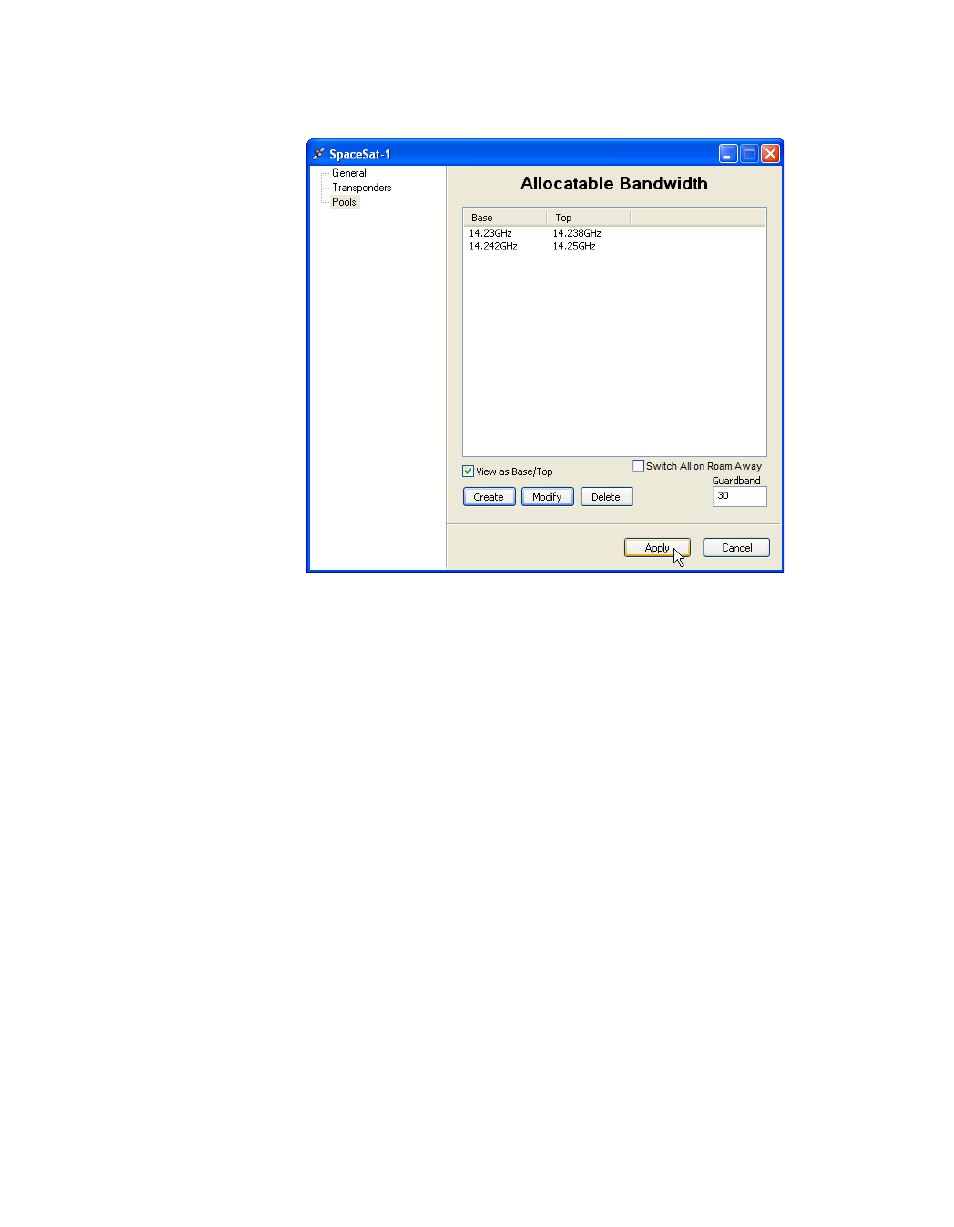
Figure 3-26 satellite pools dialog – Comtech EF Data VMS v3.12.x Vipersat User Manual
Page 130
RF Manager Configuration
MN/22156, rev 12
3-30
VMS User Guide
3. Click OK to enter the new pool in the Allocatable Bandwidth table.
Figure 3-26 Satellite Pools dialog
4. Repeat the above steps to create additional pools, as required.
5. Enter the desired Guardband for the carriers that will be allocated band-
width slots in the defined Pools. This value is entered as a percentage of the
carrier bandwidth, and is divided equally for the left and right sides of the
carrier.
For example, using the default Guardband setting of 30, a carrier using
3.3 MHz will be assigned to a 4.29 MHz slot, providing a guardband of 495
kHz on each side of the carrier.
6. If this satellite will be used for roaming/SOTM and Carrier Presence
Switching applications, activate the Switch All on Roam Away feature.
Refer to the section “Carrier Presence Switching” on page E-36 for addi-
tional information on this feature and its configuration.
7. Click Apply to save the settings, then Close the window.
The newly created pool(s) are displayed in the Spectrum View as shaded green
areas, shown in figure 3-27.