Trap preset options, Trap widths – Adobe Acrobat XI User Manual
Page 544
537
Print production tools (Acrobat Pro)
Last updated 1/14/2015
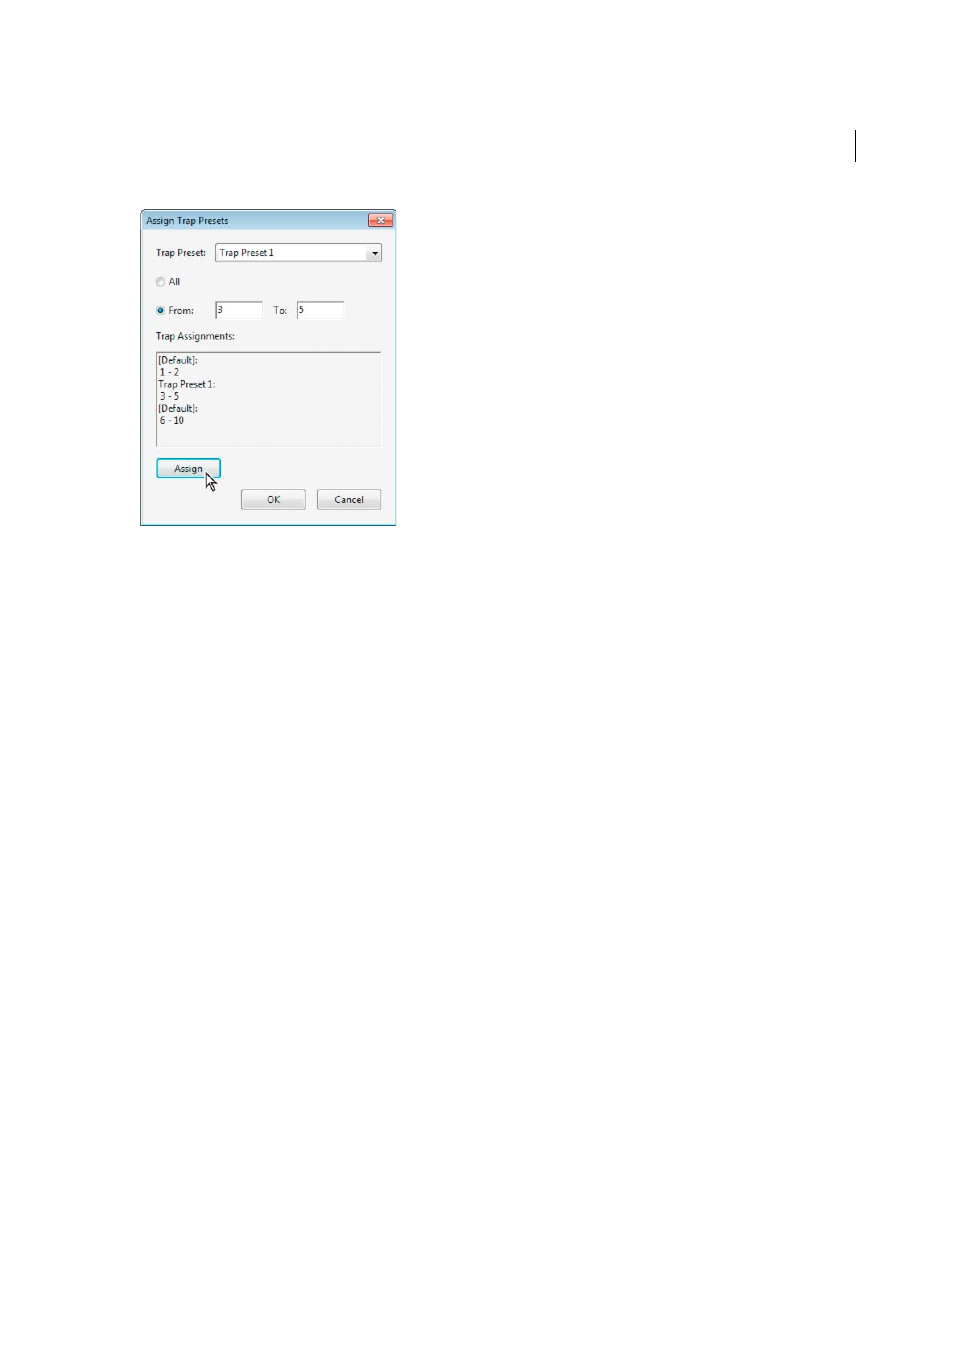
1
In the Trap Presets dialog box, click Assign.
2
For Trap Preset, choose the preset you want to apply.
3
Select the pages you want to apply the trap preset to.
4
Click Assign.
Note: If you click OK without clicking Assign, the dialog box closes without changing the trap assignments. Trap
assignments previously made using the Assign button are preserved.
5
After you finish assigning trap presets, click OK.
Disable trapping on pages
1
In the Trap Presets dialog box, click Assign.
2
Select the pages you want to disable trapping on and choose [No Trap Preset] in the Trap Preset menu.
3
Click Assign.
4
After you finish updating the dialog box, click OK.
Trap preset options
You can change trap preset options whenever you create or edit a trap preset. The same trap preset options are available
in Acrobat and InDesign. In Acrobat, you can view trap presets by choosing Tools > Print Production >Trap Presets. In
InDesign, choose Window > Output >Trap Presets.
Trap widths
Trap width is the amount of overlap for each trap. Differences in paper characteristics, screen rulings, and printing press
conditions require different trap widths. To determine the appropriate trap widths for each job, consult your
commercial printer.
Default
Specifies the trap width in points for trapping all colors except those involving solid black. The default value is
0p0.25.
Black
Indicates the distance that inks spread into solid black, or the holdback amount—the distance between black
edges and underlying inks for trapping rich blacks. The default value is 0p0.5. This value is often set to be 1.5 to 2 times
the value of the default trap width.