Change the default magnification – Adobe Acrobat XI User Manual
Page 69
62
Workspace
Last updated 1/14/2015
1
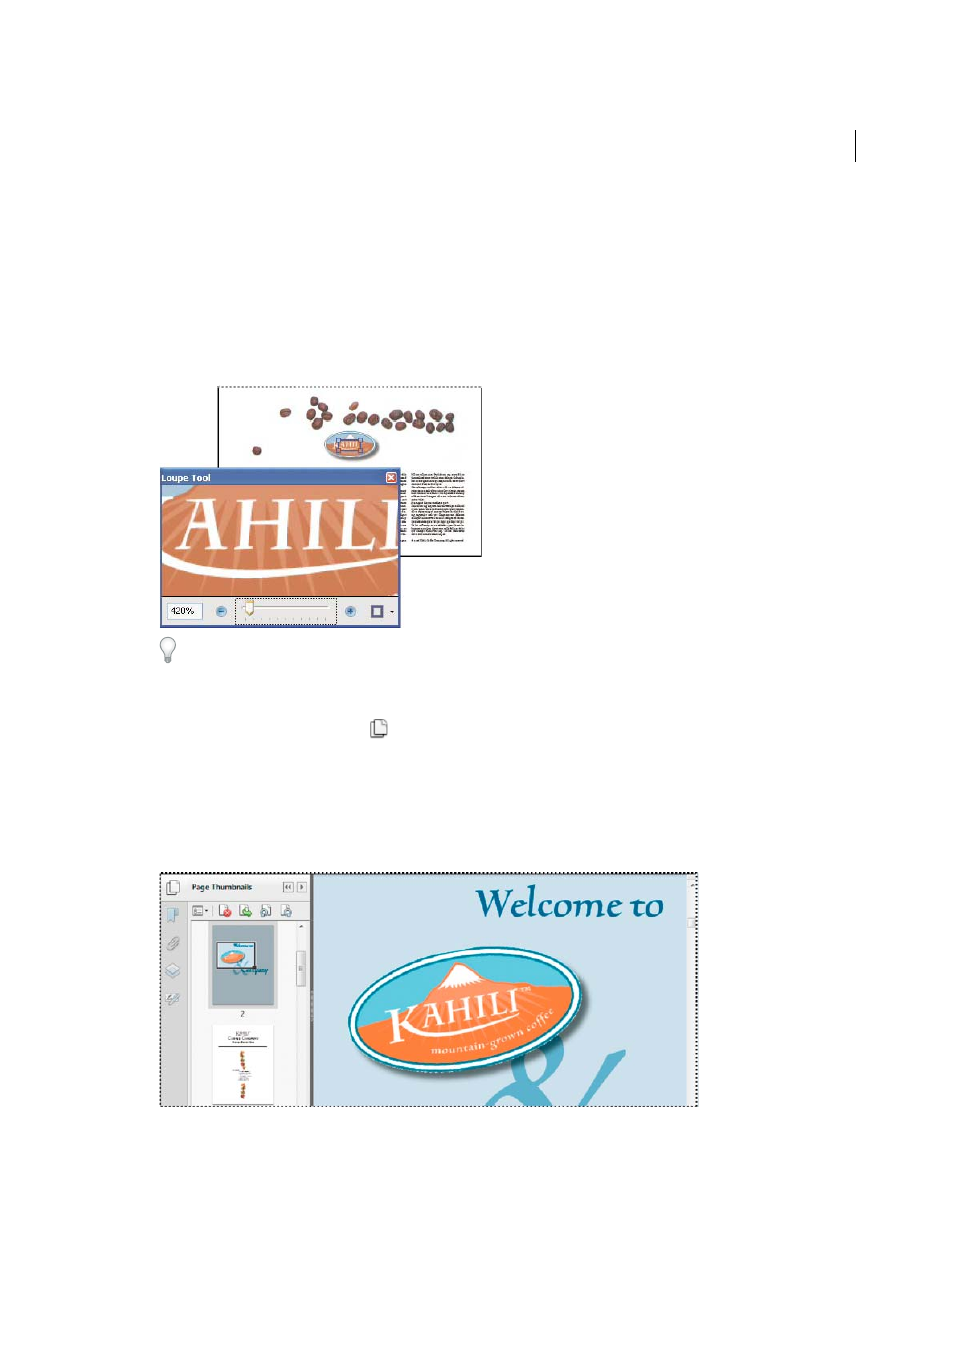
Click the area of the document you want to view in closer detail. A rectangle appears in the document,
corresponding to the area shown in the Loupe Tool window. You can drag or resize the rectangle to change the
Loupe tool view.
2
To change the magnification of the Loupe tool, do any of the following:
• Drag the slider.
• Click the plus or minus buttons.
• Enter a value in the zoom text box.
You can change the color of the Loupe tool rectangle. Click the Line Color pop-up menu in the lower-right corner of
the Loupe Tool window, and select a new color.
Change the magnification by using a page thumbnail
1
Click the Page Thumbnails button
in the navigation pane on the left side of the window.
2
Locate the thumbnail for the page. Then position the pointer over the lower-right corner of the page-view box until
the pointer changes into a double-headed arrow.
3
Drag the corner of the box to reduce or expand the view of the page.
4
As needed, move the pointer over the zoom box frame within the thumbnail until it changes into a Hand icon. Then
drag the frame to see a different area of the page in the document pane.
Change the default magnification
1
In the Preferences dialog box under Categories, select Page Display.
2
Open the Zoom pop-up menu and choose a default magnification level.