RISCO Group ACUS User Manual
Page 398
User Manual for ACUS
Uncontrolled
when
printed
©
RISCO
Group
370
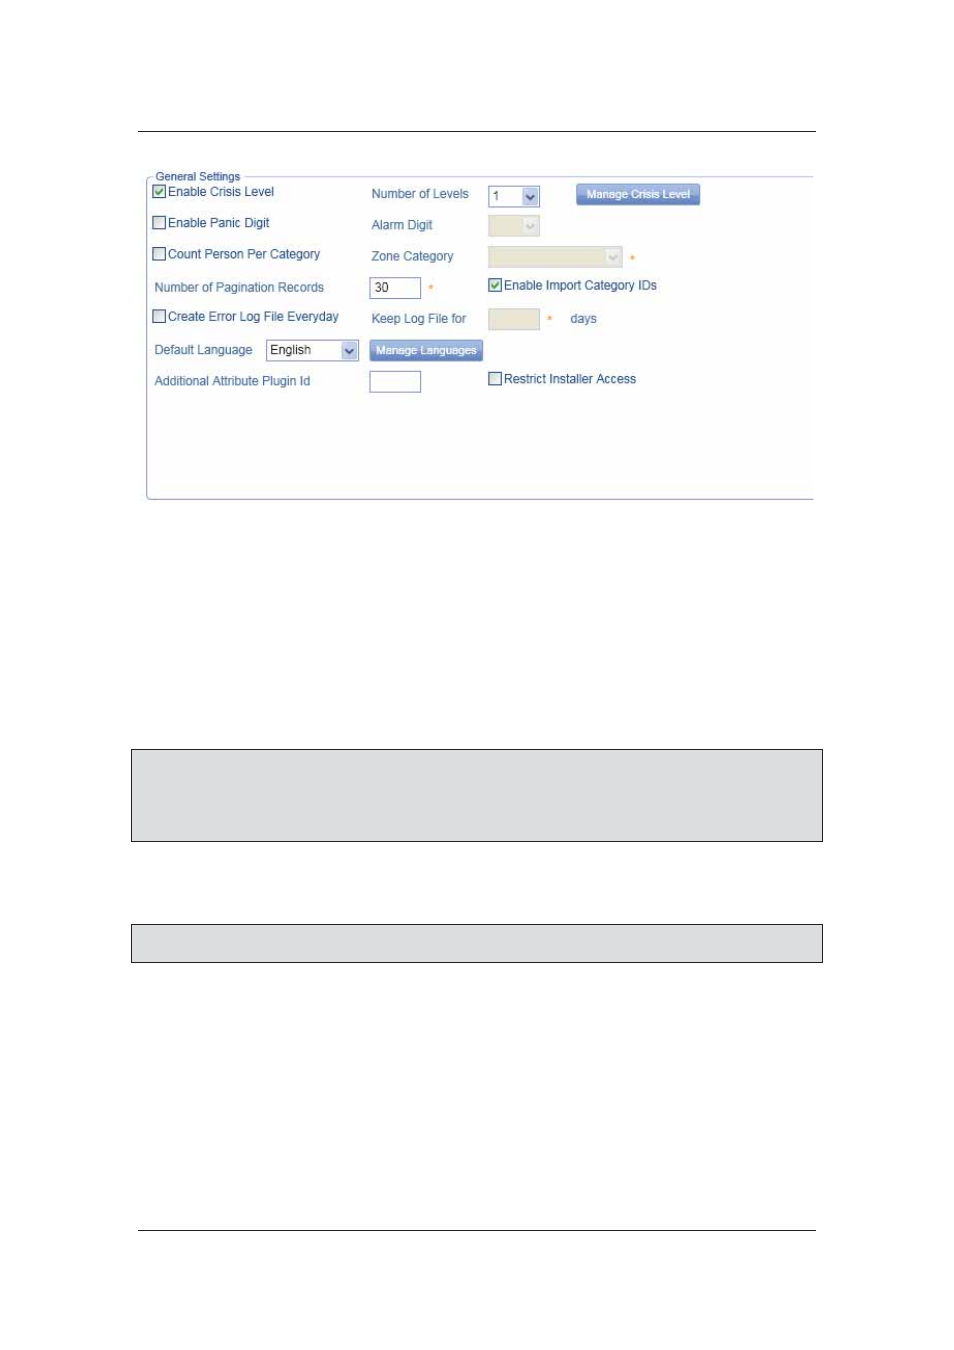
Figure 387: General Settings
6. Select
the
Enable Crisis Level check box to enable crisis levels for this section.
7. Select the number of crisis levels which you want to enable from the Number of
Levels drop-down list. You may have maximum 5 crisis levels.
8. Click
Manage Crisis Levels to configure the Crisis Levels. For details refer to section
13.1
Manage Crisis Level
.
9. Select
the
Enable Panic Digit check box to enable the Panic Mode function. The
Alarm Digit drop-down list is enabled.
10. Select alarm digit from the Alarm Digit drop-down list.
Note: A panic mode is a function that you may use in case of any dire threat/emergency. If the
panic mode is enabled and the Alarm Digit is decided, you can press the digit on the
keypad and a silent alarm for caution is sent through the system, alerting others. When you
select the Enable Panic Digit check box this function is activated for the current logged on
section.
11. Select the Count Person Per Category from the drop-down list.
12. Select the category from the Zone Category drop-down list.
Note: When you select the Count Person Per Category check box and the category from the
drop-down list, the category details are displayed when you add/edit a zone.
13. In the Number of Pagination Records field, enter the number of records which you
want to see on one page in each function. For example, if you enter 50 in the field, 50
records will be displayed in a grid for any function.
14. Select the Enable Import Category ID’s check box to import category ID’s along with
the categories.
15. Select the Create Error Log File Everyday check box to maintain an error log file
everyday.
16. Enter the number of days for which you want to maintain and save the log in the Keep
the Log File for field. The number is counted in days.