240 v and 380-480 v class drives of 15 kw or less, Removing the cooling fan, Mounting the cooling fan – Yaskawa G7 Drive User Manual
Page 413: Cooling fan replacement outline
8
-4
Cooling Fan Replacement Outline
200-240 V and 380-480 V Class Drives of 15 kW or Less
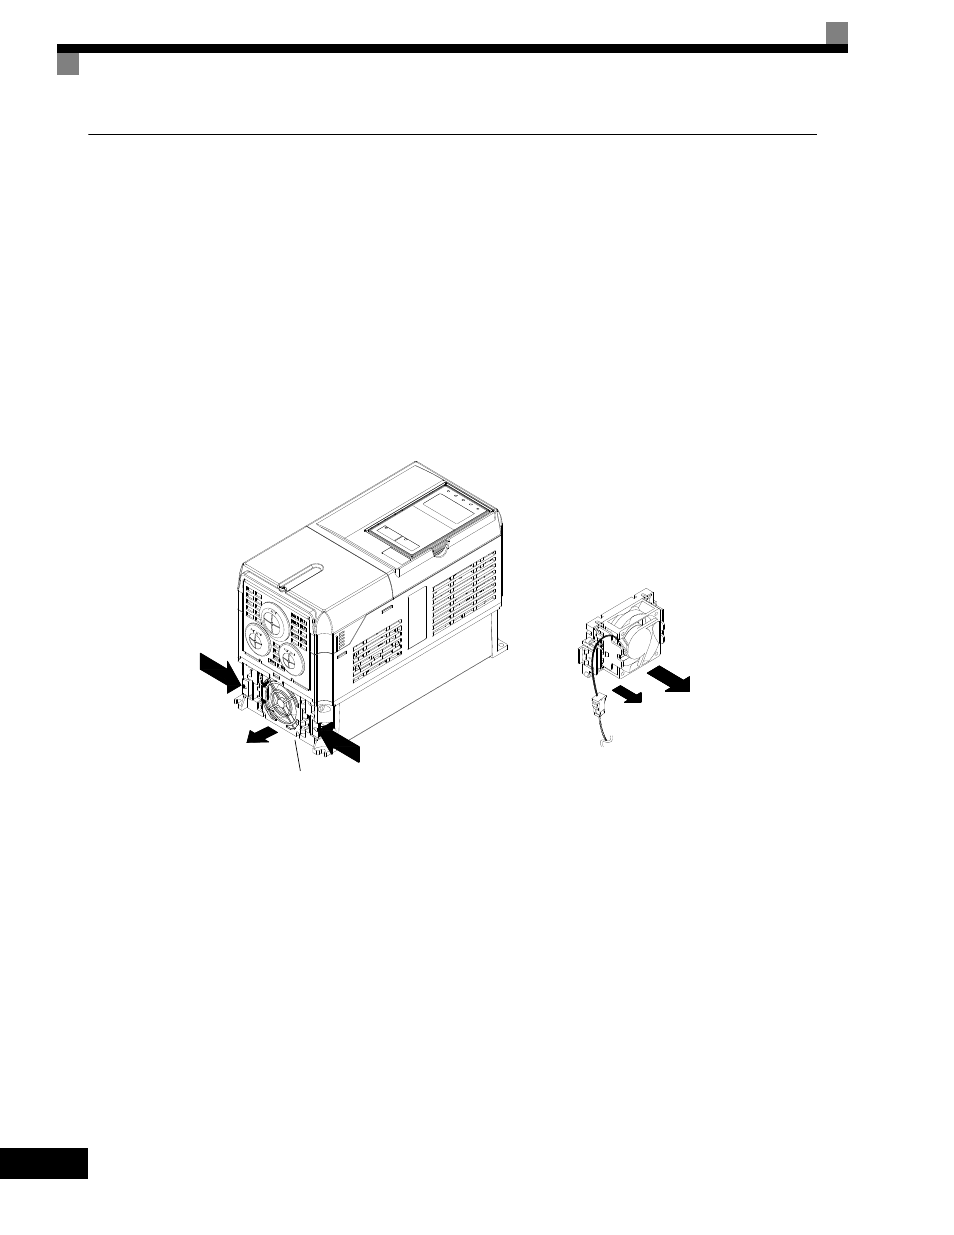
A cooling fan is attached to the bottom of the Drive.
If the Drive is installed using the mounting holes on the back of the Drive, the cooling fan can be replaced
without removing the Drive from the installation panel.
Removing the Cooling Fan
1. Press in on the right and left sides of the fan cover in the direction of arrows 1 and when pull the fan out in
the direction of arrow 2.
2. Pull out the cable connected to the fan from the fan cover and disconnect the relay connector.
3. Open the fan cover on the left and right sides and remove the fan cover from the fan.
Fig 8.1 Cooling Fan Replacement (Drives of 15 kW or Less)
Mounting the Cooling Fan
1. Attach the fan cover to the cooling fan. Be sure that the air flow direction indicated by the arrows above
faces into the Drive.
2. Connect the relay connector securely and place the relay connector and cable into the fan cover.
3. Mount the fan cover on the Drive. Be sure that the tabs on the sides of the fan cover click into place on the
Drive.
Air flow direction
1
1
2
Fan cover