Clip transitions, Clip transition settings – Sony GP-X1EM Grip Extension User Manual
Page 181
181
Clip Transitions
You can play a frame memory clip linked to a background
transition, such as a mix or wipe.
Only eight channels comprising FM1 to FM8 (FM1&2
Clip, FM3&4 Clip, FM5&6 Clip, FM7&8 Clip) can be
used in a clip transition.
Clip transition restrictions
• Pattern limits cannot be used.
• Transition preview cannot be used.
• It is not possible to set the transition rate of a clip
transition.
• Keyframe capture is not possible.
• The state of a clip transition during execution cannot be
saved as a snapshot.
• When recalling a snapshot that includes a clip transition
while executing another clip transition, the subsequent
transition does not operate properly. Recall the snapshot
after the transition completes.
• Transitions executed in two strokes, such as a preset
color mix with the stroke mode set to [Normal], or a
DME wipe with a picture-in-picture pattern, will not
execute correctly.
• In 4K format, only four channels comprising FM1 to
FM4 (FM1&2 Clip, FM3&4 Clip) can be used.
• When a clip transition is selected as the transition type,
the wipe direction selection button in the transition
control block that is lit indicates the direction of clip
playback.
Clip Transition Settings
This section describes clip transitions using FM1&2 Clip
on the M/E-1 bank as an example.
To use a clip transition effectively, the image from the
frame memory clip image that is played back during the
clip transition must be reflected in the M/E-1 program
image beforehand. For example, the settings for inserting
a key using FM1 and FM2.
1
In the <Transition Type> group of the M/E-1 >Misc
>Transition menu (1171), select [FM1&2 Clip].
2
Press [Clip Transition].
The Clip Transition menu (1176) appears.
3
Press [Clip >Recall].
The Frame Memory >Clip/Still >Recall menu (2111)
appears.
4
Select a clip file in memory, and recall the file on the
FM1 and FM2 output.
For details about the method of operation, see
“Recalling Clips” (page 179).
5
Return to the Clip Transition menu (1176), and select
the background transition type in the <BKGD
Transition Type> group.
In the M/E-1 >Misc >Transition menu (1171) or other
menus, configure a background transition, as required.
6
In the <Select> group, press [BKGD Transition].
7
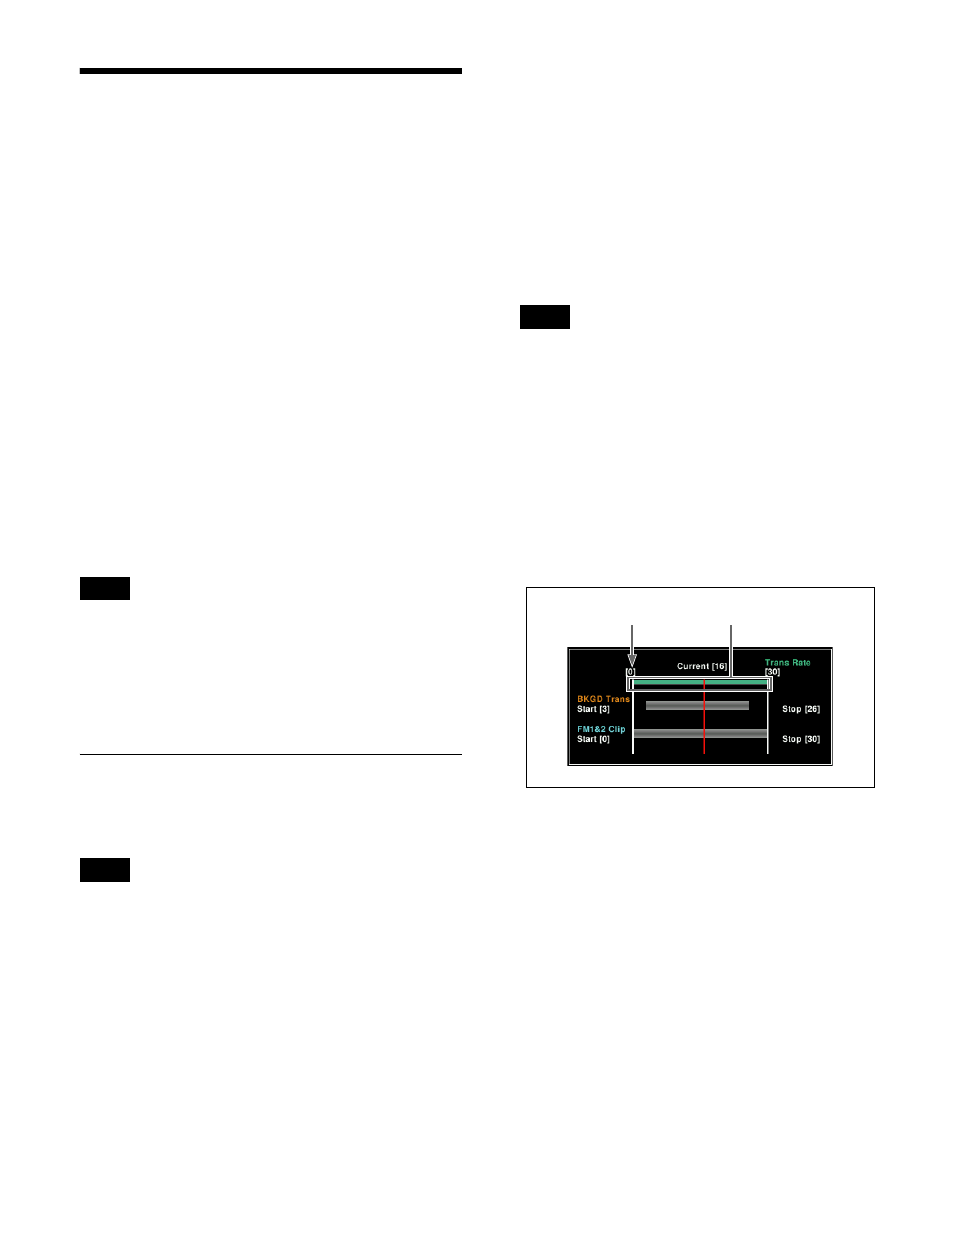
Using one of the following methods, set the start point
of the background transition.
• Move the fader lever to the start point, and press
[Start] in the <BKGD Transition Set Timing> group.
• Set the number of frames using the [BKGD Trans
Start] parameter (left edge of the reference axis is
frame 0).
8
Using one of the following methods, set the end point
of the background transition.
• Move the fader lever to the end point, and press
[Stop] in the <BKGD Transition Set Timing> group.
• Set the number of frames using the [BKGD Trans
Stop] parameter.
9
If [Wipe] or [DME Wipe] is selected in the <BKGD
Transition Type> group, select the wipe direction in
the <BKGD Transition Direction> group.
10
In the <Select> group, press [FM1&2 Clip].
11
Using one of the following methods, set the start point
of the clip.
• Move the fader lever to the start point, and press
[Start] in the <Clip Transition Set Timing> group.
Notes
Note
Note
Position of frame 0
Reference axis