Sony GP-X1EM Grip Extension User Manual
Page 314
314
“FROM” indicates the start point of the loop range,
while “TO” indicates the end point.
4
With the numeric keypad buttons of the numeric
keypad control block, enter the number of the last
keyframe in the loop range (end point).
Here, by way of example, keyframe 5 is the end point.
5
Press the [ENTER] button to confirm the entry.
The display changes, prompting you to enter the loop
count.
6
Enter the loop count.
To specify a loop count, enter a number in the range 1
to 99.
To specify an endless loop, enter “0” (zero).
Here, by way of example, “15” is entered.
7
Press the [ENTER] button to confirm the entry.
The start point, end point, and loop count that you have
set are reflected in the Timeline menu.
If you enter the loop count as “0” (endless loop), the
count is shown as “inf” (infinity).
Modifying the keyframe loop settings
You can modify the loop range or count for the currently
recalled effect.
1
Press the [KF MCRO EDIT] button, then press the
[EDIT ENBL] button, turning it on orange.
2
Press the [KF LOOP] button, turning it on blue.
The numeric keypad control block display shows the
current loop range.
3
To modify the loop range, press the [CLR] button in
the numeric keypad control block.
To modify only the loop count, press the [ENTER]
button and skip to step
6
.
4
Enter the keyframe number for the new start point, and
press the [ENTER] button.
5
Enter the keyframe number for the new end point, and
press the [ENTER] button.
The display shows the currently set loop count.
6
To modify the loop count, press [CLR] and enter the
new loop count.
7
Press the [ENTER] button.
Executing a keyframe loop
Press the [RUN] button.
The set loop range is executed repeatedly for the set loop
count number of times.
The total loop count and the number of loops remaining are
displayed in the timeline menu. If the loop count is infinite
(inf), the remaining number is not shown.
If the [REV] button is lit, the loop is played in the reverse
order.
Canceling keyframe loop execution
Press the [REWIND] button.
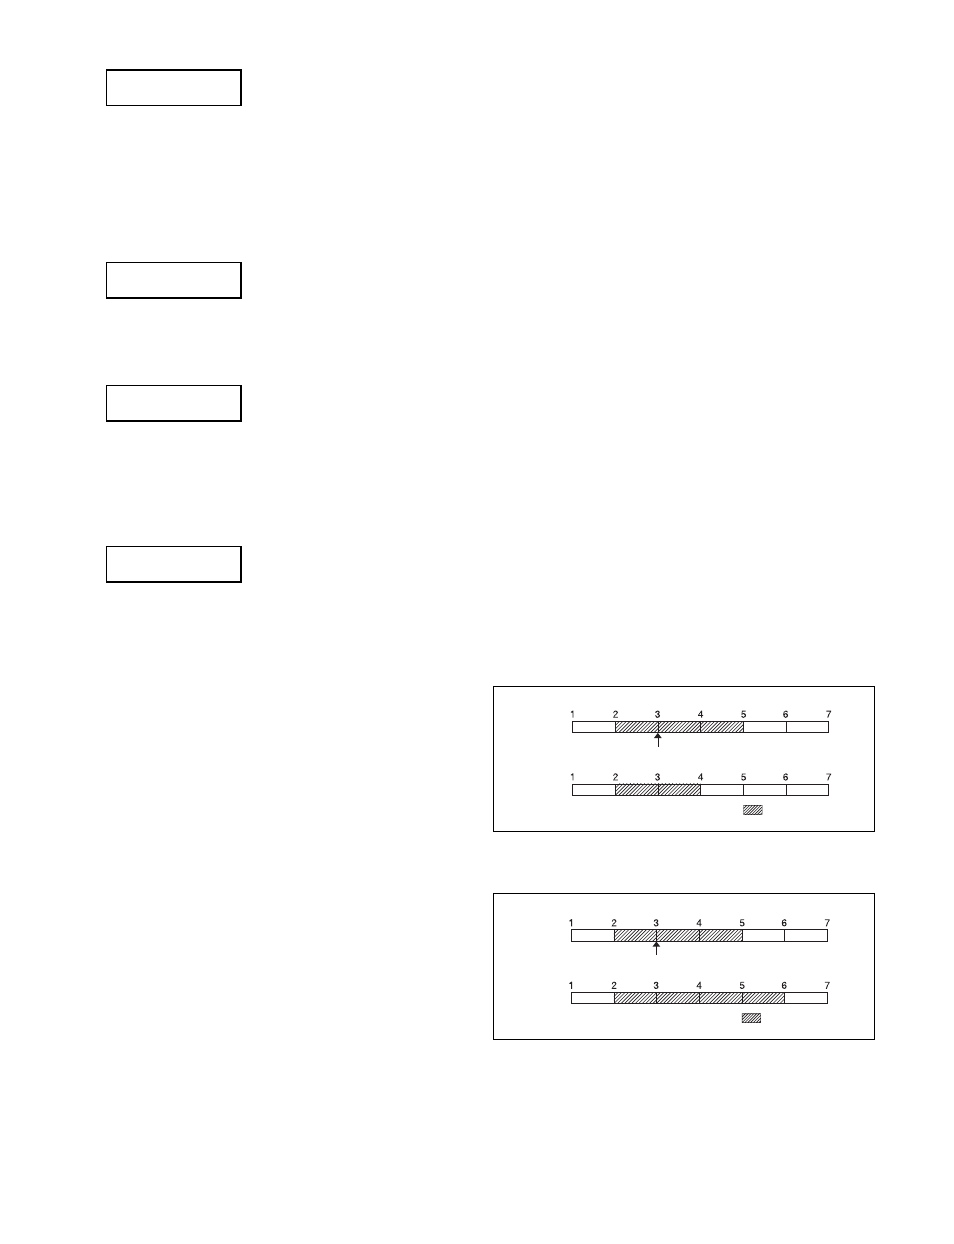
Changes to the loop range caused by
keyframe insertion/deletion
When a keyframe is inserted or deleted within the loop
range, the loop range also changes. The following are
examples.
Example 1: If keyframe 3 is deleted, the loop end point
moves forward as follows.
Example 2: If keyframe 3 is added, the end point keyframe
number moves back.
Example 3: If the keyframe at the end of the loop range
(the end point) is deleted, the keyframe loop settings
are all cleared, as follows, and the [KF LOOP] button
goes off. The same occurs if the first keyframe in the
loop range (the start point) is deleted.
FROM 2 TO
FROM 2 TO 5
COUNT
COUNT 15
Before
deletion
After
deletion
: Loop range
Deletion
Before
addition
After
addition
: Loop range
Addition