Executing a transition, Transition indicator setting the transition rate, Transition indicator – Sony GP-X1EM Grip Extension User Manual
Page 92: Setting the transition rate
92
Executing a Transition
There are two modes for carrying out a transition: auto
transitions are carried out by a button operation, and
manual transitions are carried out using the fader lever.
It is also possible to combine both methods, taking control
with the fader lever of an auto transition which has partly
completed, or complete a transition started with the fader
lever as an auto transition.
By combining common transitions with independent key
transitions, different transition types can be applied to the
background and keys, for example allowing a key wipe
combined with a background dissolve.
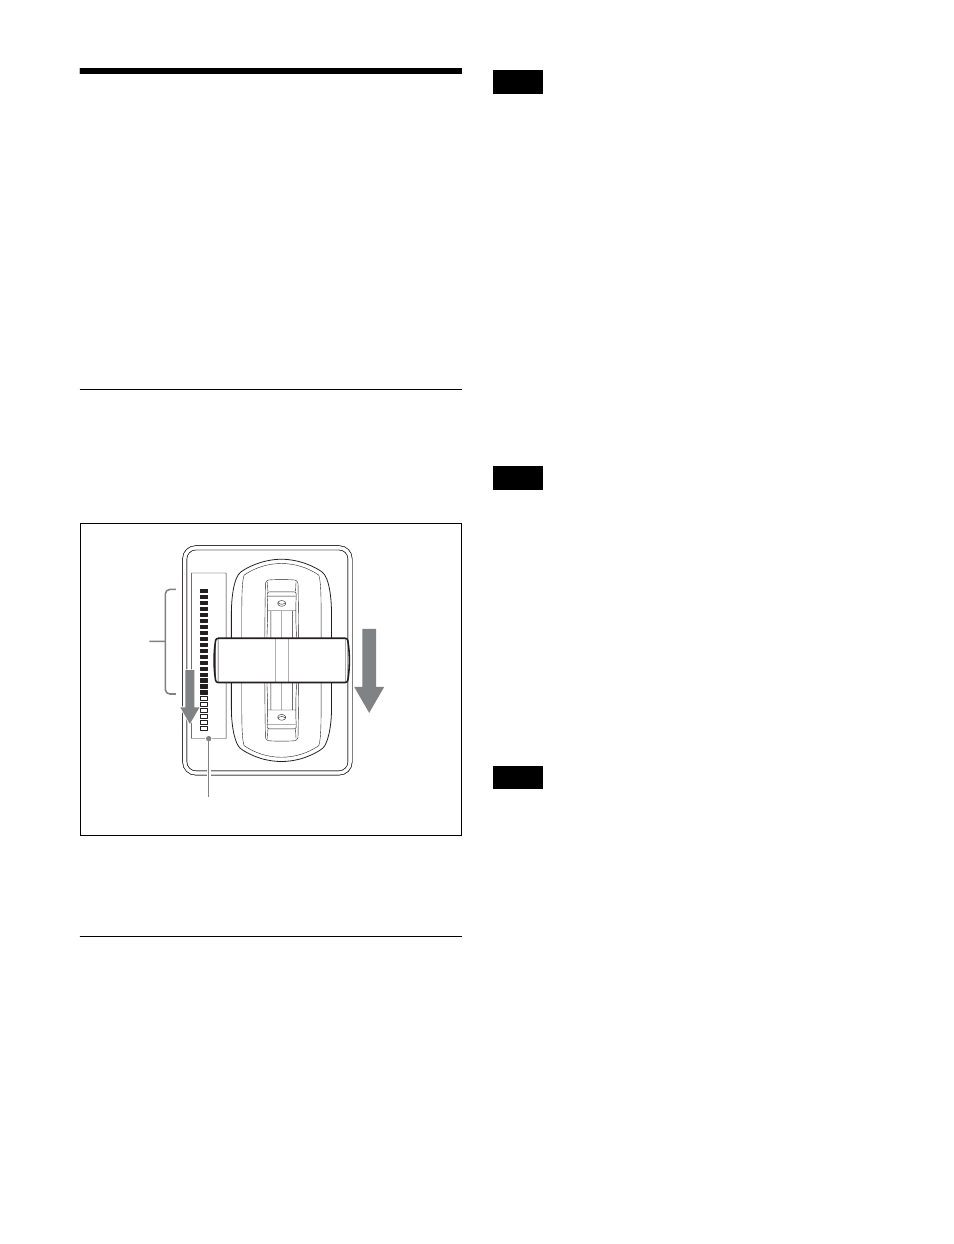
Transition Indicator
In each of the M/E banks and PGM/PST bank, to the left
of the fader lever is a transition indicator composed of
multiple LEDs. This indicator shows the state of the
transition, whether auto or manual, by which LEDs are lit.
For example, in the previous illustration, it can be seen that
the transition is more than half completed.
When the transition is completed, all of the LEDs turn off.
Setting the Transition Rate
There are two ways of setting the transition rate: using the
Flexi Pad control block or numeric keypad control block to
enter a numeric value, or using the Misc >Transition menu
for the M/E or PGM/PST bank.
You can also display the transition rate, independent key
transition rate, and fade-to-black transition rate for each
bank, and change the settings
.
When a clip transition is selected as the transition type, it
is not possible to set the transition rate.
Frame input mode and timecode input
mode
For numeric input of the transition rate value, there are two
modes: frame input mode and timecode input mode. You
select one of these modes using either the Flexi Pad control
block or the numeric keypad control block.
Frame input mode
The entered value sets the number of frames.
Example: Entering 123 constitutes an entry of 123 frames
Timecode input mode
The entered value sets the number of seconds and frames.
Example: Entering 123 constitutes an entry of 1 second 23
frames.
You can enter a value of up to 999 in frame input mode, but
a value greater than 10 seconds cannot be entered in
timecode input mode.
Frame display mode and timecode display
mode
For display of the transition rate, there are two modes:
frame display mode and timecode display mode. You can
select the mode in the Setup menu.
For details, see “Setting the Transition Rate Display
Mode” (page 430).
The display mode setting is common to the M/E and PGM/
PST banks.
Frame display mode
Displays the number of frames (0 to 999). A value also
entered in timecode input mode is converted for display as
a number of frames.
Timecode display mode
Displays a timecode value (seconds and frames). A value
also entered in frame input mode is converted for display
as a timecode value.
Lit
Transition indicator
Note
Note
Note