Configuring a policy node – H3C Technologies H3C SecPath F1000-E User Manual
Page 568
543
Item Description
Preference
Enter an IP packet preference.
There are totally eight (in the range 0 to 7) preference levels, as shown in
.
Next Hop
Enter the nexthop IP address.
Default Next Hop
Enter the default nexthop IP address.
Outbound Interface
Enter the outbound interface, which is available for P2P links only.
Default Outbound
Interface
Enter the default outbound interface, which is available for P2P links only.
Table 73 IP preference values and keywords
Preference value
Keyword
0 routine
1 priority
2 immediate
3 flash
4 flash-override
5 critical
6 internet
7 network
Configuring a policy node
To configure a node for an existing policy, use one of the following methods:
•
Click Add in
to enter the policy configuration page as shown in
name of the policy in the Policy Name box, and then configure its node.
•
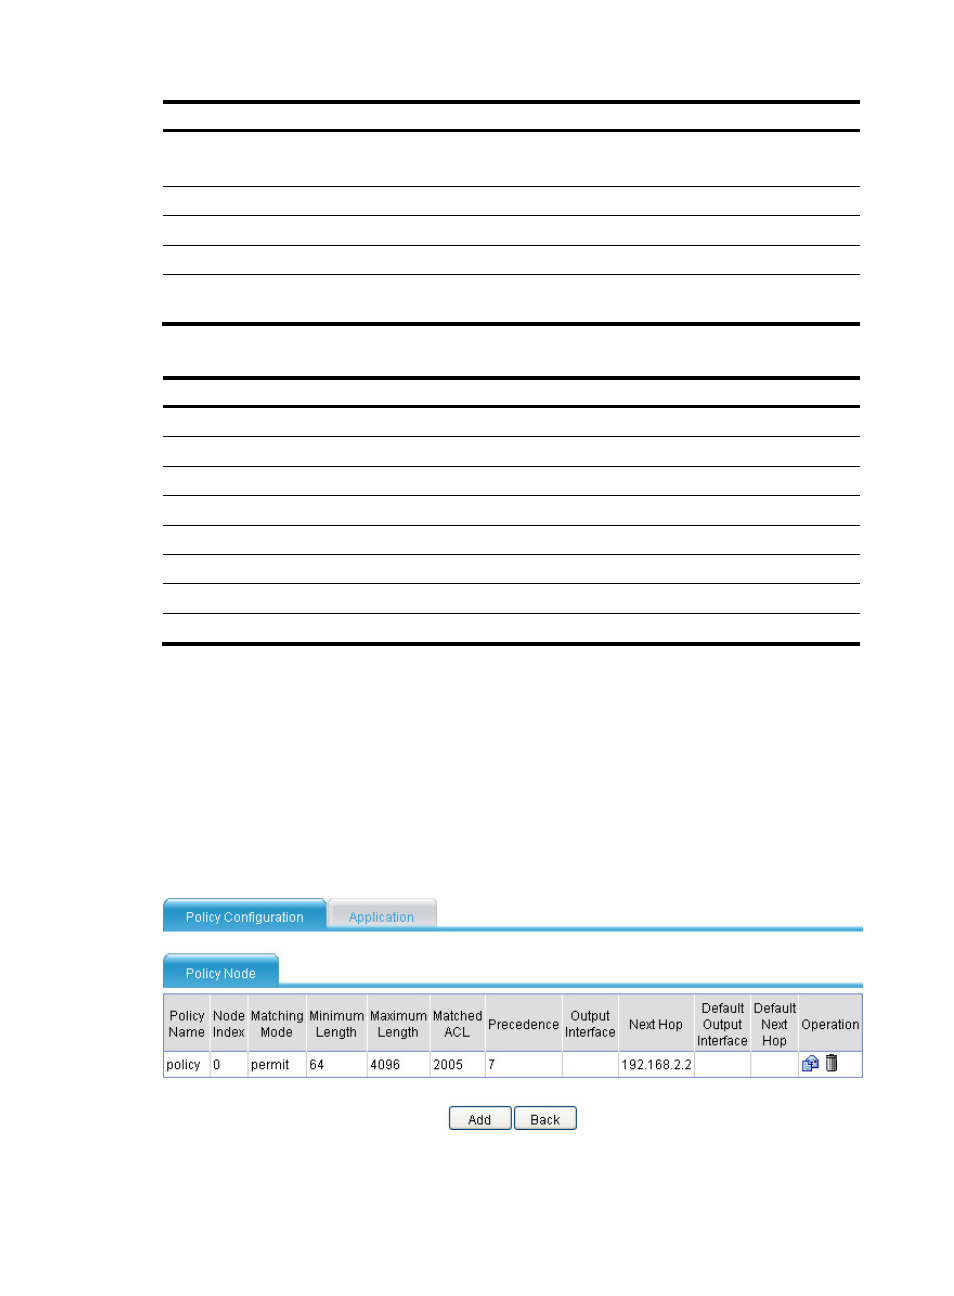
to enter the policy node list page, as shown in
You can create, modify, or remove a policy node on the page. To create a policy node, click Add
to enter the policy node configuration page (the policy name cannot be modified), as shown
in
. For descriptions of the configuration items, see
Figure 304 Policy node list page