How to view name sets, Using name sets – Grass Valley NV9000-SE v.3.0 User Manual
Page 519
NV9000-SE Utilities • User’s Guide
499
17. Using Name Sets
Adding and Viewing Name Sets
5 Enter the name of the new name set and click
OK
. A column appears to the right of existing col-
umns with the name of the new name set at the top:
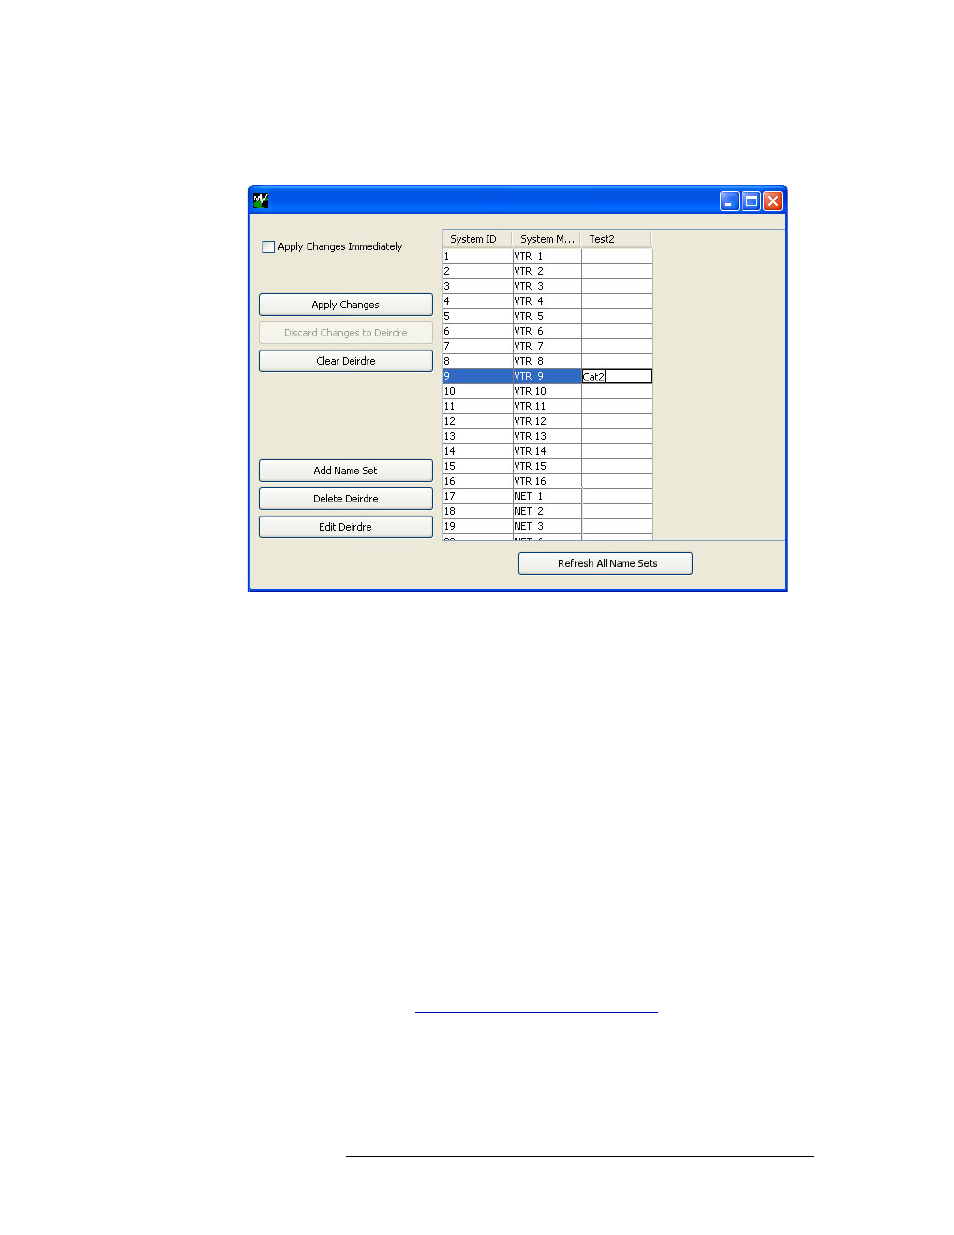
Figure 17-2. Name Sets Window with Added Name Set
6 To have changes sent to control panels immediately as each name is added to a name set, with-
out having to complete creating the name set as a whole, check the ‘Apply Changes Immedi-
ately’ check box.
To have changes applied only after you have created the entire name set, make sure ‘Apply
Changes Immediately’ is unchecked.
7 To add an alias to a name set for a device, click on the cell at the intersection of the row listing
the device you want to add and the column for that name set. The field becomes active, as
shown in Figure 17-2. In the active field, enter a name for that device.
Continue adding names until your name set is complete. To remove or change a name entered
by accident, click on the row again and either enter a new name or remove the name com-
pletely.
8 If ‘Apply Changes Immediately’ is unchecked, click
Apply Changes
to send all names in the
name set to control panels.
9 Click
X
on the window title tab to close the window.
How to View Name Sets
1 Launch NV9000-SE. (See
Launching and Exiting the Application
2 From the Navigation area, select the ‘System Management’ pane.