Importing and exporting data – Grass Valley NV9000-SE v.3.0 User Manual
Page 79
NV9000-SE Utilities • User’s Guide
59
6. Importing and Exporting Data
Exporting Data
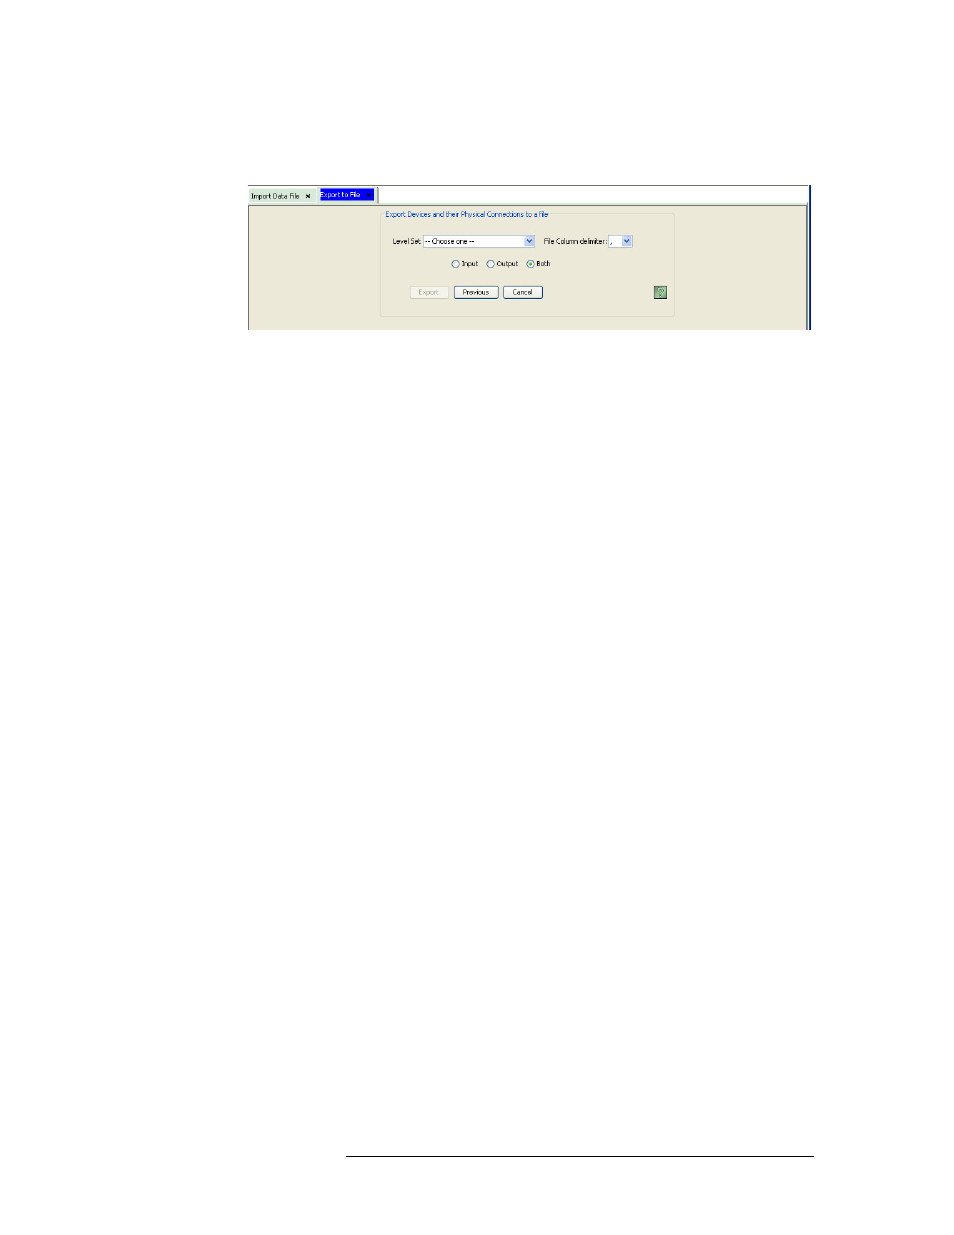
2 Select the ‘Devices and their Physical Connections’ radio button and then click
Next
. The
‘Export Devices and their Physical Connections to a file’ section appears:
Figure 6-9. Export Devices and their Physical Connections to a File Page
3 Select a ‘Level Set’ from the drop-down list. The level sets that display are those currently in
the system. You must choose from and existing level set.
4 From the ‘File Column delimiter’ drop-down list, select a delimiter. When imported, the file is
converted to text and no table cells exist. You can choose to have data that appears in a column
separated from data in other columns by a delimiter: comma (,), tab <tab>, or slash (/). By
default, a comma is selected.
5 Select whether to import ‘Input’, ‘Output’, or ‘Both’ input and output connections by clicking
the corresponding radio button.
6 Click
Export
. The ‘Save’ dialog box appears. Browse to the location where you want to save the
export data file and enter a ‘File name’ and then click
Save
.
Or
Click
Previous
to return to the previous page without saving the export data.
Or
Click
Cancel
to cancel without saving changes and close the page.