H3C Technologies H3C WX3000E Series Wireless Switches User Manual
Page 161
140
3.
Select Enable SNMP Trap.
4.
Click Apply.
5.
Click Add.
The page for adding a target host of SNMP traps appears.
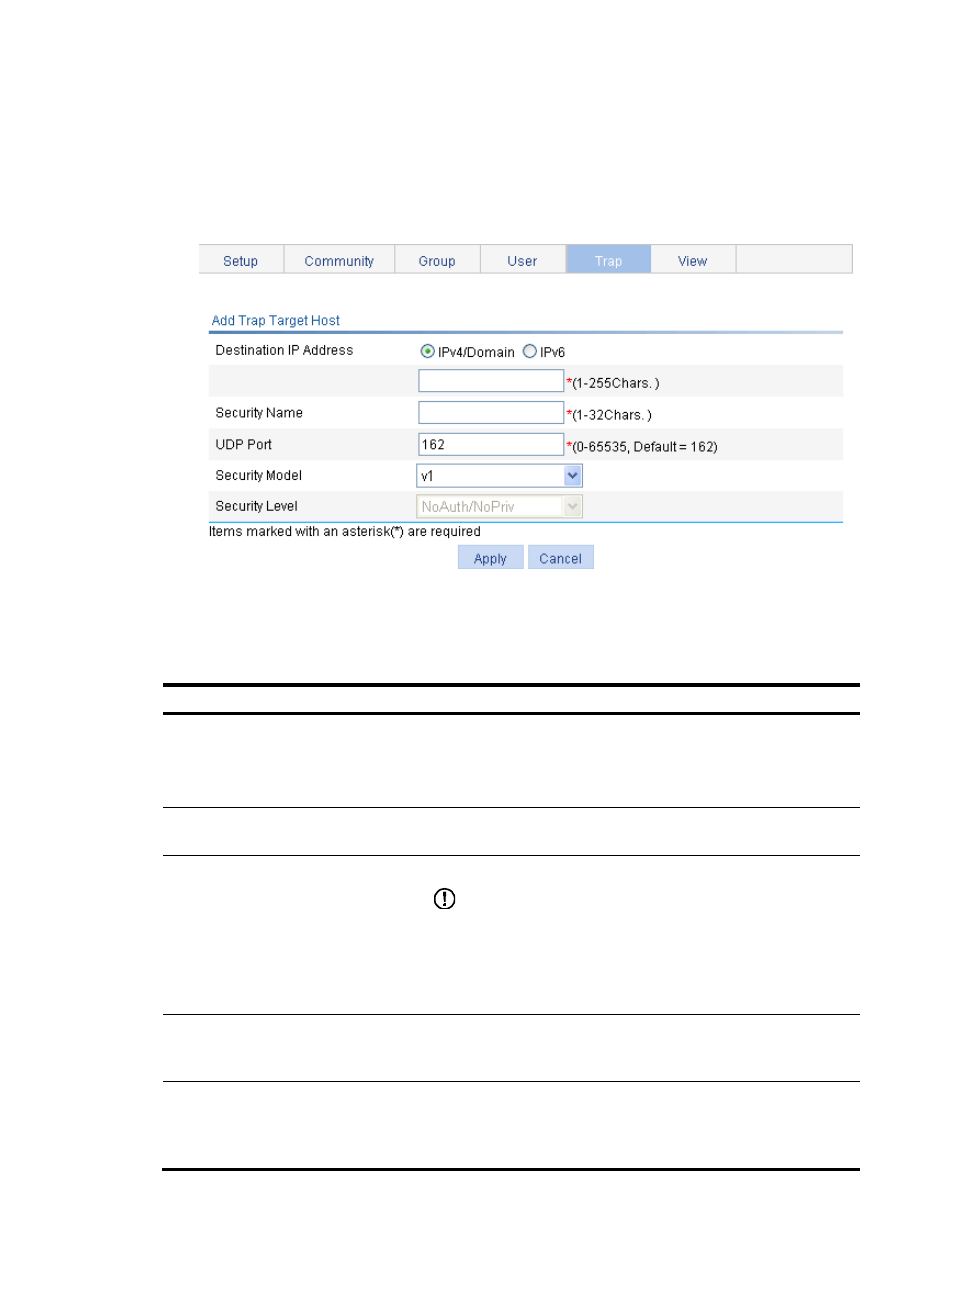
Figure 99 Adding a target host of SNMP traps
6.
Configure the settings for the target host as described in
.
7.
Click Apply.
Table 58 Configuration items
Item Description
Destination IP Address
Set the destination IP address or domain.
Select the IP address type: IPv4/Domain or IPv6, and then type the
corresponding IP address or domain in the field according to the IP
address type.
Security Name
Set the security name, which can be an SNMPv1 community name,
an SNMPv2c community name, or an SNMPv3 user name.
UDP Port
Set UDP port number.
IMPORTANT:
The default port number is 162, which is the SNMP-specified port used
for receiving traps on the NMS. Typically (such as using IMC or MIB
Browser as the NMS), you can use the default port number. To change
this parameter to another value, you need to make sure that the
configuration is the same as the configuration on the NMS.
Security Model
Select the security model, which is the SNMP version. The model
must be the same as the model running on the NMS. Otherwise, the
NMS cannot receive any trap.
Security Level
Set the authentication and privacy mode for SNMP traps when the
security model is selected as v3. The available security levels are: no
authentication no privacy, authentication but no privacy, and
authentication and privacy.