Displaying the ipv6 active route table – H3C Technologies H3C WX3000E Series Wireless Switches User Manual
Page 210
189
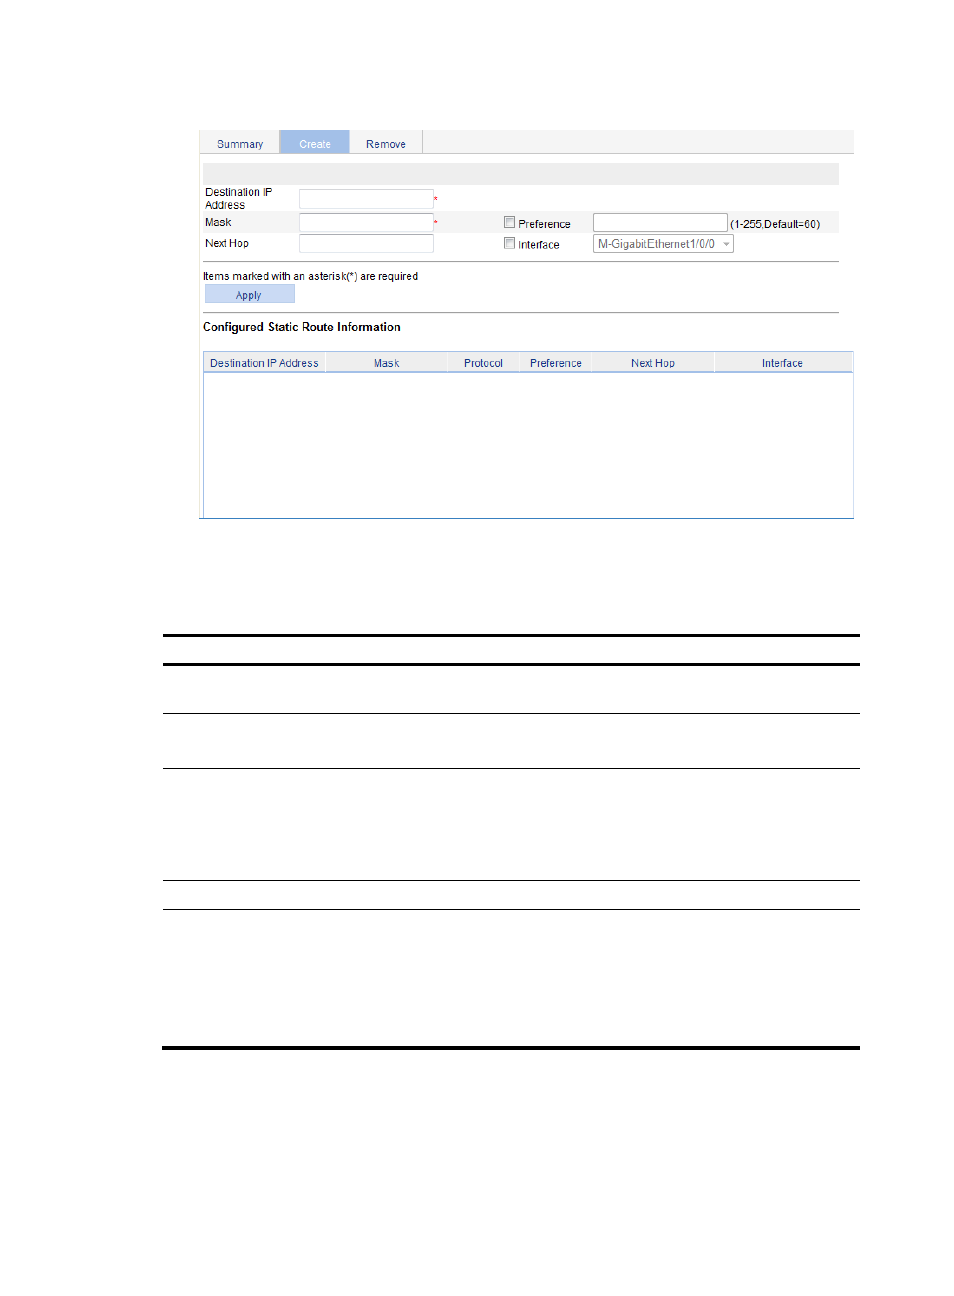
Figure 159 Creating an IPv4 static route
3.
Specify relevant information, as described in
4.
Click Apply.
Table 72 Configuration items
Item Description
Destination IP Address
Enter the destination host or network IP address, in dotted decimal
notation.
Mask
Enter the mask of the destination IP address.
You can enter a mask length or a mask in dotted decimal notation.
Preference
Set a preference value for the static route. The smaller the number, the
higher the preference.
For example, specifying the same preference for multiple static routes to
the same destination enables load sharing on the routes, while specifying
different preferences enables route backup.
Next Hop
Enter the next hop IP address in dotted decimal notation.
Interface
Select the outgoing interface.
You can select any available Layer 3 interface of the device, for example,
a virtual interface. If you select NULL 0, the destination IP address is
unreachable.
If you select this option, leave the Next Hop field blank. Otherwise, your
configuration does not take effect.
Displaying the IPv6 active route table
From the navigation tree, select Network > IPv6 Routing to enter the page, as shown in
.