H3C Technologies H3C WX3000E Series Wireless Switches User Manual
Page 550
529
2.
Click Add to enter the portal service application page.
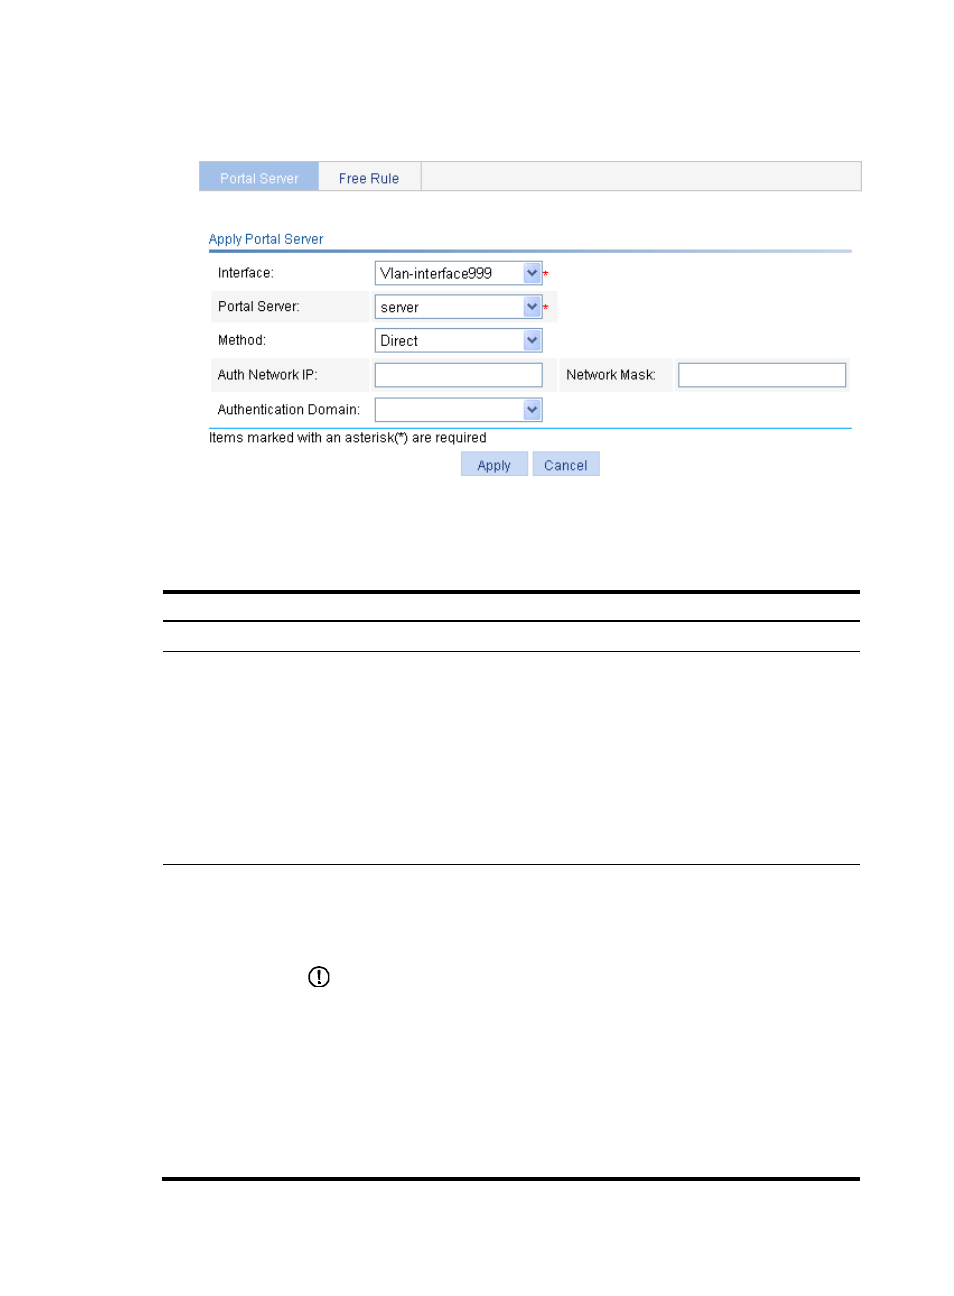
Figure 558 Portal service application
3.
Configure the portal application settings as described in
.
4.
Click Apply.
Table 171 Configuration items
Item Description
Interface
Specify the Layer 3 interface to be enabled with portal authentication.
Portal Server
Specify the portal server to be applied on the specified interface. Options include:
•
Select Server—Select an existing portal server from the Portal Server list.
•
New Server—If you select Add under this option from the list, the portal server
configuration area, as shown in
, will be displayed at the lower part of the
page. You can add a remote portal server and apply the portal server to the interface.
For detailed configuration, see
.
•
Enable Local Server—If you select this option from the list, the local portal service
configuration area, as shown in
, will be displayed at the lower part of the
page. You can configure the parameters for local portal service. For detailed
configuration, see
.
Method
Specify the portal authentication mode:
•
Direct—Direct portal authentication.
•
Layer3—Cross-subnet portal authentication.
•
Re DHCP—Re-DHCP portal authentication.
IMPORTANT:
•
In cross-subnet portal authentication mode, Layer 3 forwarding devices are not
required to be present between the authentication client and the access device.
However, if they are present, you must select the cross-subnet portal authentication
mode.
•
In re-DHCP portal authentication mode, a client is allowed to send out packets using
a public IP address before it passes portal authentication. However, responses of the
packets are restricted.
•
If the local portal server is used, you can configure the re-DHCP mode but it does not
take effect.