Dhcp relay agent configuration example, Network requirements – H3C Technologies H3C WX3000E Series Wireless Switches User Manual
Page 235
214
2.
Enable the DHCP server on VLAN-interface 2: (This operation can be omitted because the DHCP
server is enabled on the interface by default.)
a.
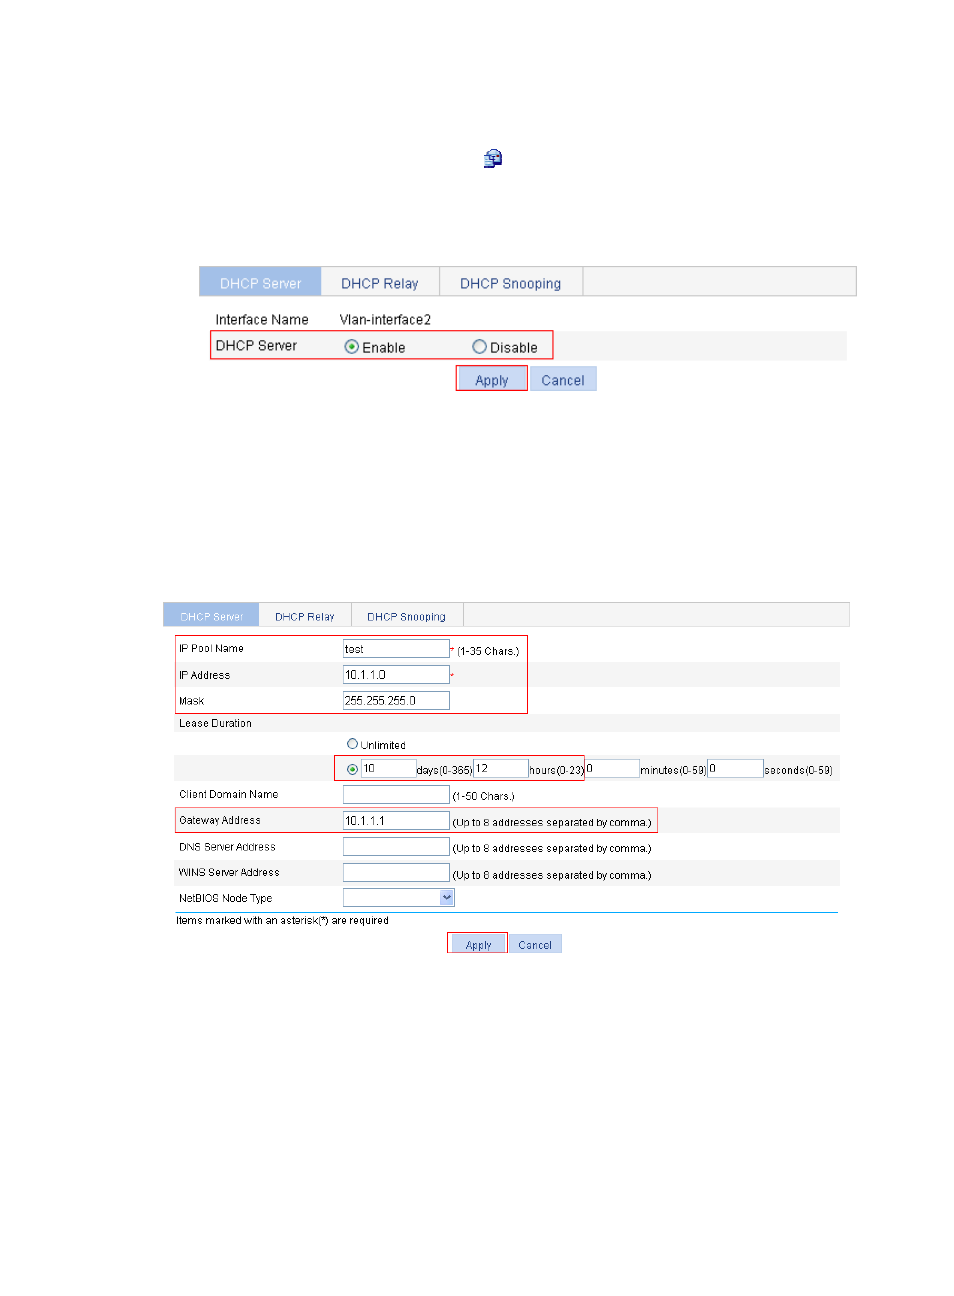
In the Interface Config field, click the
icon of VLAN-interface 2.
b.
Select the Enable option for DHCP Server.
c.
Click Apply.
Figure 184 Enabling the DHCP server on VLAN-interface 2
3.
Configure a dynamic address pool for the DHCP server:
a.
Select the Dynamic option in the Address Pool field (default setting), and click Add.
b.
On the page that appears, enter test for IP Pool Name, enter 10.1.1.0 for IP Address, enter
255.255.255.0 for Mask, enter 10 days 12 hours 0 minutes 0 seconds for Lease Duration, and
enter 10.1.1.1 for Gateway Address.
c.
Click Apply.
Figure 185 Configuring a dynamic address pool for the DHCP server
DHCP relay agent configuration example
Network requirements
As shown in
, VLAN-interface 1 on the DHCP relay agent (AC) connects to the network where
DHCP clients reside. The IP address of VLAN-interface 1 is 10.10.1.1/24 and the IP address of
VLAN-interface 2 is 10.1.1.1/24. VLAN-interface 2 is connected to the DHCP server whose IP address is
10.1.1.1/24.