Integrating scc with sms, Sms plug-in installation, Sms and managed devices in the topology – H3C Technologies H3C Intelligent Management Center User Manual
Page 971
957
Integrating SCC with SMS
SCC supports SMS 3.1.0.7607 and later versions.
SMS plug-in installation
1.
Install the SMS plug-in.
2.
Launch the CLI of the server installed with SCC, and go to the IMC installation
directory\IMC\client\bin\ directory.
3.
Execute installsms.bat. For Linux operating systems, execute ./installsms.sh.
4.
Enter the IP address of the SMS plug-in in the https://smsip format.
5.
Enter the username and password for the SMS administrator.
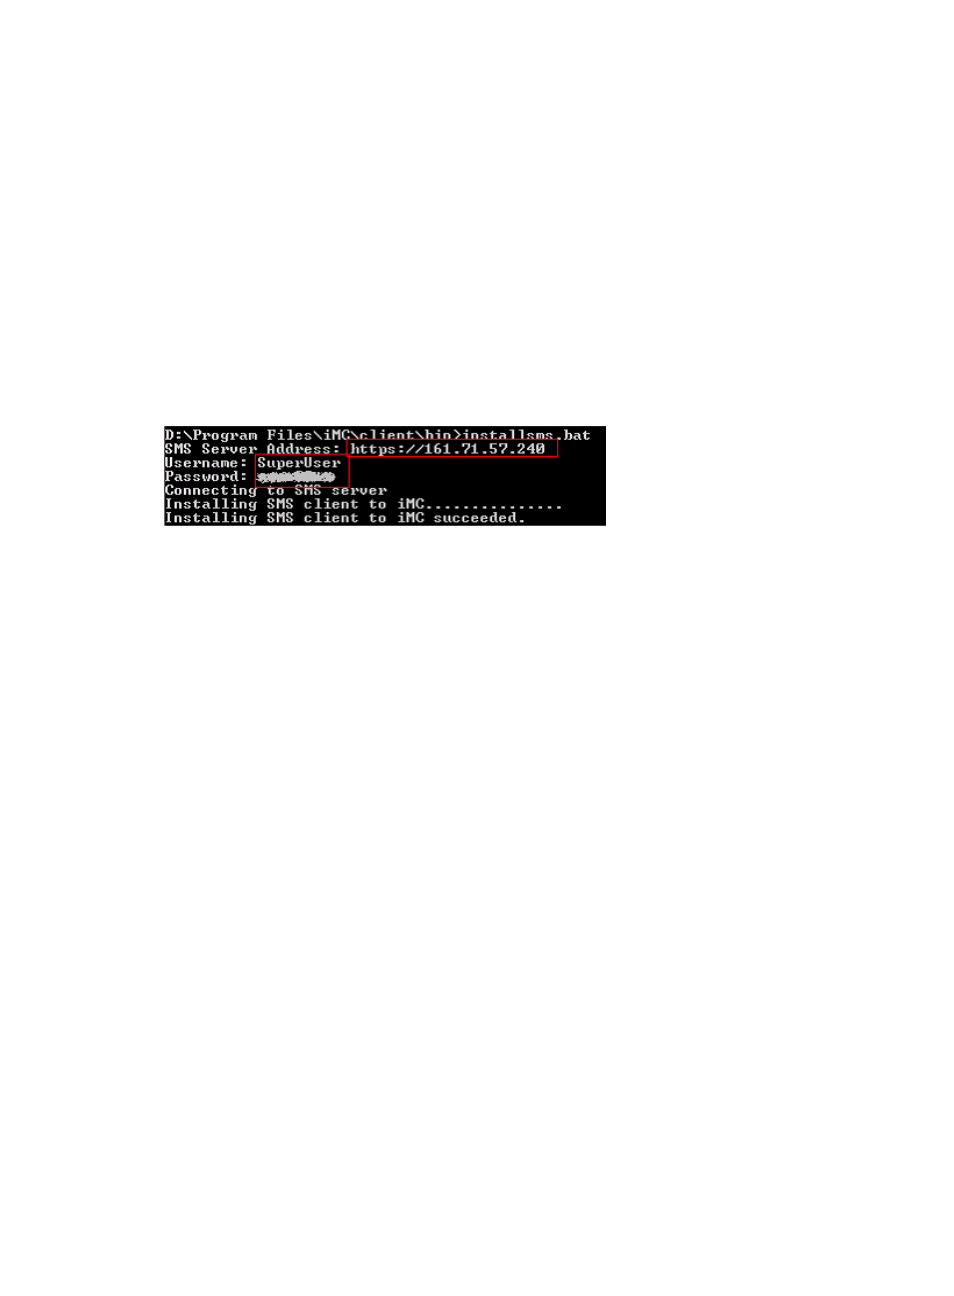
shows an example of the SMS screen when the plug-in is successful installed
Figure 97 SMS plug-in installation example
6.
Restart jserver.
7.
Open the Intelligent Deployment Monitoring Agent, and click the Process tab.
8.
Right-click the jserver process and select Stop Process from the shortcut menu.
9.
When the jserver process stops, right-click the process, and select Start Process from the shortcut
menu.
The SMS management page in SCC
1.
Navigate to Alarm > SMS Management:
a.
Click the Alarm tab from the tabular navigation system on the top.
b.
Click the Security Control Center on the navigation tree on the left.
c.
Click the SMS Management link located under Security Control Center on the navigation tree
on the left.
The SMS Management page appears.
SMS list
•
Device Label: Contains the IMC name and the IP address for the SMS. The contents of the device
label field serve as an active link for drilling down into the Device Details page.
•
IP Address: Contains the IP address of SMS.
•
Operation: Contains an active link. Click the link to display five actions: Launch SMS Client, Display
All Attack Alarms, Modify Login information, Display All Managed TP IPSs, and Display Report.
You can click any link to open the SMS management page, and view or edit information.
SMS and managed devices in the topology
1.
Navigate to My Network View topology:
a.
Click the Resource tab from the tabular navigation system on the top.
b.
Click View Management on the navigation tree on the left.
c.
Click Network Topology under View Management from the navigation system on the left.